Monthly Archives: July 2012
I push pixels around
I heart photo editting apps, and pushing pixels around is fun.
I use FluidFx (set to “image sculpt”) to push the pixels around… enlarging an eye, fattening a lip, raising an eyebrow, creating a smirk, and more is entertaining to me. Then, i run it through ToonPaint app.
I snap selfie pics a lot, then when I’m standing in line at the grocery store, riding along in the car as a passenger, or any other spare moment, you can find me pushing pixels around.
The first photo is the original on the left, and the two “afters” are on the right.

This next photo was created using the same method.

In this third photo, I used one of my favorites of me and Mitch. It went through WordFoto app.

All of these photos were labeled using Phonto app.
I actually had a much longer tutorial style post written for these photos, but I think that it’s easier for you to just comment or email me (Amberdhenson {at} att {dot} net) if you need help with the app. Trust me. Working with these particular apps is easy.


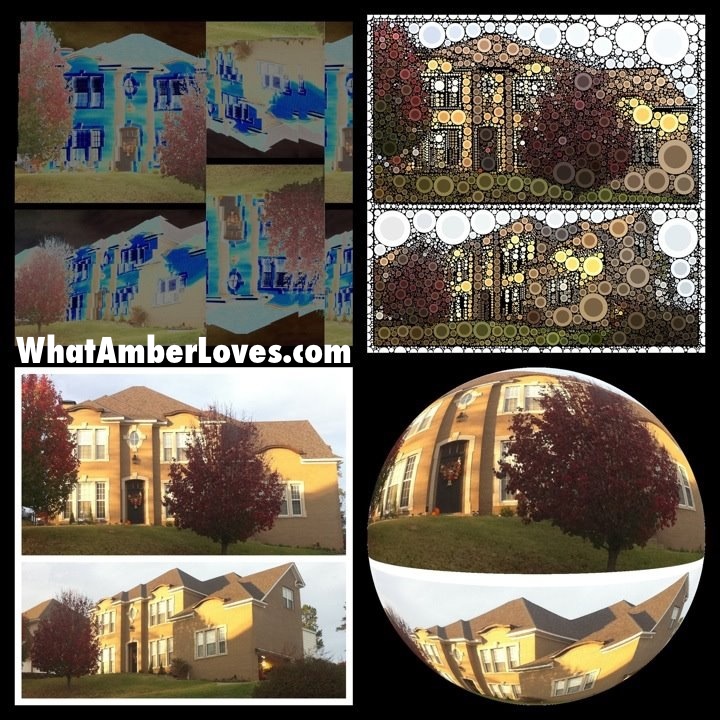
In this next photo: “picblender” app shows a blend of one of my selfies and a farm photo that i snapped between Liitle Rock and Memphis, 2) a quote and a selfie, then 3) and 4) show a selfie blended with one of my pots of chives that I’m growing, labeled with “labelbox” app…

Lastly, “tinyplanets” app featuring my house:

Peek Inside Our House: “BONUS ROOM!”
Good Afternoon, Internet! How are you today? I’m GREAT! Our oldest daughter had a sleepover party to celebrate her birthday yesterday, and now, while our oldest two daughters are outside playing and our youngest is napping, I have a few minutes to myself to update this weblog! YaY!
Well, my last post was 3 of my Favorite Pie Recipes, so now I want to talk about things other than food.
Recently, I’ve promised my followers and RSS subscribers a peek inside our house under renovation!
Here is a peek inside our house:

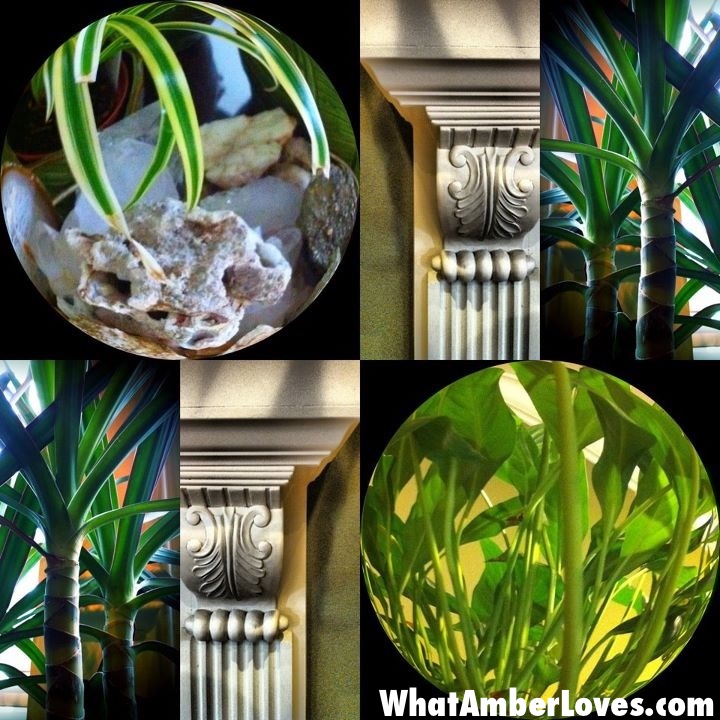
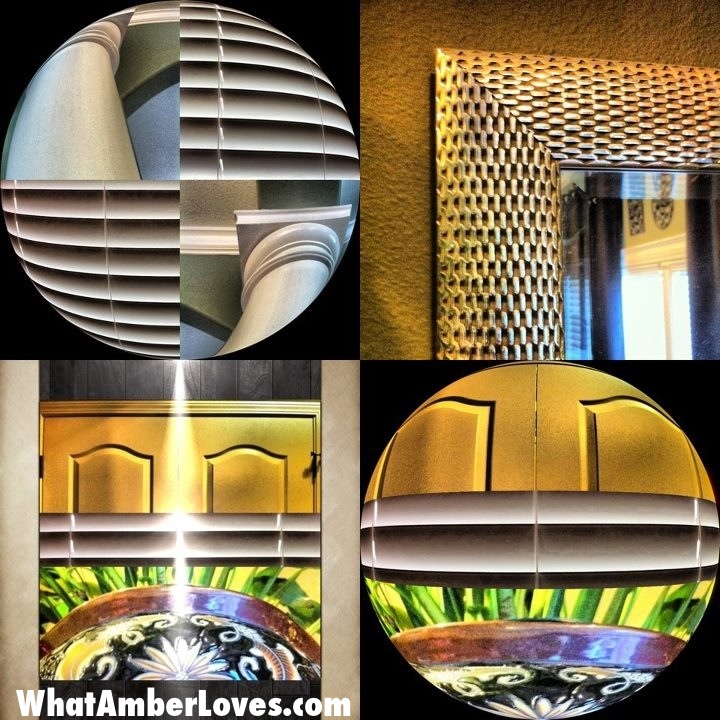
Here is a first peek inside our home that I promised. There is only one full room visible in this photo, the “bonus room” over the garage, but there are peeks at other things throughout the house. I like that room quite a bit: vintage, chrome Wassily chairs, handknotted, vegetable dyed rug, dora maar-ish perpetual face vase, etc. Also in this picture, I see houseplants in this picture, LOTS of houseplants. I see grommet top curtains, antique milk glass lights, and a piano. The lights were a gift from my grandmother; the lights originally hung in a turn-of-the-century building that operated as a feed store in Hot Springs, AR. Also, in this picture, I see some of my rock/stone specimens sitting atop what should be candleholders and sitting in bowls. I see a portion of the fireplace surround, wall sconces, wood blinds, cabinet details, and interior support columns. I see wineglasses, a watercolor painting, corners of framed mirrors and the walnut tree in our backyard barren during winter. I’ll add photos of other rooms, soon.


Your Friend, ~Amber Hamilton Henson of http://www.WhatAmberLoves.com
Wonder to which parties I’m linking? I have a page dedicated to “shares”!
Pies: 3 Favorites!
Good Morning Bloggers! How about a 3 for 1, today? Yep, three of my favorite pie recipes in one post!! Here we go!!


My “Summer Strawberry Sour Cream Pie” included a few strawberries from my little garden!! We didn’t have enough ripe all at once for the pie, so I did use some from the grocery store. Knowing that there were a few in there from our little garden was enough to really please our little girls, though!! Love.
If I’d had a little more free time today, I would have made the crust. I kind of feel like I cheated by using a crust from the store. Oh, well; it was good, anyway! Next time… 😉
The link to the recipe that I found and followed for this strawberry pie was by willowbirdbaking.
Filling Ingredients:
1 quart fresh strawberries
1 cup flour
1 1/4 cup sugar, reserve 1 tablespoon
Dash salt
1 cup sour cream (not fat-free)
Directions:
* Preheat oven to 450 degrees F. To make the crust, pulse flour and salt together to combine. Add scoops of lard and pulse into the mixture has the texture of coarse sand, about 10 seconds. Add in chunks of butter and pulse until butter pieces are no larger than small peas, about 10 pulses. Add minimum amount of water and pulse on low. If dough remains crumbly and doesn’t come together, add another tablespoon of water. Add as little as is required to enable the dough to be rolled into a ball. Form the dough into a disk, wrap in plastic, and refrigerate for 20-30.
* Roll disk of dough out to around 2 inches larger than your pie plate and transfer it, situating it in the plate. Fold the excess dough around the edges and crimp, trimming where necessary.
* Hull and wash the strawberries and slice them in half. Set aside. Sift flour, sugar, and salt into a large mixing bowl. Add sour cream, blending until creamy. Gently fold in the berries without overmixing. Pour fruit into pie shell and spread to edges without packing down — there should be spaces throughout the filling. Sprinkle the top with the last 1 tablespoon sugar.
* Bake the pie for 10 minutes, then reduce the heat to 350 degrees F (I leave the oven door open a minute during this period to let the temperature drop a little) and bake an additional 30 minutes or until crust is golden brown.
* Broil the pie for 2-3 minutes to brown up the top. Allow to cool completely before cutting, and serve with fresh whipped cream or ice cream.


My “Bourbon Pecan Pie” has been tried and tested multiple times, now. It has officially become a “keeper” recipe and has been written by hand in my “go-to” recipe book!! I can’t wait to share it with extended family during the holidays this fall!!
The story: I saw the recipe on Pinterest, pinned, and followed the instructions. It didn’t quite work for me. It just didn’t set and stayed runny. pauladeen
So, I made another one and cooked it for an hour, and the crust was a little overdone. At this point, I had spent quite a bit of time with the bottle of corn syrup and noticed that there is a pecan pie recipe printed on the side, so I hybridized the two recipes and my pie came out perfectly!! Here is my recipe:
1 cup sugar
2 tablespoons butter, melted
3/4 cup dark corn syrup
3 large eggs, beaten
2 cups pecan halves or pieces (not “crushed/crumbled” pecans)
2 tablespoons good-quality bourbon
1 (9-inch) deep-dish pie shell, unbaked
* Preheat the oven to 350 degrees F.
* In a medium bowl, stir together the sugar and melted butter. Add the corn syrup, eggs, pecans, and bourbon, and stir until all ingredients are combined. Pour mixture into an unbaked pie shell, and place on a heavy-duty cookie sheet.
* Bake for 50 minutes
* Remove from oven and cool on a wire rack.
Note: If your pie is not fully set at this point, cover the edges of the pie crust with aluminum foil and return to oven until it is set. Covering the edges will keep them from overcooking. 😉
PS
Mitch, thanks for shelling the pecans for me! Love You!!


Blackberry Pie and Blackberry Cobbler
Our oldest daughter and I picked all of our berries ourselves! We are lucky to live in an area where blackberrries thrive in the wild here in Arkansas. I’m kind of laughing about the notion of “wild” since we never really left the sidewalk to pick them. There is about a mile long stretch in our neighborhood where they grow really thickly right beside the sidewalk!
The link to the recipe that I found and followed for the blackberry pie was by sevenspoons.
We absolutely LOVED the pie! The only thing that I changed from theirs was to eliminate “gelatin packet” in the whipped cream topping. It was unneccessary, so long as you whip your cream thoroughly.
The Recipe:
Ingredients for the crust
2 cups shortbread cookie crumbs
1/8 teaspoon kosher salt
3 tablespoons unsalted butter, melted
Ingredients for the filling
6 cups blackberries, divided
1/4 cup granulated sugar
1/8 teaspoon kosher salt
1 teaspoon lemon zest
Ingredients for the topping
1 1/2 cups heavy, whipping cream
2 tablespoons caster sugar
Seeds scraped from half a vanilla bean
2 tablespoons sour cream
1 teaspoon powdered gelatin
2 tablespoons milk
* To make the crust, preheat an oven to 325°F (160°C). In a large bowl, stir together the cookie crumbs and salt. While stirring, start to drizzle in the butter. Only use enough butter to dampen the crumbs – depending on the cookies used it might be as little as 1 tablespoon or as much as 3. If you compress the crumbs with the back of a spoon they should pack like sand at the beach, but not appear sodden.
* Press the crumbs into a 10-inch springform pan, forming an even layer across the bottom and a 3-inch crust up the sides. Bake in the preheated oven until lightly golden and set, around 8-10 minutes. Set aside to cool completely. (Shortbread cookies, ‘Nilla wafers, graham cracker cookies, and more all work, or use a premade crust, if you’re running short on time)
* To make the filling, take 3 cups of the berries and put them in a medium saucepan with the sugar and the of the salt. Bring to a boil over medium heat, then reduce to a simmer. Cook, stirring, until the fruit becomes soft and the juices begin to thicken, around 7-10 minutes.
* Carefully remove the blackberries to a blender (or use an immersion blender), and process until smooth. Push the puréed sauce through a sieve, back into the saucepan. Return to the heat and bring again to a simmer, stirring often. Cook the sauce until it becomes thick, with a clear, glossy look, around 5-7 minutes. You should have around 1 cup of purée.
* Off the heat, stir in the lemon zest, followed by the soaked gelatin, stirring quickly to dissolve.
Tumble in the reserved berries, give them a few turns in the pan to coat, then pour into the cooled crust. Refrigerate for 10 minutes to start to firm up.
* To make the topping, pour the whipping cream into a bowl along with the sugar and scraped contents of the vanilla bean. Beat the cream to firm peaks, then fold in the sour cream.
* Spread the topping over the blackberry filling, return the pie to the fridge and chill until set, around 2 hours.
* To serve, remove from the pan and cut with a warm knife, wiping the blade clean between slices.
Makes a 10-inch pie.
For the Blackberry Cobbler that I made the next day, I loosely used the same recipe that I always use for fruit cobblers. This post is already pretty long, since it covered three of my favorite pies, so I’ll write a separate entry for cobblers soon! I hope you enjoy the pies! Let me know!!
Your Friend, ~Amber Hamilton Henson
Like this post? Be sure to check my “my Kitchen” for links to more of my recipes!
Wonder to which parties I’m linking? I have a page dedicated to “shares”, too!
Guess what?! I was featured!

Old House became a “Historic” House
Let’s accomplish a few tasks all at once with this post. I’m going to tell you a little story about how a couple (my husband, Mitch, and I), through meticulous budgeting and money management, bought a house for $37,500 and sold it for $255,500. My friends and family that have kept up with us for years through Facebook have seen and heard this story, but knowing roughly what our annual income is, Mitch’s new co-workers recently wondered aloud as to how we can afford to live in the house in the neighborhood that we do, now. I’ll answer that with this post. Second, I’m seeing A LOT of blog posts linking to other blogs linking to other blogs that show home improvement, restoration, DIY projects, real estate transactions, and more. I thought that having already gone all the way through the process once, our story and what we did may be of some value to others currently going through the process.
Basically, we bought an old house (built in 1902) that was a few blocks beyond the borders of the “Governor’s Mansion Historic District” in downtown Little Rock, Arkansas. Mitch and I were newly weds. I was 18. He was 22. We saw the huge space and had a dream. Overall, the neighborhood was pretty rough (high crime, condemned houses, etc.), but there were these little dots of inspiration, too. Within a block or two, one or two houses were newly remodeled/rehabilitated houses, a couple were under construction, and few dilapidated ones had “for sale” signs. So, even though the condemned houses and old-homes-that-became-boarding-houses still outnumbered us by far, there were indicators that a change COULD be possible. Our friends and family openly said that they thought we were crazy to choose to buy such a rough house in such a rough area. We knew we weren’t. While simultaneously attending college full-time and working as a receptionist full-time, I started planning and tackling projects. Mitch, with the help of his dad, brother, and my brother, worked tirelessly. My grandmother was a saving grace, gifting funds multiple times. Among the very first projects we tackled were to take down all of the metal bars on the doors and windows in order to give the house a “friendlier/homier” feeling, having a professional security system installed, and putting a pretty new roof on the place. The house was structurally sound, but every surface of the interior needed to be replaced. Interior plaster, floors, ceilings, and fixtures had to be replaced, the second story had been stripped all the way back to just the framing beams, for the most part, and the big front porch was about to completely fall off, it seemed. The yard was barren and empty, except for one lovely, mature pecan tree in the backyard.
For many years, we really didn’t have any sort of hobbies or spare money to spend on anything other than updating our old house. See, while lots of people took out big construction loans, refinanced after every project and kept their projects fully mortgaged, we didn’t. We saved and paid for each project one at a time, acting as our own general contractor and hiring professionals as needed for central heat/air conditioning, new electrical breaker boxes, and rough plumbing. Mitch and I insulated, hung new drywall, painted, installed floors, built closets, built bookshelves, installed all of the outlets/switches/lighting, installed all of the tubs/sinks/toilets, re-built the front porch, built fences, installed landscaping, and more.
When we bought the house, we thought we would tackle it all in a year or two. However, since we took a pay-as-we-go and DIY approach, it was actually a decade before it was all done. Interestingly enough, the more changes that we and the few others kept making were encouraging to the rest of the neighborhood and potential buyers. One by one, almost all of the houses in the area began to change. Real Estate prices went up. Crime went down. The boundaries of the “Governor’s Mansion Historic District” that were/are controlled by the Capitol Zoning District Commission were extended to include our house!
Did I mention that during those years spent renovating, Mitch worked full-time and took on automotive restoration projects for profit, I graduated with two degrees, we had two daughters, and were expecting a third daughter when we decided to sell it? The addition of a third child soon to arrive and the needs of our growing daughters who wanted neighborhood pools, bike paths, room to roam, access to a newly constructed public school, and so forth are what ultimately necessitated the sale of our beloved house downtown.
Important message here. See the photo that shows the floorplan of the house and so forth? I believe that in a “buyers’ market” you have to do whatever it takes to help sell your house, if you’re truly motivated to sell quickly. In Arkansas, most online real estate listings do not include a floorplan, but in the event that a buyer might see our house on the internet first, we wanted it to be memorable and for them to be able to envision the spaces. Seeing how the rooms actually connect and flow from one another is very different than using just photographs and trying to imagine how it may be laid out. It paid off. Our buyer was from out of state, saw it online, wanted to see ours specifically, even though it was a cluttered market with several other homes similar to ours, he chose to visit ours and wrote an offer. I never had the opportunity to ask, but I’d guess that being able to see the floorplan was a tremendous help and a deciding factor as to which houses were worth taking the time to visit.
(Dear Readers, Include a floor plan of your home with your photographs when you are selling your home online. Taking the guesswork out of it all for your buyers and real estate agents instantly creates a degree of familiarity and comfort with a piece of property compared to those that forget to include the floor plan. I used Adobe Illustrator to create ours, but a simple sketch to scale by hand would get the job done, too, or you can probably hire a local graphic artist or college student inexpensively to visit the property, measure, and create an illustration for you. Having an illustration of the space plan/layout of the house is also a useful reference for other agents that show your home! When we were buying our new home, we were astounded at how few listings included floor plans on their marketing materials. Online, it was impossible to guess how much square footage was wasted by hallways or what sort of distance existed between bedrooms and bathrooms. Furthermore, without a copy of a floor plan in hand, going to an “open house” where potential buyers outnumbered agents can be like walking around in a maze sometimes. Rooms get overlooked or viewed twice, etc. Include a floorplan. If you’re in central Arkansas and looking to buy or sell, I recommend the services of Scott Heffington. Having him represent our house as a selling agent was fantastic. We will be using his services again in the future.)
Okay; Mitch, my husband, just read my draft of this post and isn’t convinced that my descriptions of the work we did adequately portray how dramatic the transformation of the old house really was. So, on that note, I’m adding a few before/after photos. It would be nice to have more “before” pictures, but we don’t. We were so focused on improvement, we just didn’t think to take many “before” photos. (Dear Readers, TAKE BEFORE PHOTOS! You’ll be glad you did!) The next picture shows the old house in the beginning, then when it got a new roof, then years later after it was painted, storm windows added, landscaped, fenced, new slate pathway, etc., etc. The right side shows the upstairs interior views as it was when we started versus how it was when we finished the master suite level of the house.
I miss my house. I absolutely love my new house and new neighborhood, but even if I say that I PROFOUNDLY miss my old house, old neighbors, and the friends we made along the way downtown, it is an understatement. It was a great house, with great memories inside, and a style that was completely of my own design. We’ve been in our new house for almost two years now. It is a fantastic house. It is primarily a brick and stone exterior, which means a lot less maintenance than our old painted wooden house. It has a great family-friendly floorplan, the craftsmanship of the finishes are great, and for the most part, we really like the fixtures throughout the house. The previous owners were the ones that commissioned its construction, so as a result of being a custom home, it came equipped with lots of bonus features and meticulous attention to detail. I’ll start showing you some of this in future posts. We’ve made a few changes, too. We’ve painted most of the interior, built a wall of bookshelves, swapped a few fixtures, changed bedroom carpet for new wood floors, etc. It’s still a work in progress. I’ll post photos of these new projects soon and tell you about a few major projects that we still have planned! Stay tuned!
Last photo shown is a photo of our new house in our new neighborhood.
Thoughts? Questions? Please, use my comment space on this blog post or email me directly AmberDHenson@att.net
See you in the blogosphere soon!
Your Friend, ~Amber


P.S.
Hi, again! Please, see my new “SHARES” page for info leading to other blogs/sites and ‘zines!
This post is a featured article in Hat Trick Magazine!! Click on the issue cover to read more!:

Guess what?! My post was featured on a great site! Here’s the button link!:

I’m linked:
Verry Merry Vintage Style
Home and Garden Thursday @ Blissful Rythm

Waterize My Photographs
Hello Bloggers!
Chances are, if you use Pinterest, you’ve seen photos of manicures and pedicures and animals and barns and more that appear to be photographed beside some sort of gently rippling pond. Well, some of those photos may have been taken beside an actual pond, some may have been Photoshop’d, but a A LOT of them have been edited using “WaterMyPhoto” app on a phone or tablet!!
Click here for the iPhone/iPad app.


If you’re one of the many people that like to add captions or quotes to your original photos, like I do, then this app is a fun one to play with. It really adds an interesting tranquil effect that pairs well with tranquility quotes.
Here are a few examples of my creations:
• vignette on one of my tabletops that includes a Buddha and quote.
• my self-portrait with a quote.
• my house, that actually is on top of a hill, in the spring


 "Pin It")


I have many, many favorite photo editing apps that I plan to review one or two at a time on this blog. If you have a favorite that you recommend, let me know!! If you enjoy iPhone/iPad photo editing apps like I do, please use my comment button to add links to your work or email me AmberDHenson@att.net and I’ll include links into this or future posts!
See you soon, in this blogging realm! Your Friend, ~Amber Hamilton Henson
P.S.
Hi, again! Please, see my new “SHARES” page for info leading to other blogs/sites!
Crescent Roll Wreaths
Today, I’m going to post onto this blog/website twice:
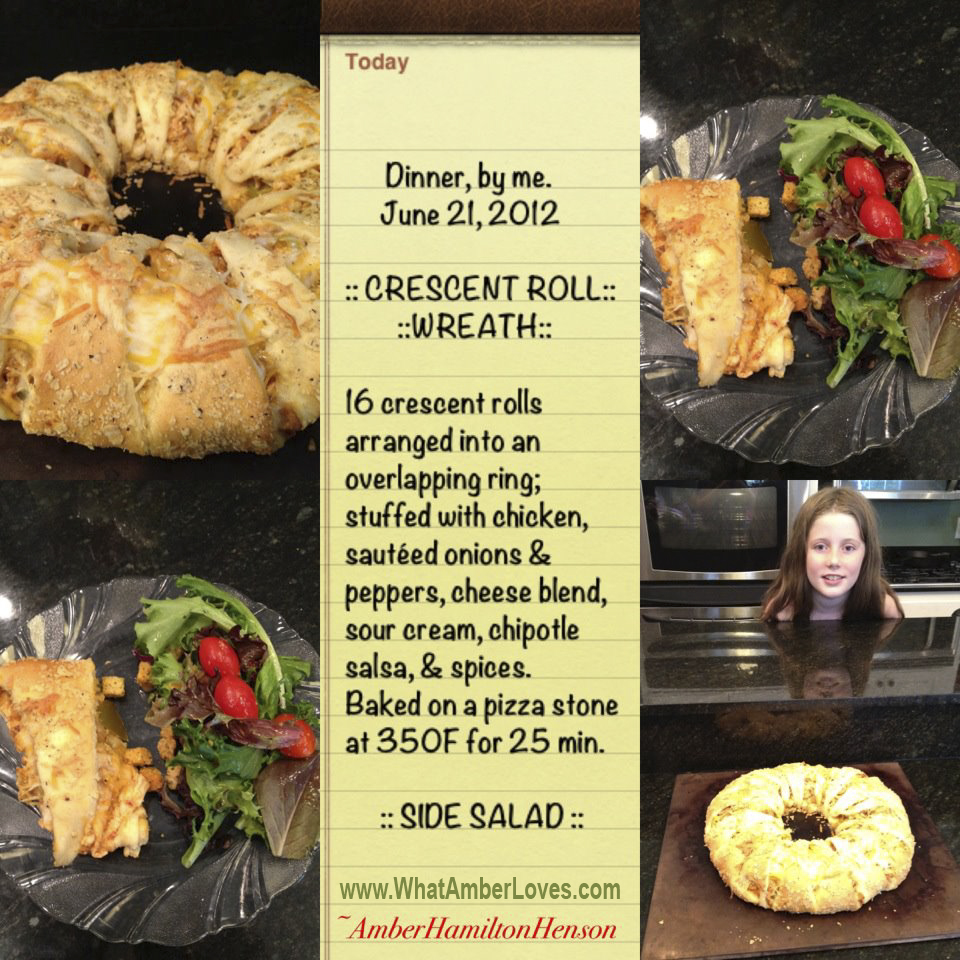
First, I’m going to share one of my favorite things to create for dinner: CRESCENT ROLL WREATH!
Second, I’m going to show you another fun little photo editing app for iPhone/iPad users that I use occasionally, named WATERMYPHOTO.
Ok, the crescent roll wreaths… Love them!! Here we go…


The crescent roll wreaths/rings are great, because they can be stuffed with any of your favorite meats, veggies, and sauces, whatever is seasonal, and any sort of leftovers sitting in your refrigerator. Seriously, the options are endless! You can create breakfast wreaths, dinner wreaths, dessert wreaths, and wreaths for special occasions like bridal showers, baby showers, pot-luck events, and more. I make crescent roll wreathes A LOT. The reason? They’re pretty simple and they look great. Presentation matters.
I almost always use the same brand of pre-made crescent roll dough in a tube. Their recipe for breakfast wreaths using bacon and eggs looks pretty good, too! Pillsbury brand crescent rolls yield consistent results for me. Here is another crescent wreath that I made a couple of weeks ago:
EASY CRESCENT WREATHS RECIPES:
These wreaths are really easy. You decide how big or small you want to make the wreath and use a quantity of crescent roll dough accordingly. I’m feeding a family of 5, so I use two tubes of 8 crescent triangles (16 total.) The “stuffing” includes meats and veggies that have already been cooked and any sort of sauce or cheese to help hold it all together. Use ANYTHING as a stuffing for the wreath. When I lay out the wreath, I put the short sides of the triangles together, making sure that they overlap. I add the ring of stuffing, and then I tuck the tips of the triangles under. I promise, its easy. You can’t go wrong.
It goes in the oven at 350F for 25 minutes, primarily to cook the crescent dough. I always bake mine on a pizza stone, but I would guess that it would work fine on a greased cookie sheet, too!
*The top photo shows the one that my husband and daughters refer to as the “PIZZA WREATH”. It is stuffed with cooked ground beef, crispy bacon, pepperoni, sautéed onion/peppers/mushrooms, and then is held together with 3/4 jar of Arrabbiatta sauce and a layer of cheese. As a finishing touch, I brushed the crescent dough with butter, sprinkled garlic powder, and a generous dusting of Parmesan cheese.
*The wreath in the second photo was stuffed with chicken, onions, peppers, garlic, chipotle salsa, sour cream, and cheese with crumbled corn chips pressed into the crescent dough, for texture. I think adding the crumbled chips onto the dough was important for this wreath. Beyond just adding texture, it really added a salty, corn flavor to the dough, which is otherwise a little sweet!
Have Fun Creating Your Own Version! If you have questions or if you want to share a link to one that you make, please feel free use my comment button! As always, feel free to be social by pinning, re-blogging, and more, as long as it is clear that it links back to this page, too!
Your Friend, ~Amber Hamilton Henson
P.S.
Like this post? Be sure to check my “my Kitchen” for links to more of my recipes!
Wonder to which parties I’m linking? I have a page dedicated to “shares”, too!
Linked:
Mom’s Test Kitchen
If this post gets featured, the Party Hostesses’ Links/Buttons will be pasted here:
Guess what?! I’VE BEEN FEATURED!!!


This post is also linked:
Funky Junk Interiors (wreaths category)
RePurpose and ReUpholster Chairs by using BELTS!
Those of you who have visited our house can attest to just how much i love the use of contrast in design and decor. Few things please my eye more than a great study in contrast. Placing a pair of chrome, mid-century mod chairs on each side of an ornate, antique cabinet excites me. Having an unusual, re-purposed piece adjacent to something contemporary and common is what makes a space interesting, I believe.
The room that we use as our “television den” was lacking pieces with character, but due to the oversized sofa and chairs, there was little room to add much more furniture. However, there is plenty of room for a straight-backed, armless chair (or two) on either side of a chest. Straight-backed, armless chairs occupy only a very small space, are great as spare seating during a party or holiday gathering, and can be pulled up to the big dining room table to squeeze in one extra guest in a pinch! So, the question became, where do I find such chairs that are actually interesting to look at, not just another plain chair?!
Well, the answer was easy. See, several years ago, when our oldest daughter was a toddler, my mother gave us a small, child-size chair that had been hers when she was a child. It had a seat that was woven in rush (similar to caning) that was starting to fray and had discolored. I wanted to keep the chair. I decided to tackle the re-seating project myself using alternative materials. I considered fabric, neckties, and more, but ultimately, I was afraid that they wouldn’t be durable enough, then I thought of belts! They were perfect! Made of thick, heavy duty leather, if woven together, they would provide plenty of support, durability, and would be easy to clean if there was a spill. So, that’s what I used. Belts.


Finding another broken chair was easy. I go to estate sales (where the entire contents of house are sold due to death, divorce, cross-country moves, etc) on Saturday mornings a couple times of year. There are several in central Arkansas every weekend, but who has time to go that often?! I wish I did, but our daughters’ schedules keep us so busy that a few times a year is all I get. Yesterday, I went to two estate sales. It turns out that these old, rush woven chairs with broken seats are common. Many are quite old, “antique,” I dare say. Through the years, when people have purchased new dining sets, upholstered pieces, and so forth, the old rush-woven and caned chairs get moved to porches, decks, patios, and garages. They deteriorate pretty quickly when they are left exposed to the elements. The chairs then get discarded, set by the street for the garbage trucks, or a lucky few get a price tag of a few dollars at an estate sale or vintage re-sale shop until someone comes along with a craft idea for how to re-use them. So, I just bought another one at an estate sale this weekend.

The process of putting it together was really simple. First, using a knife, I cut away the old, woven rush. Then, I cleaned the chair with an abrasive, soapy sponge. Next, I misted the chair with a light dusting of satin black spray paint, letting the original mahogany wood stain still show through in places. Last, I just wove the belts on the chair, doing all of the side-to-side belts first and buckling them on the underside of the seat. For the front-to-back direction, I alternated going over or under the side-to-side belts. If having the “tails” of the belts hanging down after they’re buckled bothers you, just do what I did and use a zip-tie to hold them in place! 😀

Now, it is important to note that not all belts will fit perfectly. The easiest belts to work with were the ones that had holes, grommets, or weave that ran the full length of the belt. These belts are my favorite. In the future, if I ever do decide to re-weave the chair with traditional materials, these belts will be able to return to their original use as belts, unaltered! But, for the ones that didn’t fit, it was really easy to just use a hole-punching tool to add a hole where you need it. If you don’t have a punch tool like the one I’ve pictured, I’m pretty sure that you could just hammer a nail through the belt atop a piece of wood in order to make your hole.
😉
Enjoy my project or links? Please, pin it, tweet it, like it, whatever… just be social and feel free to share as long it links back to here, my watermark remains visible on my photos, and you contact me to let me know! (WhatAmberLoves@att.net) I’d love to see what everyone else in the blogoshpere is making!
I hope y’all are enjoying your Sunday, today! Your friend, Amber
P.S.
Hi, again! Please, see my new “Press” page for info leading to other blogs/sites!
Guess what?! I was featured!!!
 |
 |
I’m linked/linking:
Funky Junk Interiors
MissMustardSeed “Furniture Feature Friday”
Catch as Catch Can @ My Repurposed Life
BlissRanch’s Junkers United

Dill Pickle Fries and the Labelbox app


I really, really, really enjoy using a variety of iPhone/iPad apps for quick edits of my photos that I use in social media. I am trained in the use of Adobe Photoshop and LOVE it, but the little apps are really pretty amazing, too. There are lots of actions being performed by iPhone photo editting apps in a matter of seconds that would otherwise take us graphic artists a significant amount of time to re-create in Photoshop.
My iPhone/iPad photo-editting highlight of the day: LABELBOX


;
It is a great free app that can be used to add simple captions to to your photos. I use it A LOT. I use it to label recipe/cooking photos, I use it to caption photos of my kids, and I use it to caption all sorts of activity oriented photos. It is absolutely one of my favorite free photo editing apps. It is uber simple to install and use.
Click here to get “Labelbox” app, now.
;;
I hope you enjoy! Your friend, Amber

P.S.
Hi, again! Please, see my new “SHARES” page for info leading to other blogs/sites!
Peaches, Peaches, Peaches!
Oh, my goodness, y’all! We absolutely LOVE fresh peaches! Local orchards are open for business, there are always pick-up trucks selling peaches and watermelons parked in the shade somewhere along every major street, and all of the WalMart, HomeDepot, and garden centers are selling fruit trees that are ready to transplant. Most of the fruit trees available for sale around here are big enough that you will have fruit ready the very next year. Afterall, THIS is summertime in Arkansas.
In this post: 1) Picking peaches at a local orchard, 2) “Peach & Pecan Crumble” for dessert, 3) “Peach Bellinis” for adult beverage hour, 4) planting new peach trees in my yard, and 5) tips for pruning the trees each year! ::
:: Peaches grow really, really well here in Arkansas. (The Zone 7 climate is perfect!) ::
1) Since we had no other plans on a recent Saturday, my husband and I decided to take our three daughters to a peach orchard and let them pick a few pounds of fresh peaches! We went to Cadron Crest Orchards in Guy, Arkansas. It is near Conway, here in central Arkansas. I don’t know whether they have a website or not, but you can call them at (501) 679-3243 to find out whether or not the orchard is open or closed for the day and which varieties are being picked each week. They have about 20 different varieties of peach trees; a full, long row of each variety of tree makes for a large orchard! Different varieties ripen during different times of the summer. “Summer Prince” peaches open the season and are picked around June 20th, but “Big Red” peaches don’t ripen until around September 15th. ::

:: Anyway, each of our two older daughters carried a bag and filled it with peaches! In just a matter of minutes, the bags were full. We went to have them weighed in order to pay for our haul, and we discovered they had picked over 20 pounds of peaches! Oy! Well, we are a family of five, so we ate them all pretty quickly! ::
2) Photo of “My Peach & Pecan Crumble” for dessert (The Peach Crumble recipe that I followed)


3) Photo of My Peach Bellinis (The recipe that I followed has great photos!)
 "Pin It")
4) GARDENING: Well, we live in the suburbs. Our lot is only 13,500 square feet, not acreage. Womp, womp, womp… I want acreage, lots and lots of acreage. At our next house… I digress. Back to my current garden space… We have 13,000+ square feet, which is plenty of room for a small collection of fruit trees. When we bought this house in 2010, the backyard was already fully fenced, had one mature walnut tree, and the rest was lawn, a blend of Zoysia and Bermuda grass, to be specific. Thus, even with all of our girls playground equipment, there is plenty of room to add fruit trees! So, guess what we bought?! We bought 3 new little peach trees!! We bought three different varieties that will ripen during different parts of the summer!! YaY!!!

Having never grown peach trees before now, I did a little research about how to care for them. It turns out that they have a pretty short lifespan and for best fruit production they need a pretty specific style of pruning every year. Peaches only grow on new little pieces of wood (branches) that are less than two years old. That’s quite the opposite of apples, which only grow on wood older than 3 years. Thus, the way that you prune a peach tree is very different than the way you prune an apple tree.
5) RESEARCH: Here are a few links to what I learned in order to help me care for my new peach trees:
A diagram showing how to prune:

…a short video explaining the differences between pruning apples and peaches…
Why are most fruiting trees in the south painted white at the bottom! Nope, it is not to prevent bugs; it is to prevent SUNBURN! Who knew?! I haven’t painted my trees yet, but I will. I will use household interior latex paint, only. Exterior paints and enamels contain chemicals that could damage/poison the trees. ALL of the trees at the orchard that we visited had their trunks painted white from the ground to about 24″.
🙂 Okay, that is all for now. My youngest daughter is calling for me. I’ll probably write again tomorrow. My goal will be to use and write on this blog/website at least once or twice a week. We’ll see. Whether you like my post, see technical errors, or have a comment, please, try my “comment” button and/or enter your email address to subscribe to updates! Thanks!
“Later, ‘gators” and “Afterwhile, crocodiles!” ~Your friend, Amber
P.S.
Hi, again! Please, see my new “SHARES” page for info leading to other blogs/sites!
First Post!
First Post :: Okay, this is kind of a secret blog at this point, since I haven’t told anyone that I’m creating this blog! I’m hoping to figure out some of the basics and get a few posts completed before I begin to share this blog by linking to other social media and telling my family and friends about it. ::
Let’s start by attaching a current photo of me. ::

Amber Hamilton Henson

:: Lets see if I can get a Pinterest button to work on my new blog; it’ll make it easier to share recipes, crafts, and more on future posts. :: Did it work?


