Monthly Archives: October 2012
Zombie Rats for Dessert!
It is definitely a Halloween tradition of ours to let the kids make a few crazy treats each Halloween. Last year, we made witch cupcakes, that was before I started blogging. Maybe I’ll upload a round-up of old Halloween pics? That would be fun! Regardless, here is what we made tonight, ZOMBIE RATS!!!
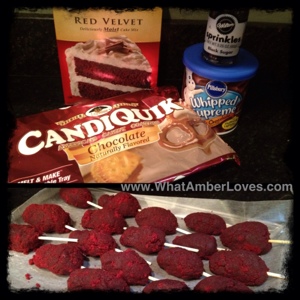
The “zombie rats” are actually red velvet cake balls coated in a hard chocolate shell! They have almond slivers for ears, red hot candy eyes, and candy tails!

I saw the “creepy cake ball lab mice” tutorial on Polish The Star’s Blog, and decided to try it, with a twist! 🙂 Instead of white lab mice, we went for big brown rats with red velvet filling! Mice + Rats + Halloween at its best! Yum!
My husband, Mitch, and our daughters really get all of the credit for actually assembling our yummy little rats; I was in the room, though, so that counts, right?!
Here’s how they did it:
Bake a cake, let it cool, crumble it up, mix it with icing, form balls (mice bodies).
Put in freezer for ten minutes with a skewer to use for dipping.
Melt coating. Dip bodies. Return to freezer for 10 minutes to firm the coating.
Remove skewer, insert twizzler tails, and affix red hot candy eyes with addition chocolate.
🙂


Happy Halloween!
~Amber Hamilton Henson
Spider Eggs!

(click on photos to enlarge)

Devilled Eggs embellished with black olive spiders are an addition to our brunch on this Sunday before Halloween!
Easy to Make:
Hard boiled eggs, split in half.
Yolks removed and blended with mayo, sweet pickle relish, garlic powder, salt, and pepper.
Refilled and Dressed with black olives!
“Spider Eggs!”
Happy Halloween!
~Amber Hamilton Henson
Halloween Wreath!
For the first time EVER, I’ve made a Halloween wreath that isn’t of the cutesy, sparkly variety! It has bones. It has spiders. It has moss, webs, and twigs. There isn’t anything orange or purple or pink or any other bright color on it. At all. It’s a first for me. I kinda like it! It matches well with the brick and stone exterior of our house, an unplanned bonus! It’s a mossy skeleton wreath!
Here it is: (click on photo to enlarge!)

The supplies were simple enough: (around $20 and around 20 minutes) a $5 grapevine wreath, bag of bones from WalMart for $9.97, Spanish moss for $4 from Hobby Lobby, burlap ribbon for $1.99 from Hobby Lobby, artificial spiders, craft letters leftover from another project, hot glue. (see next photo)

The details: (click on photo to enlarge)
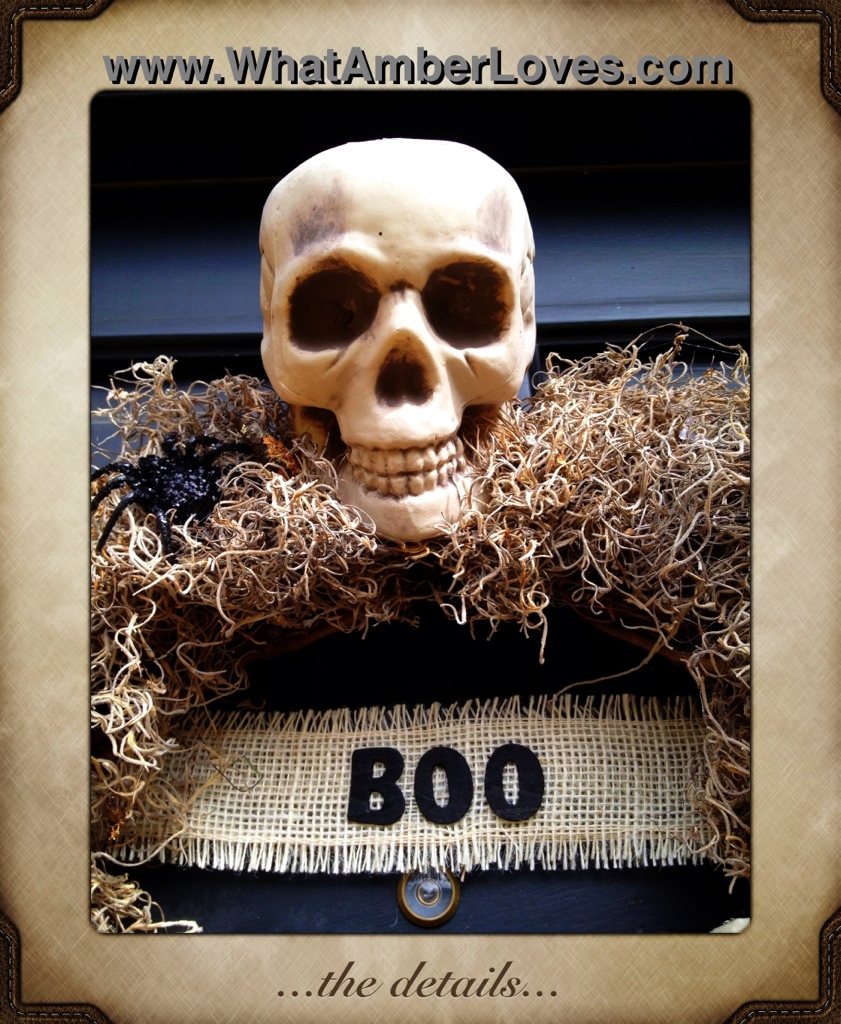
So, there it is in all its glory, my first non-cute “scary style” Halloween wreath!
It’s already hanging on our haunted house!
(click on photo to enlarge)

^that is a photo of our house that was edited on the iPad using the “wordfoto” app!
Thanks for stopping by to see my newly assembled mossy skeleton wreath! What do you think?
~Amber
PS
As always, feel free to re-post an image, pin it, tweet it, fb it, or whatever, so long as it clearly links back to here! If you do feature this project on your blog, site, or ‘zine, please, let me know and I’ll add your link into this post!
You’ll see this wreath at these HALLOWEEN themed parties:
Door Decor and Halloween Link Party @ Momnivore’s Dilemma
Halloween Party @ ChickenScratchNY
Handmade Halloween @ HappyHourProjects
Halloween Party @ PolishTheStars
Eat, Drink, & Be Scary @ SomeWhatSimple (this is a HUGE party!!)
We’ll also be spreading the scare at these awesome parties:
Be Inspired #41 @ ElizabethAndCo
Wow Us Wednesday #88 @ SavvySouthernStyle
All Star Block Party #20 @ FullCircleCreations
Tutorials, Tips, & Tidbits #18 @ StoneGableBlog
Treasure Hunt Thursday #78 @ FromMyFrontPorchToYours
Happy Hour Friday @ HappyHourProjects
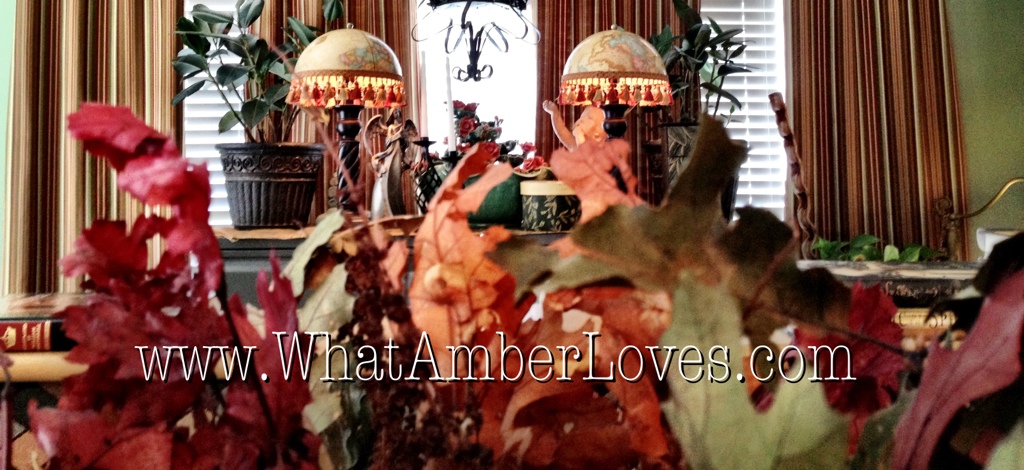
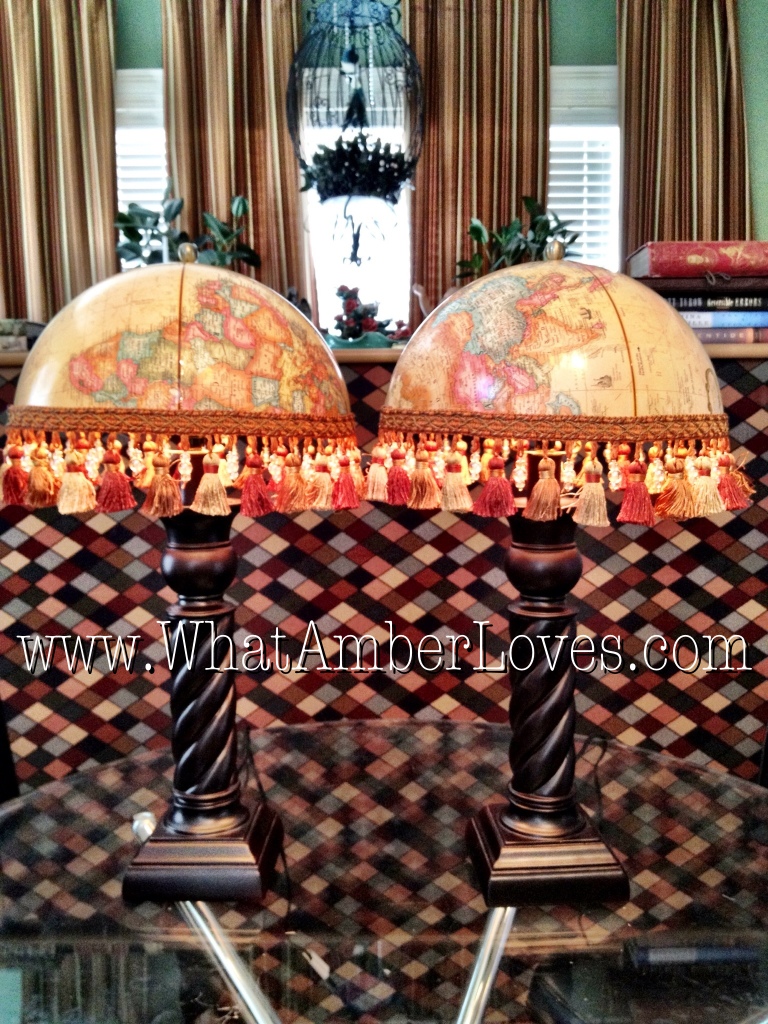
DIY Globe Lampshades!

I needed a pair of lamps to sit on top of my file cabinets in our home office/library. I decided I wanted globe lamps. You know, when you cut apart a globe in order to make lampshades out of the globe?
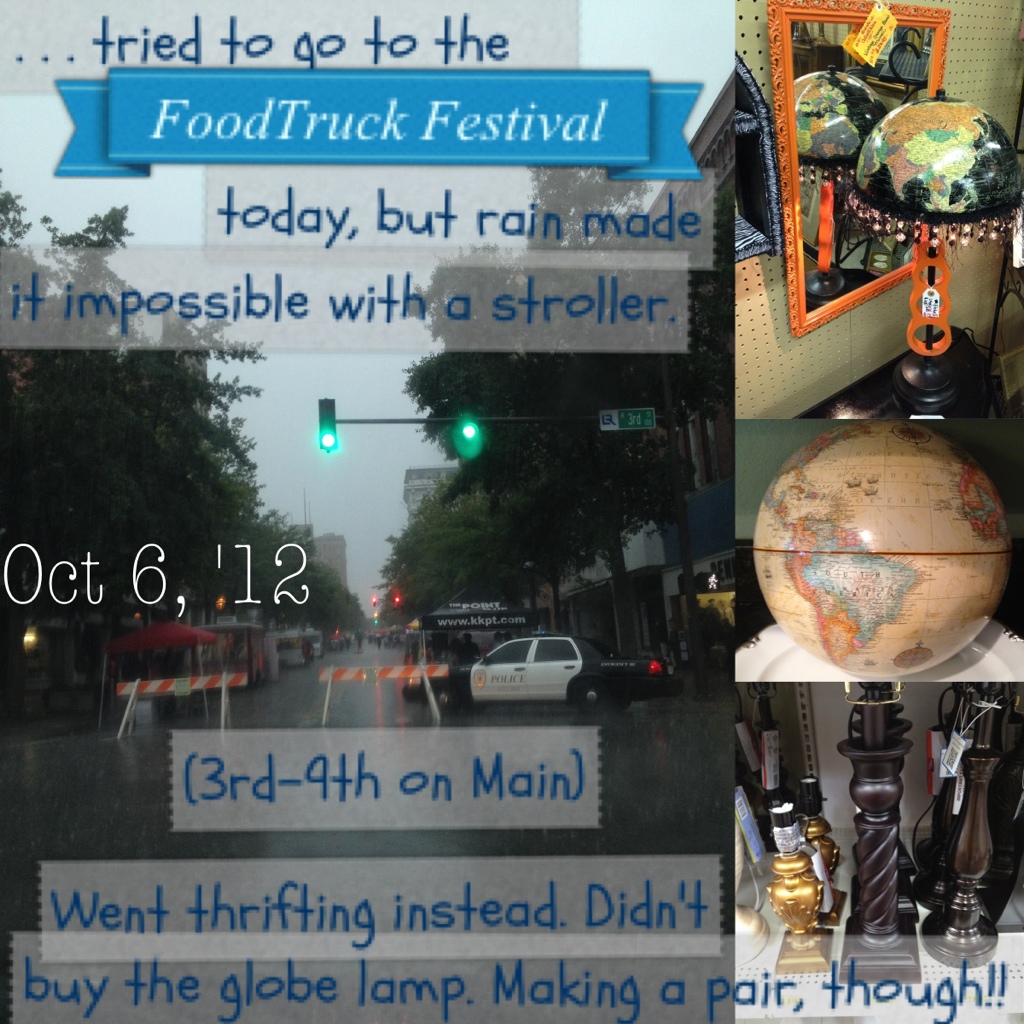
Not wanting to cut up my husband’s childhood globe and since it was raining on Saturday, making it impossible for us to attend a local FOODTRUCK Festival in the rain with our youngest in a stroller, we went looking around at a few local thrift/antique stores in order to find a globe and just muse around.
I saw a lamp that I really liked while we were out shopping: (click on photo to enlarge it)

Despite the fact that I totally fell in love with the lamp and globe lampshade, I didn’t get it, because I wanted a pair of lamps; however, I firmly believe YOU should totally go buy this handcrafted one-of-a-kind globe lamp. It’s only $15.99 at Hidden Treasures on Hwy 107 in NorthLittleRock/Sherwood, Arkansas.
I did find a globe that day at MidTowne Antiques to use for MY project. 10 bucks. Deal. That makes two lamp shades at only $5 each!! 🙂
(click on photo to enlarge it)

HOW TO:
The easier way to split the globe would have been to just remove the tape along the equator, but then one globe would be rightside up and the other would be upside down. That wouldn’t do! I wanted a pair!! So, using a jigsaw, my husband Mitch cut it along one of the lines of longitude for me! 🙂 Now, I have a pair that are BOTH sideways. Both. That makes me happy. Next, we just drilled a hole in the top, so that it slides on easily and is held in place between the lamp’s harp and finial. Glue on trim. Insert low wattage bulb. Important: very low wattage bulb, because this is a cardboard shade. Done! (click on photos to enlarge them)

Thanks for tuning in! Since making this project, I’ve kind of been fascinated by globe projects and prices. I’ve compiled a round-up and shopping board on Pinterest, click “Globe Trotting,” to see the globe projects I’ve found!
Second, Want to know more about the age or value of the globe you’re using in a craft project? If you look, I think there are probably several resources available. For instance, it took me about three seconds when I looked, and I discovered the globe I used was manufactured in 1981, based on the names of countries/political boundaries. The link for discovering the age of my globe is here. Neat, huh? 🙂
AND, I can’t finish this post without a big HAPPY BIRTHDAY shout out to my dad, pretty much the most awesome guy that has ever existed! Love you Dad!!
Your Friend,
~Amber Hamilton Henson
PS
When this globe lampshade parties or is featured, you’ll see the links and buttons at the bottom of this post updated daily! As always, feel free to re-post an image, pin it, tweet it, fb it, or whatever, so long as it clearly links back to here! If you do feature this project on your blog, site, or ‘zine, please, let me know and I’ll add your link into this post!
These globe lampshades were featured!! Twice!!
(click on featured button links to see!)

Linking to the best Parties:
Lampshades Category @ FunkyJunkInteriors
Be Inspired #40 @ ElizabethAndCo.
Wow Us Wednesdays #87 @ SavvySouthernStyle
Primp Your Stuff #66 @ PrimpJunktion
Penny Pinching #158 @ TheThriftyHome
Treasure Hunt Thursday #77 @ FromMyFrontPorchToYours
Tutorials, Tips, & Tidbits @ StoneGableBlog
Home and Garden Thursday #10 @ BlissfulRhythm Delightsome Life
Transformation Thursday #173 @ TheShabbyCreekCottage
Hookin’ up With HOH #120 @ HouseOfHepworths
Happy Hour Friday @ HappyHourProjects
Catch as Catch Can #93 @ My Repurposed Life
ReDoux Friday #76 @ ReDoux Interiors
Funky Junk Saturday Nite Special #156 @ FunkyJunkInteriors
Be Inspired #41 @ ElizabethAndCo


