Blog Archives

Bloody Eyeballs!
We’re bringing #EYEBALLS to the Halloween party tonight!
👁 Easy to assemble & healthy-ish
👁 Fresh blueberries
👁 Canned #lychee fruit
👁 Strawberry Jam
👁 Toothpicks

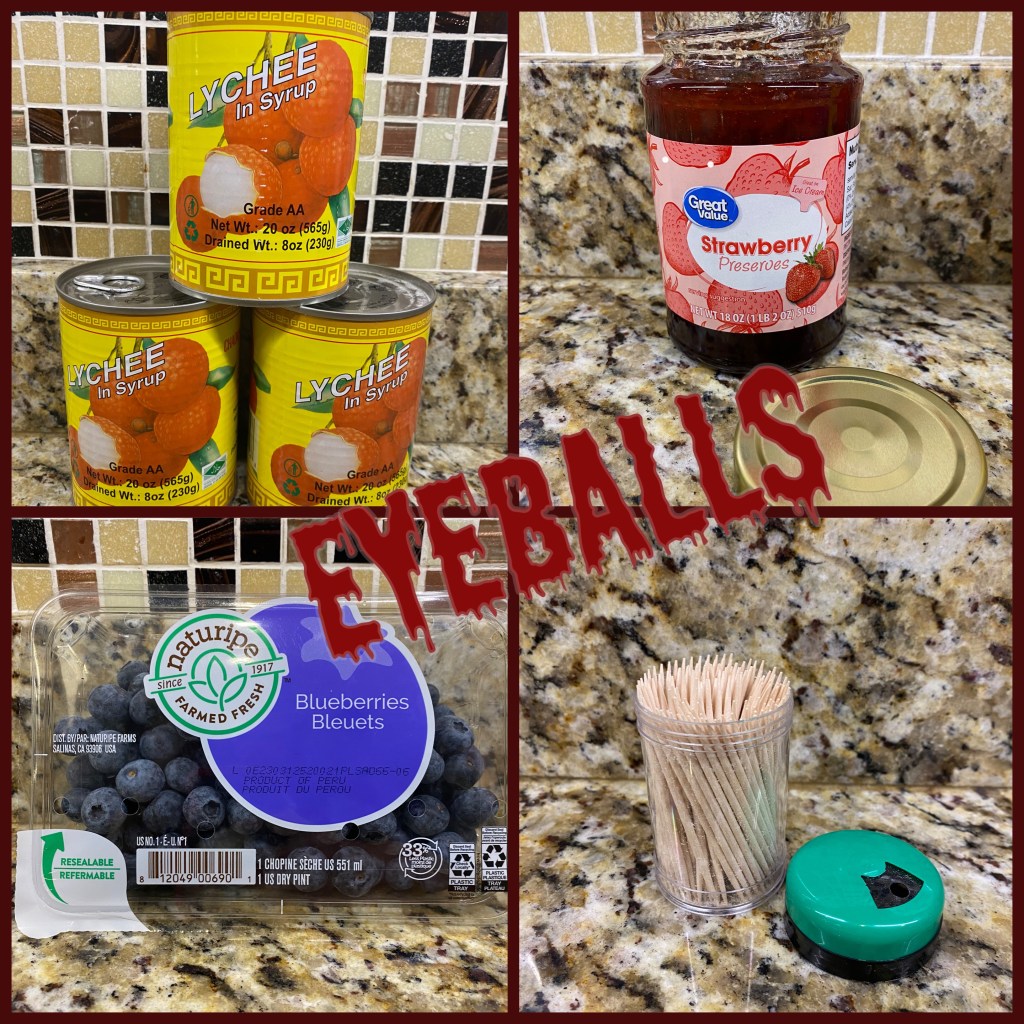
These are sweet, fun, and a bit gory in appearance. The recipe/assemblage is simple. The finished treats amuse me a lot.
Do you think other guests at the party we’re attending tonight will be willing to try one?
🎃🩸👁🩸
Your Friend,
AmberHH

“GROUND ROADKILL” a sweet Halloween treat

Just for fun, every year our family creates at least one consumable, silly Halloween food item. This year, Abigail saw “ROADKILL” on social media somewhere and decided to duplicate/improve upon the idea. So, that’s what she did!
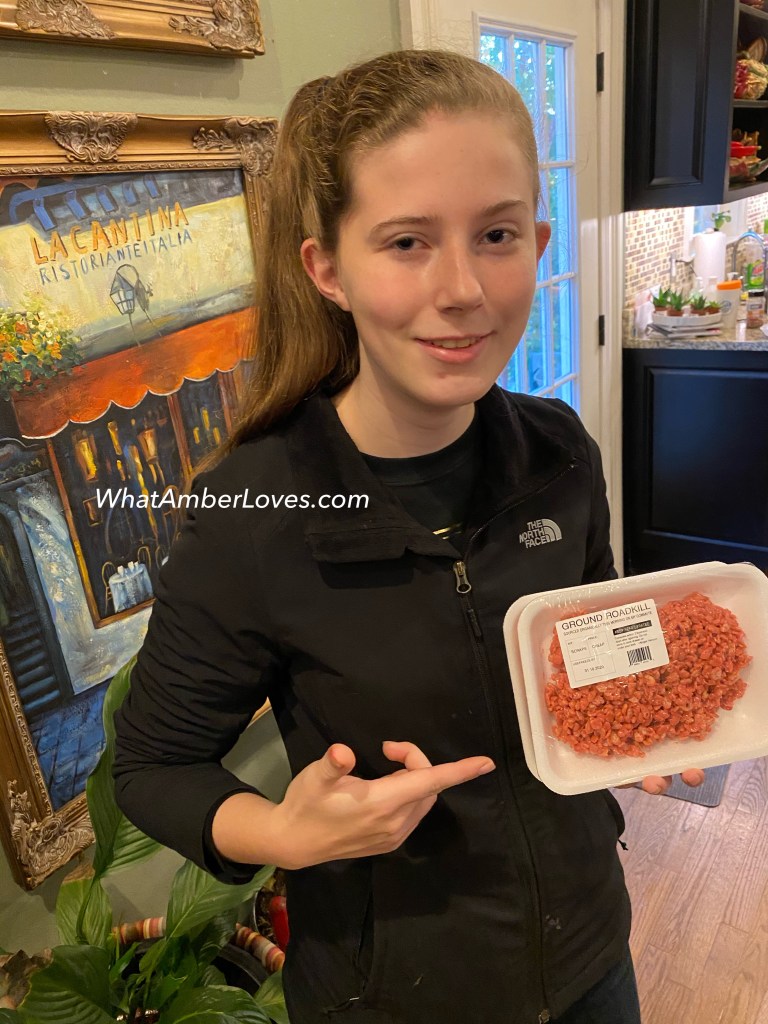
Following a standard recipe for Rice Krispy treats, she added RED food coloring plus a few drops of BLACK food coloring into the melted marshmallow before stirring in the rice cereal. (Adding the black was essential to muddy the pink/red a bit and give the color some depth.)

Packaging. It is really the presentation that transforms these regular treats into something appropriately able to trick friends for Halloween.
Using styrofoam trays, clear cling wrap, and custom printed labels, the treats suddenly transform in appearance from being a sticky sweet indulgence to an appearance of potentially rank (and definitely gross) ROADKILL.
Attention to detail designing the labels was fun! Did you notice the expiration date is on Halloween? The storage instructions? We had fun with this part of the process!

Whether you’re carving jackolanterns, trick-or-treating, going to parties, or just staying home watching scary movies this evening, we hope you enjoy the day!


Happy Halloween, y’all!


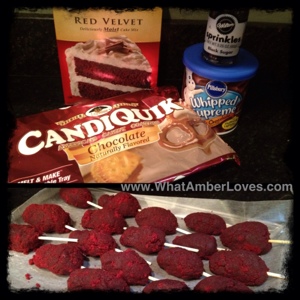
Zombie Rats for Dessert!
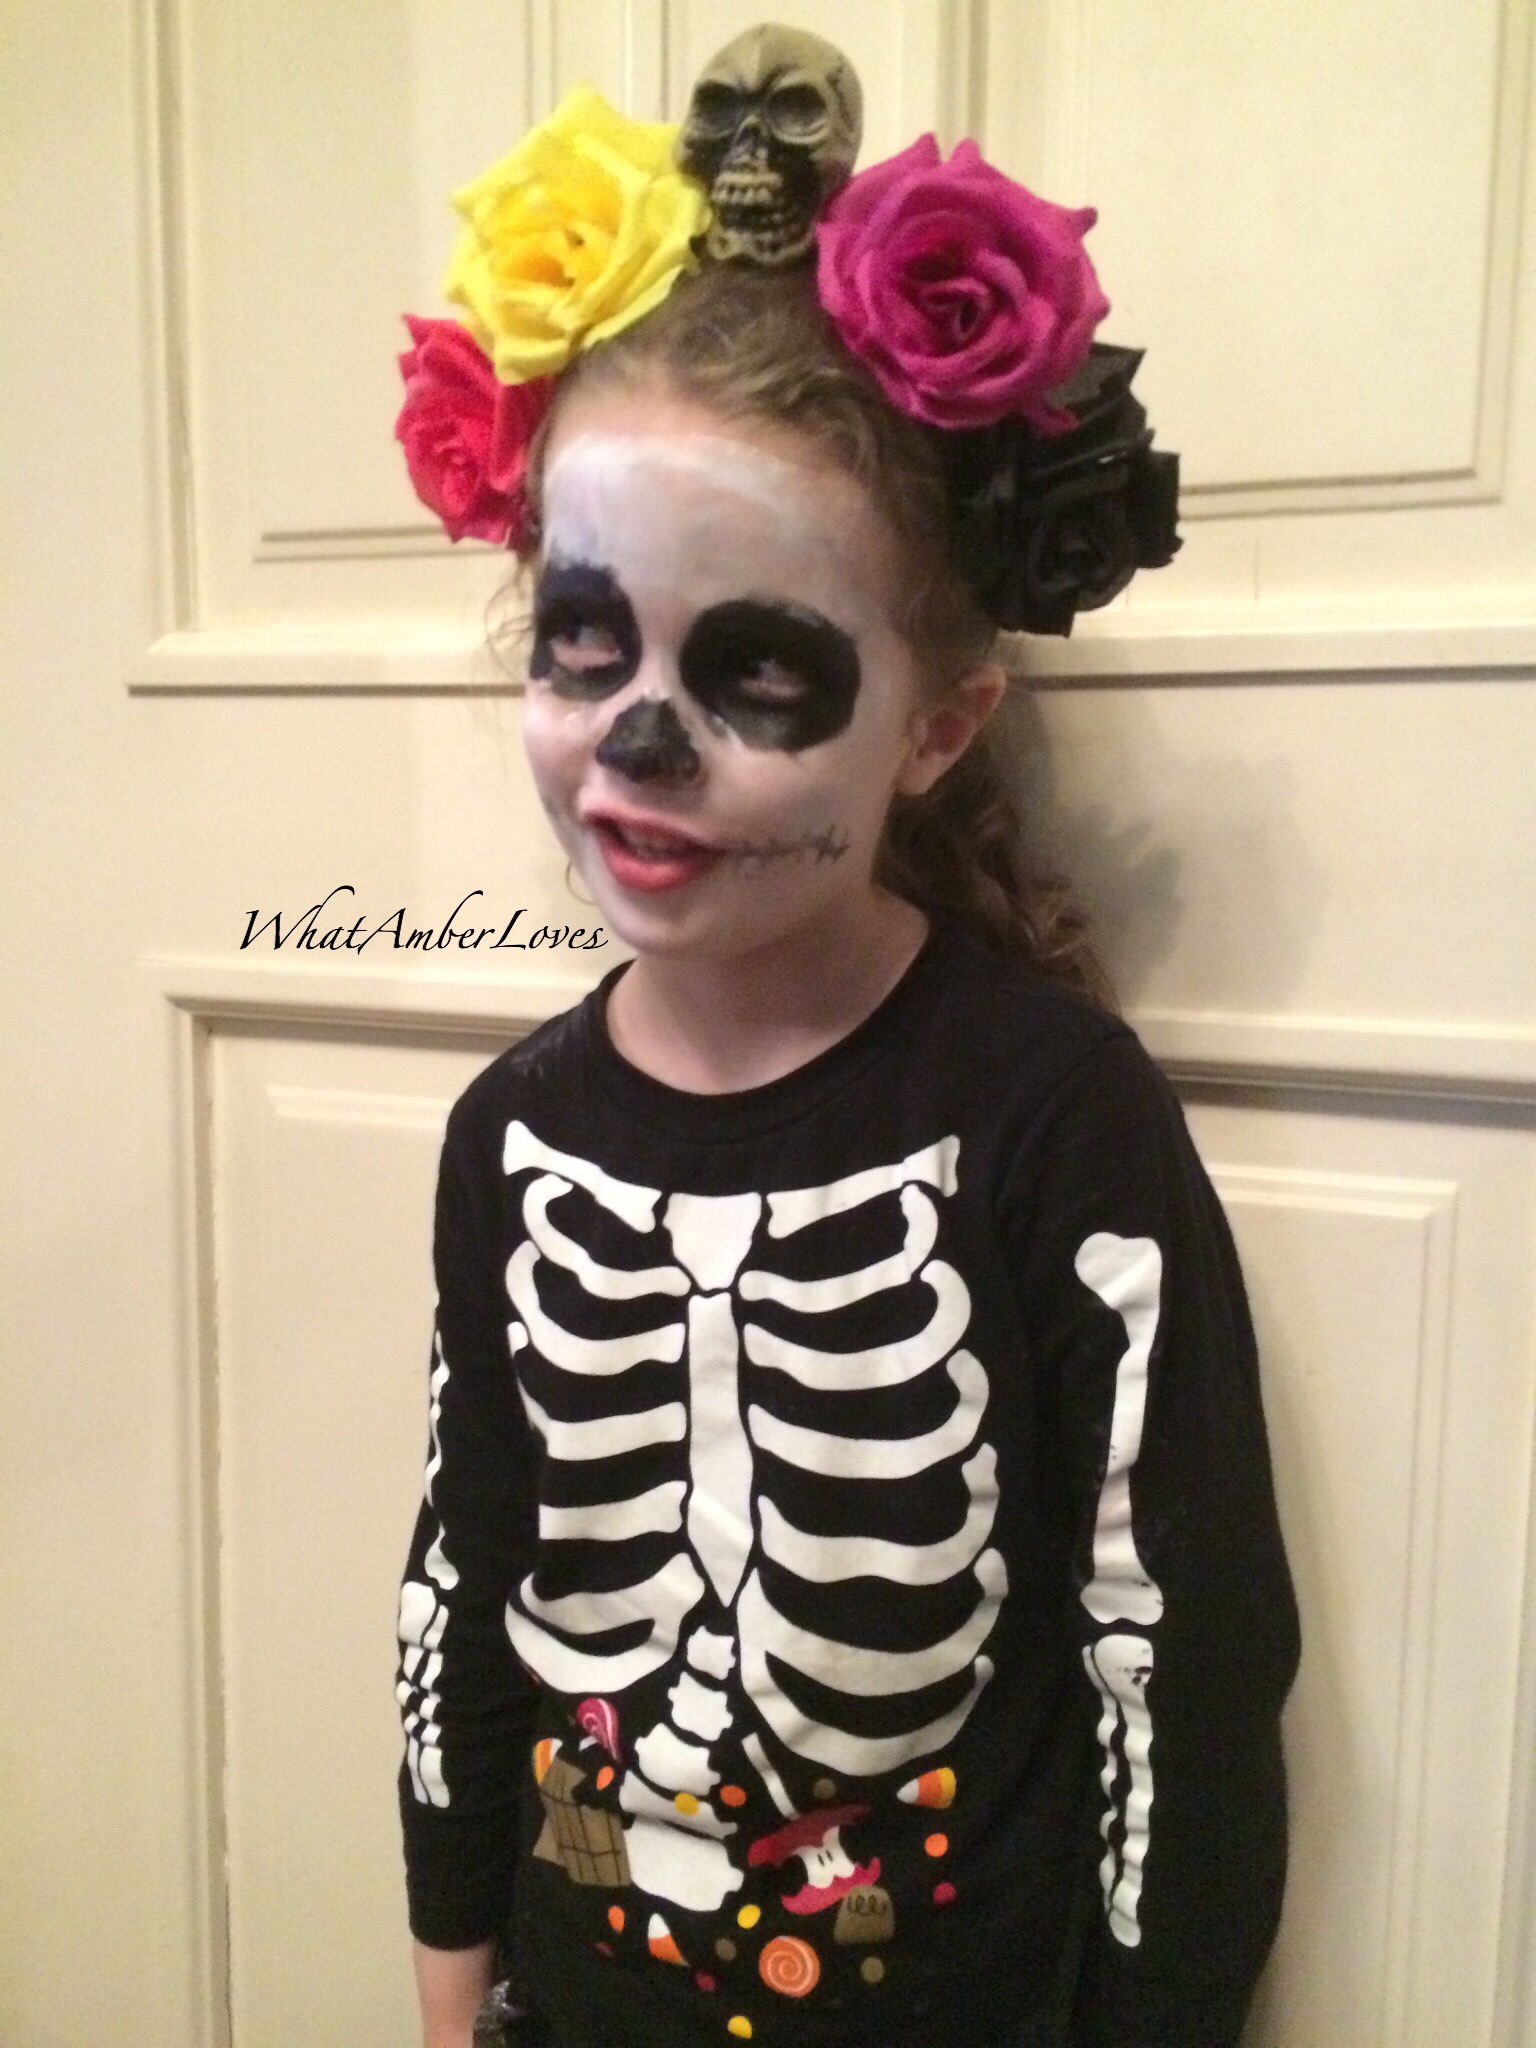
It is definitely a Halloween tradition of ours to let the kids make a few crazy treats each Halloween. Last year, we made witch cupcakes, that was before I started blogging. Maybe I’ll upload a round-up of old Halloween pics? That would be fun! Regardless, here is what we made tonight, ZOMBIE RATS!!!
The “zombie rats” are actually red velvet cake balls coated in a hard chocolate shell! They have almond slivers for ears, red hot candy eyes, and candy tails!

I saw the “creepy cake ball lab mice” tutorial on Polish The Star’s Blog, and decided to try it, with a twist! 🙂 Instead of white lab mice, we went for big brown rats with red velvet filling! Mice + Rats + Halloween at its best! Yum!
My husband, Mitch, and our daughters really get all of the credit for actually assembling our yummy little rats; I was in the room, though, so that counts, right?!
Here’s how they did it:
Bake a cake, let it cool, crumble it up, mix it with icing, form balls (mice bodies).
Put in freezer for ten minutes with a skewer to use for dipping.
Melt coating. Dip bodies. Return to freezer for 10 minutes to firm the coating.
Remove skewer, insert twizzler tails, and affix red hot candy eyes with addition chocolate.
🙂


Happy Halloween!
~Amber Hamilton Henson
Spider Eggs!

(click on photos to enlarge)

Devilled Eggs embellished with black olive spiders are an addition to our brunch on this Sunday before Halloween!
Easy to Make:
Hard boiled eggs, split in half.
Yolks removed and blended with mayo, sweet pickle relish, garlic powder, salt, and pepper.
Refilled and Dressed with black olives!
“Spider Eggs!”
Happy Halloween!
~Amber Hamilton Henson
Halloween Wreath!
For the first time EVER, I’ve made a Halloween wreath that isn’t of the cutesy, sparkly variety! It has bones. It has spiders. It has moss, webs, and twigs. There isn’t anything orange or purple or pink or any other bright color on it. At all. It’s a first for me. I kinda like it! It matches well with the brick and stone exterior of our house, an unplanned bonus! It’s a mossy skeleton wreath!
Here it is: (click on photo to enlarge!)

The supplies were simple enough: (around $20 and around 20 minutes) a $5 grapevine wreath, bag of bones from WalMart for $9.97, Spanish moss for $4 from Hobby Lobby, burlap ribbon for $1.99 from Hobby Lobby, artificial spiders, craft letters leftover from another project, hot glue. (see next photo)

The details: (click on photo to enlarge)
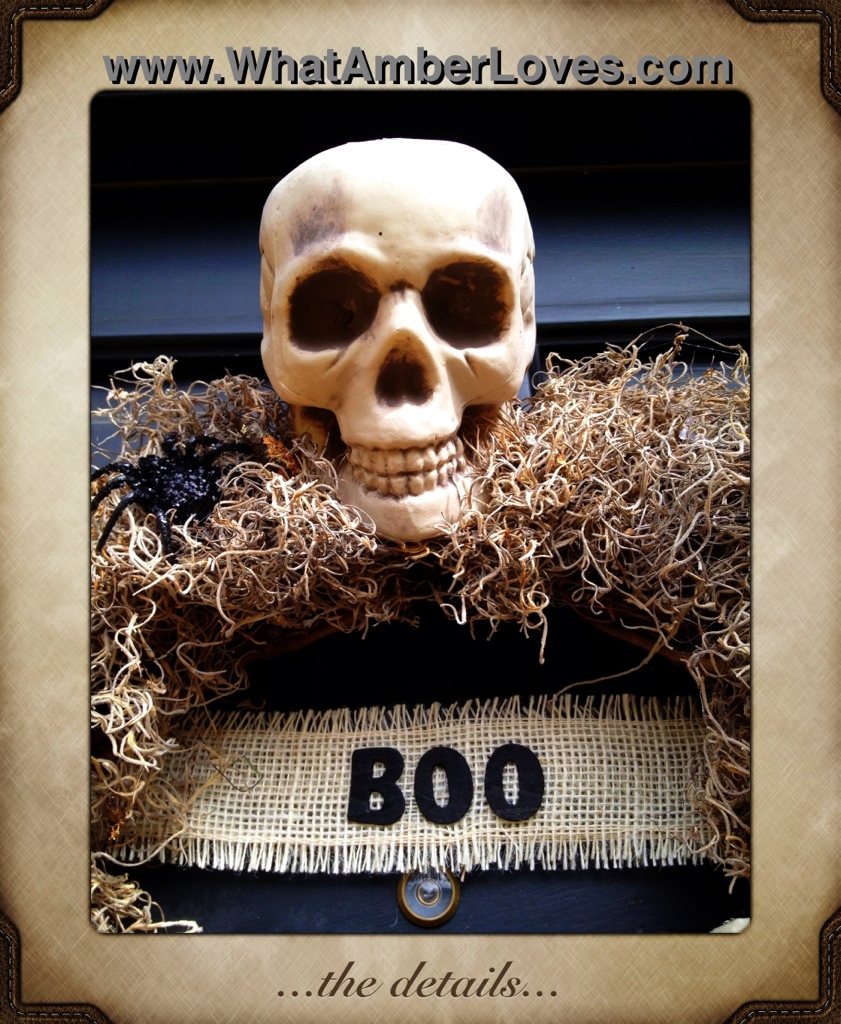
So, there it is in all its glory, my first non-cute “scary style” Halloween wreath!
It’s already hanging on our haunted house!
(click on photo to enlarge)

^that is a photo of our house that was edited on the iPad using the “wordfoto” app!
Thanks for stopping by to see my newly assembled mossy skeleton wreath! What do you think?
~Amber
PS
As always, feel free to re-post an image, pin it, tweet it, fb it, or whatever, so long as it clearly links back to here! If you do feature this project on your blog, site, or ‘zine, please, let me know and I’ll add your link into this post!
You’ll see this wreath at these HALLOWEEN themed parties:
Door Decor and Halloween Link Party @ Momnivore’s Dilemma
Halloween Party @ ChickenScratchNY
Handmade Halloween @ HappyHourProjects
Halloween Party @ PolishTheStars
Eat, Drink, & Be Scary @ SomeWhatSimple (this is a HUGE party!!)
We’ll also be spreading the scare at these awesome parties:
Be Inspired #41 @ ElizabethAndCo
Wow Us Wednesday #88 @ SavvySouthernStyle
All Star Block Party #20 @ FullCircleCreations
Tutorials, Tips, & Tidbits #18 @ StoneGableBlog
Treasure Hunt Thursday #78 @ FromMyFrontPorchToYours
Happy Hour Friday @ HappyHourProjects


