Blog Archives
Kitchen Herbs!
Hello, Springtime in Arkansas!
We’ve sure had a slow, colder than usual start, but alas, it finally FEELS like Springtime!
Having so much rain in the last two weeks has rapidly turned the landscape green, again! YaY! My kitchen herb collection is enjoying a great start this season! Yours? There are few interesting plants in my pots, I think!

My chives are huge, because they are usually good year ’round in this pot. They went dormant after our heavy Dec25 snow, but came back strong. I lift and divide them every 3 years or so, but I’ll also have plenty of seeds to share in a couple of months after they bloom.
The sage is about 3 years old now; it started as a teeny, tiny little sprout, purchased in a 2 or 3″ pot. It is quite a beauty, now at over 18″ in all directions! (For reference, these pots have about an 18″ diameter. They all receive morning to early afternoon sun, and are shaded by the house during late afternoon.)
Not having a greenhouse and adequate lighting indoors, I’ve grown my basil using Bonnie brand starter plants the last few years and have been really pleased with the results every year! Somehow,around here,each basil plant costs less than a package of fresh herbs at the grocery store. One “Sweet Basil” plant will yield the equivalent of a dozen+ grocery store purchases of packaged fresh basil for me. Furthermore, with things like basil and mint, you’ll find that in Arkansas, you have the option to grow many more varieties than you’re likely to find in grocery stores! Cooking for a family of 5, budget matters. Having been lucky enough to dine in a few fine places along life’s journey, quality and flavor matter, too. When I grow Bonnie herbs, my family gets to eat spectacular, fresh herbs while I save on my grocery expenses! There isn’t a downside for us. Our kids take turns watering them in the mornings, as needed, and we have a system where they take turns for who “gets to” pick basil, snip chives, etc.
They LOVE being involved caring for our edible plants.
New, (well, new to me) this year, I’m growing Bonnie’s CULANTRO. Interesting, yes? I didn’t misspell it. Its spelling is similar to cilantro, as is it’s flavor, but it sure doesn’t look anything like cilantro! You’re going to want to read what Bonnie says about this plant! I’m fascinated! In this house, we LOVE using cilantro in the summer, so having the option to grow a plant with a similar, but stronger, flavor sounds GREAT to us!

Bonnie provides QR codes on a plant marker with some of the plants they sell. I just use my free QR reading app on my smartphone, and then I’m instantly linked to Bonnie’s website! Bonnie’s QR links each deliver a wealth of information about the plant’s characteristics, how to care for the plant, and recipes using the plant! Even if you don’t find a QR code on your Bonnie plant, I suggest going to their site. I find that the range of information they share for the plants they sell is currently unparalleled.
For example, check out CULANTRO:
OVERVIEW of Culantro: bonnieplants.com~herbs~culantro
GROWING Culantro: bonnieplants.com~growing~culantro
COOKING with Culantro: bonnieplants.com~cooking~recaito
Awesome, right? 🙂
Bonnie plants and the Bonnie website are AMAZING. If you skipped to this sentence without clicking on their links, you might want to re-think that decision. Go back. Click one or all three of those links.
You won’t be disappointed!
(But, please come back here to visit me again, sometime, too! Really!) 🙂
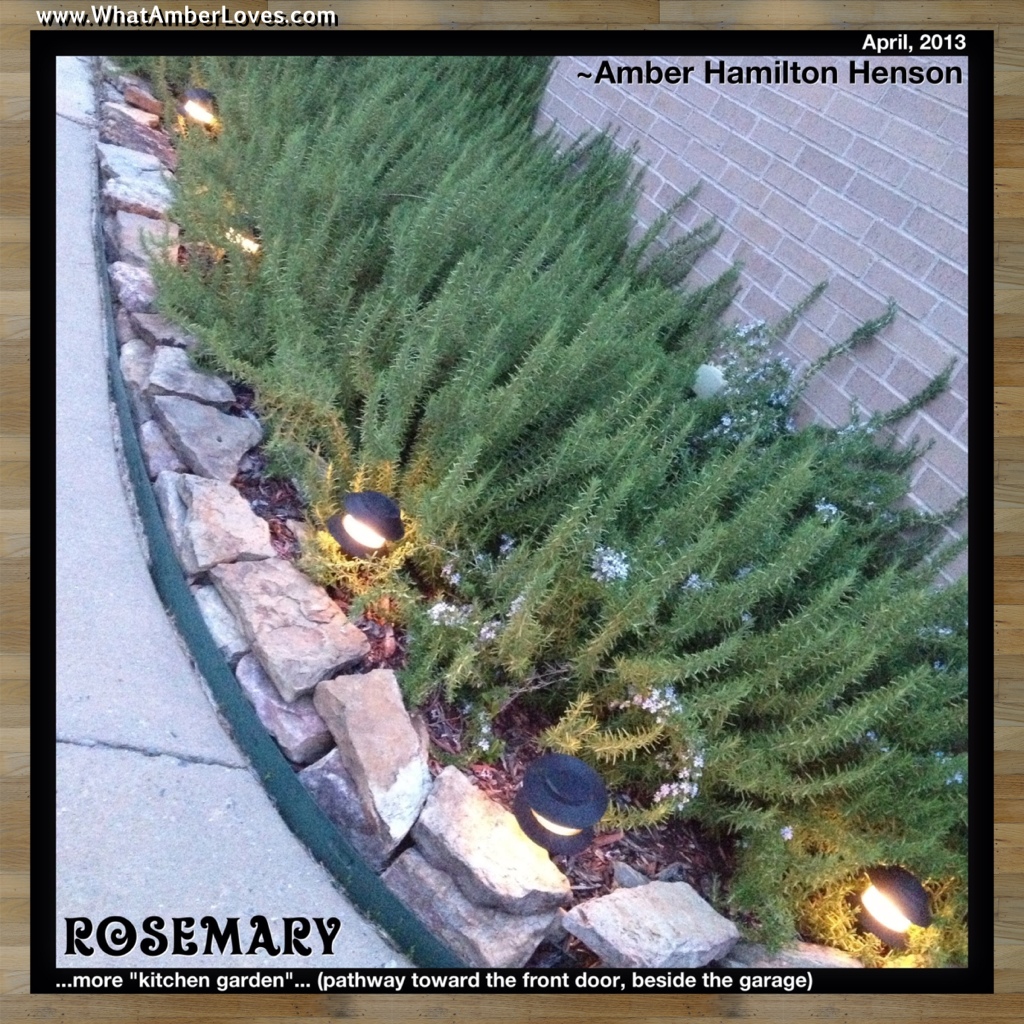
In this photo, you can see my Rosemary filled a bed quite nicely. They are planted in front of the house, beside a path leading to the front door. With even the slightest breeze, it is so refreshing to experience the Rosemary!

Further up the pathway, you’ll see some of the Wooley Lambs’ Ear that I propagated out of the pot last year. Let’s talk about it, shall we? We shall.
Woolly Lambs’ Ear is one of my absolute favorite plants that I’ve been dividing and sharing for over a decade. There is quite a bit of it spread around downtown, at Our Old Historic House Downtown, and neighboring homes. One of the neatest things about visiting historic areas, is admiring historic gardens. When we moved to our new house in 2010, of course we brought these pots, and since I’d already been keeping some of the Wooley Lambs’ Ear in a pot, I’ve just kept propagating and planting!
What is so special about this plant? I like this plant so much that I don’t hardly know where to start talking about it!
First, it is amazing in children’s gardens. The soft, fuzzy texture is fun to explore. It stands up to and rebounds from a reasonable amount of steppage. It grows into nice, tight border plantings that resist weeds. It attracts bumblebees and butterflies while in bloom. It is low maintenance, and as I’ve mentioned, it is really easy to lift, divide and multiply.
Guess what else?! Historically, the local folklore is that Wooley Lambs’ Ear have been used medicinally and for personal hygiene due to its antiseptic, soothing, and absorbent properties. I can totally imagine that laying their big, cool damp leaves across sunburned shoulders would potentially relieve some discomfort in the summer!
Can it get any better? Other Sources say it can. “Yes, Wooley Lambs’ Ear is edible!” other sources claim. Apparently, according to other sources, some people enjoy Lamb’s Ear fresh in salads, gently steamed as greens, and steeped into tea! Their advice says to pick fresh, young leaves for best flavor! Here is what they what they say about Wooley Lambs’ Ear:
“The whole plant (Stachys) is medicinal as an alterative, antibacterial, antipyretic, antiseptic, antispasmodic, astringent, carminative, diuretic, febrifuge, hypotensive, stomachic, styptic, tonic, vermifuge and vulnerary. A cold water infusion of the freshly chopped or dried and powdered leaves makes a refreshing beverage, while a weak infusion of the plant can be used as a medicinal eye wash for sties and pinkeye. It is taken internally as a medicinal tea in the treatment of fevers, diarrhea, sore mouth and throat, internal bleeding, and weaknesses of the liver and heart.” Source: Wikipedia
“Lamb’s ear is loosely related to Betony (both are Stachys), and is sometimes called woolly betony. Besides the sopping up of blood and use as a [wound] dressing, lamb’s ear has also been used as a poultice and has analgesic properties. It was used either alone, or to help hold in other herbs like comfrey. It was often used in the aftermath of bee or wasp stings, and reduces the swelling from both. It was used for centuries as a “women’s comfort” for hemorrhoids, menstrual flow, birthing, for nervous tension, and as a skin aid. It’s easy to see that with the invention of Tylenol, gauze, feminine hygiene products, cotton packing, and make up removal pads, the knowledge and use of lamb’s ear for this purpose kind of went out the window. However, now you know you have a natural substitute if everything goes wrong and supplies are not available. Lamb’s ear has been used as a natural dye for wool. Boiling the leaves in hot water and then adding a mordant, brings out a fabulous, creamy, yellowish beige. Using the bracts (flower spike) instead of the leaves, a light mauve can be attained. The leaves traditionally have been used in cooking from the West Indies. A lovely tea can be made from the leaves as well, tasting a bit like chamomile. I also have a mole verde recipe that calls for small lamb’s ear leaves. When harvesting for food, only choose small, healthy leaves.” -Source: The Chippewa Herald
Lol. It is not a “baaa’ad” plant. Interesting.
Personally, I’m optimistic that we will all be able to continue a path of following MODERN medicine and modern science. I hope I also do my part to maintain and pass along the little known, Folklore trivia about this native plant for the sake of conversational interest and the possibility of cultivating, potential future opportunities for a neat plant, too!
NOTE: Please, do not use me (Amber) or this blog post as reference claiming Woolly Lambs’ Ear is edible or medicinal; I’m merely relaying that other online sources make such claims! I have not attempted to look for historical botanical information for this plant in actual textbooks, if it even exists, nor have I seen a detailed recipe posted by a recognized, reputable chef or commercial kitchen.
You may, however, quote me saying that I think it is a pretty interesting plant to handle and have in the landscape!
So, there it is. Wooley Lambs’ Ear grows in a pot beside all of my edible herbs, even though personally, my family and I don’t eat the Wooley Lambs’ Ear! I’ve never felt compelled to try it, primarily because the texture and scent haven’t struck me as being particularly appetizing. Our Woolly Lambs’ Ear uses one of the pots just because it always has; perhaps it always will? It was one of the first things I put into the pots 10+ years ago, and I enjoy it. It attracts A LOT of wild bees in the summer, which I think is pretty awesome, too.

I have a few other herbs started, more herbs planted in less photogenic pots, and am always looking for new, interesting (tried and true) edible additions that I haven’t added to my repertoire of care, yet.
What are YOUR favorite kitchen herbs to grow and serve at home?
Do you have suggestions for me to add to my garden?
Drop me a note in my comments section or join our WhatAmberLoves Facebook page!
We may actually start using the page this Spring!
Transformation is in the air!
Your Friend,
~Amber Hamilton Henson
(This is a personal blog. All of the opinions here are exclusively my own and were unsolicited. They do not necessarily reflect the opinions of those products, businesses, or events that may be featured within posts, although my goal IS to be PR friendly toward such products, businesses, and events that I choose to promote, while simultaneously offering valuable, relevant data, facts, links, or other to my family, friends, and community that may encounter this post. I have not received compensation, product, or payment of any type for publishing this post. In the event that I am compensated after-the-fact, the post will be edited in this section to reflect such compensation. Any reader attempting to duplicate any recipe, activity, craft, or other created by me [Amber] or shown on this blog should be done at the reader’s own risk. Cool? Cool.)
This article is featured in HAT TRICK magazine, beginning on page 98. Click on magazine cover to be redirected: Hat Trick magazine

Also, Linking this post:
The Trendy Treehouse’s “Share Wednesday”
End of 2012!
End of the year! It is New Year’s Eve! Today, we cleaned house a bit and put away the Christmas tree in order to facilitate a FRESH new year for 2013! Not wanting to leave any project undone, now is as good of a time as any to update this blog, too! Right? Right! The last time I wrote on here, we were making Halloween projects! Wow! We’ve done a lot since then, here a few photo highlights:


We’re looking forward to 2013 and hope that you are too!
Your Friends,
Mitch and Amber Henson
email: WhatAmberLoves@att.net
Zombie Rats for Dessert!
It is definitely a Halloween tradition of ours to let the kids make a few crazy treats each Halloween. Last year, we made witch cupcakes, that was before I started blogging. Maybe I’ll upload a round-up of old Halloween pics? That would be fun! Regardless, here is what we made tonight, ZOMBIE RATS!!!
The “zombie rats” are actually red velvet cake balls coated in a hard chocolate shell! They have almond slivers for ears, red hot candy eyes, and candy tails!

I saw the “creepy cake ball lab mice” tutorial on Polish The Star’s Blog, and decided to try it, with a twist! 🙂 Instead of white lab mice, we went for big brown rats with red velvet filling! Mice + Rats + Halloween at its best! Yum!
My husband, Mitch, and our daughters really get all of the credit for actually assembling our yummy little rats; I was in the room, though, so that counts, right?!
Here’s how they did it:
Bake a cake, let it cool, crumble it up, mix it with icing, form balls (mice bodies).
Put in freezer for ten minutes with a skewer to use for dipping.
Melt coating. Dip bodies. Return to freezer for 10 minutes to firm the coating.
Remove skewer, insert twizzler tails, and affix red hot candy eyes with addition chocolate.
🙂


Happy Halloween!
~Amber Hamilton Henson
Spider Eggs!

(click on photos to enlarge)

Devilled Eggs embellished with black olive spiders are an addition to our brunch on this Sunday before Halloween!
Easy to Make:
Hard boiled eggs, split in half.
Yolks removed and blended with mayo, sweet pickle relish, garlic powder, salt, and pepper.
Refilled and Dressed with black olives!
“Spider Eggs!”
Happy Halloween!
~Amber Hamilton Henson
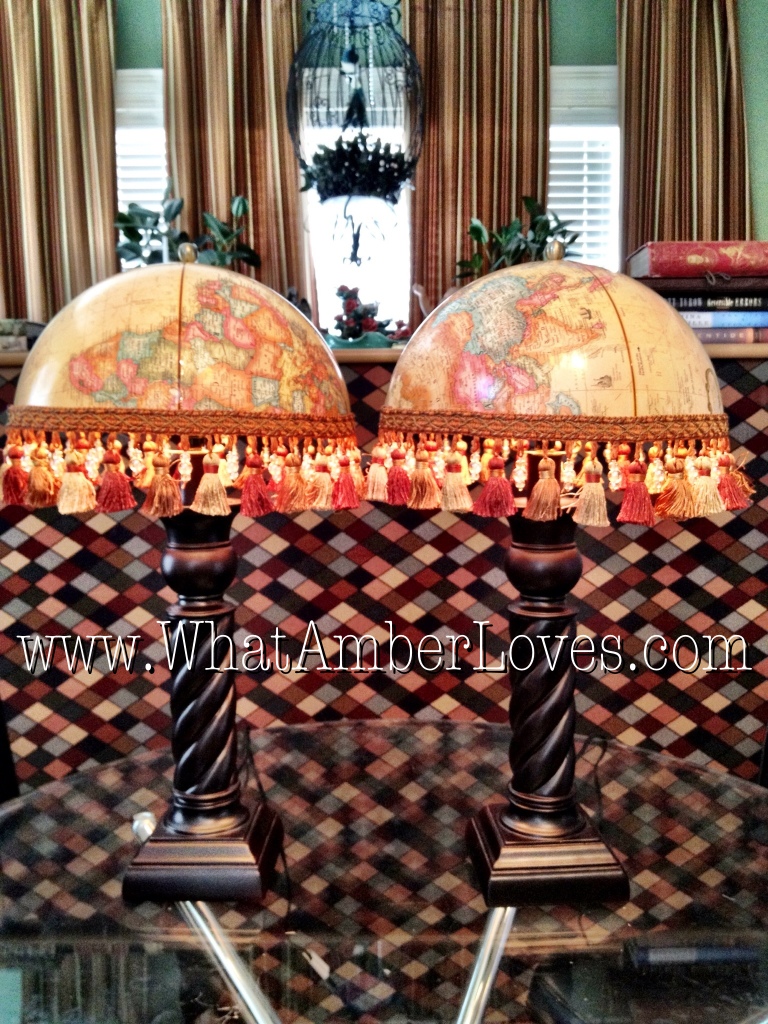
DIY Globe Lampshades!

I needed a pair of lamps to sit on top of my file cabinets in our home office/library. I decided I wanted globe lamps. You know, when you cut apart a globe in order to make lampshades out of the globe?
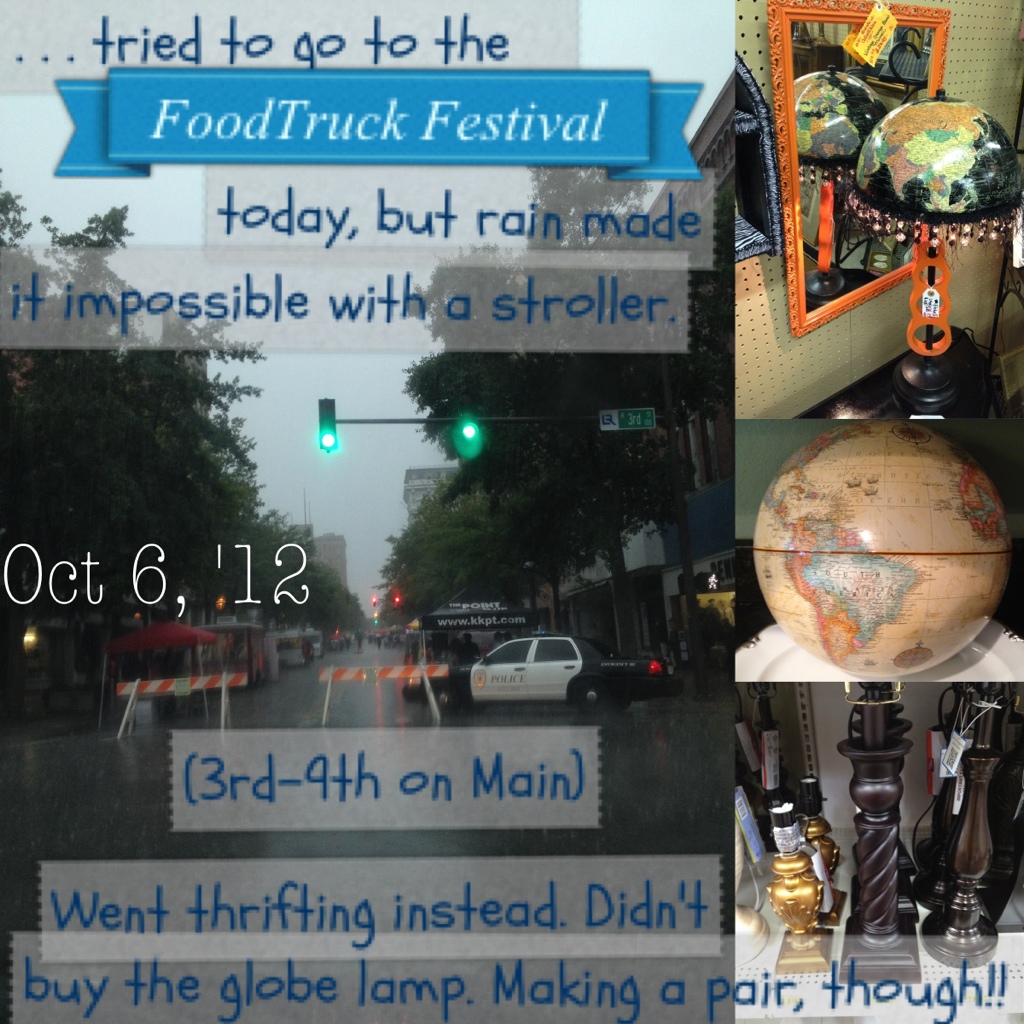
Not wanting to cut up my husband’s childhood globe and since it was raining on Saturday, making it impossible for us to attend a local FOODTRUCK Festival in the rain with our youngest in a stroller, we went looking around at a few local thrift/antique stores in order to find a globe and just muse around.
I saw a lamp that I really liked while we were out shopping: (click on photo to enlarge it)

Despite the fact that I totally fell in love with the lamp and globe lampshade, I didn’t get it, because I wanted a pair of lamps; however, I firmly believe YOU should totally go buy this handcrafted one-of-a-kind globe lamp. It’s only $15.99 at Hidden Treasures on Hwy 107 in NorthLittleRock/Sherwood, Arkansas.
I did find a globe that day at MidTowne Antiques to use for MY project. 10 bucks. Deal. That makes two lamp shades at only $5 each!! 🙂
(click on photo to enlarge it)

HOW TO:
The easier way to split the globe would have been to just remove the tape along the equator, but then one globe would be rightside up and the other would be upside down. That wouldn’t do! I wanted a pair!! So, using a jigsaw, my husband Mitch cut it along one of the lines of longitude for me! 🙂 Now, I have a pair that are BOTH sideways. Both. That makes me happy. Next, we just drilled a hole in the top, so that it slides on easily and is held in place between the lamp’s harp and finial. Glue on trim. Insert low wattage bulb. Important: very low wattage bulb, because this is a cardboard shade. Done! (click on photos to enlarge them)


Thanks for tuning in! Since making this project, I’ve kind of been fascinated by globe projects and prices. I’ve compiled a round-up and shopping board on Pinterest, click “Globe Trotting,” to see the globe projects I’ve found!
Second, Want to know more about the age or value of the globe you’re using in a craft project? If you look, I think there are probably several resources available. For instance, it took me about three seconds when I looked, and I discovered the globe I used was manufactured in 1981, based on the names of countries/political boundaries. The link for discovering the age of my globe is here. Neat, huh? 🙂
AND, I can’t finish this post without a big HAPPY BIRTHDAY shout out to my dad, pretty much the most awesome guy that has ever existed! Love you Dad!!
Your Friend,
~Amber Hamilton Henson
PS
When this globe lampshade parties or is featured, you’ll see the links and buttons at the bottom of this post updated daily! As always, feel free to re-post an image, pin it, tweet it, fb it, or whatever, so long as it clearly links back to here! If you do feature this project on your blog, site, or ‘zine, please, let me know and I’ll add your link into this post!
These globe lampshades were featured!! Twice!!
(click on featured button links to see!)


Linking to the best Parties:
Lampshades Category @ FunkyJunkInteriors
Be Inspired #40 @ ElizabethAndCo.
Wow Us Wednesdays #87 @ SavvySouthernStyle
Primp Your Stuff #66 @ PrimpJunktion
Penny Pinching #158 @ TheThriftyHome
Treasure Hunt Thursday #77 @ FromMyFrontPorchToYours
Tutorials, Tips, & Tidbits @ StoneGableBlog
Home and Garden Thursday #10 @ BlissfulRhythm Delightsome Life
Transformation Thursday #173 @ TheShabbyCreekCottage
Hookin’ up With HOH #120 @ HouseOfHepworths
Happy Hour Friday @ HappyHourProjects
Catch as Catch Can #93 @ My Repurposed Life
ReDoux Friday #76 @ ReDoux Interiors
Funky Junk Saturday Nite Special #156 @ FunkyJunkInteriors
Be Inspired #41 @ ElizabethAndCo
Gypsy? Hippie? SCARF CURTAINS!!
I haven’t written on this blog in over a week! Where has the time gone?! Geez! There are times that I have so much to say that its a challenge to find the time to write any of it! I bet you other bloggers face the same issue. Anyway, . . . Here, in THIS moment, I have time to write:
First, if youre a subscriber, you might have noticed that I haven’t shown our dining room on this site yet, despite the fact that I think it will be one of the more impressive rooms in our house. Two reasons: art wall and curtains. See, a couple months ago, we switched the rooms around. What was once a den attached to the kitchen became the dining room and vice versa. It kind of threw everything into disarray for a bit. We have 15-20 original works of art leaning against walls awaiting their new gallery style / salon style installation in the dining room, at least 3 of them are canvases 48″ in size. The glass tile fireplace installation was fun. I’m glad we switched the rooms around, because I LOVE having the fireplace in our dining room. But, there are still a couple projects awaiting supplies or my time. Work in progress.
Work in progress. Second, If you’ve been following me on Pinterest, you may have seen that I’ve pinned a few sets of curtains made of scarves recently. See the inspirational photos that helped me choose a direction, by clicking here, here,and here. See? Aha! Easy, breezy curtains for the dining room made of varying sheer or shiny scarves?! Well, with 10′ ceiling and a desire for floor-to-ceiling curtains, that would require A LOT of scarves; so, I decided to buy scarf style material! I decided I would some of the yards of silk that friends brought me as a present from one of their recent shopping excursions in the fabric district in China and 3 more fabrics that I purchased locally. Btw, yes, friends (also, former neighbors of ours) travelled all the way to China and along the way they visited a region known for their textile production. They shipped back YARDS of beautiful silks. I’m planning to hang the new curtains using by clipping the fabric onto rings. Easy. Breezy. Mix of prints. Mix of colors. Etc.
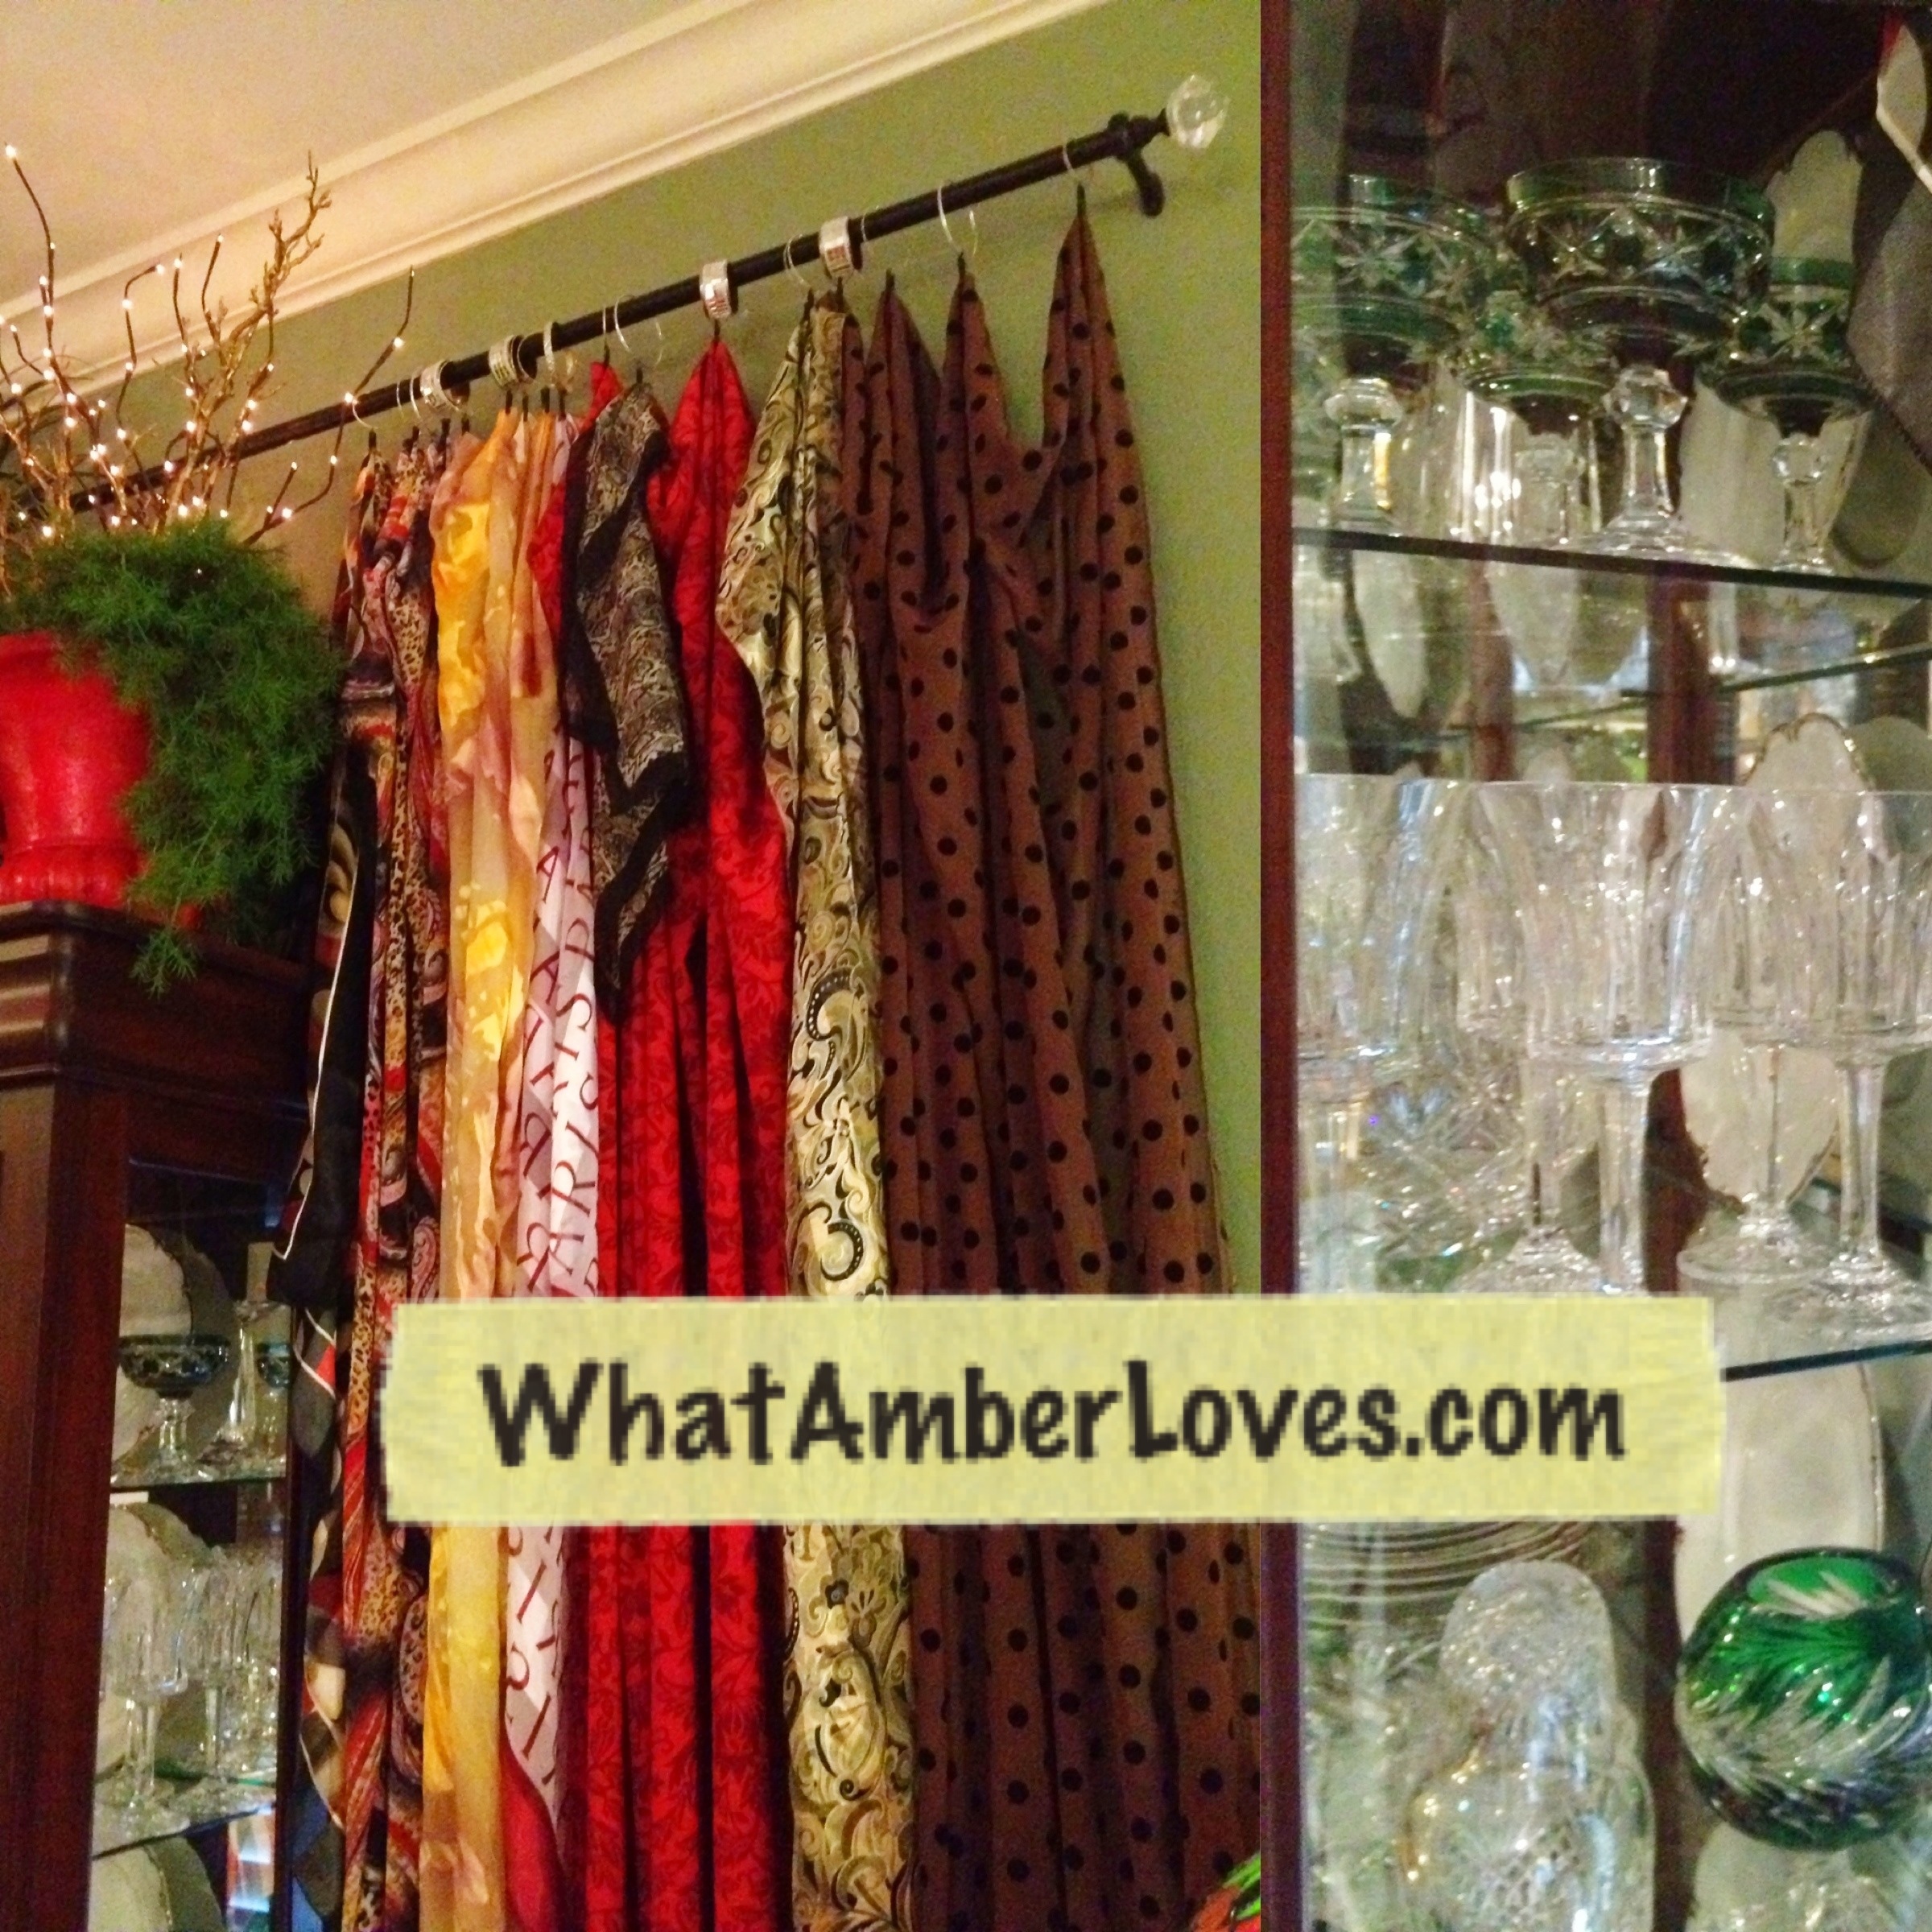
Here, in the next photo, you can see my new fabrics just tossed across the curtain rod awaiting sewing and proper installation. You can also see a bit of other items in the dining room:
(click on photo to enlarge it)

Today, among other errands, I shopped for the curtain rings with clips attached, in order to hang my scarves and fabric in the dining room that I told you about yesterday.
There were several options available. What to do? What to do? DIY, of course! I bought a bag of miniature wooden clothespins from the craft department at WalMart and bundles of costume jewelry from a jewelry store on Chenal Parkway, here in Little Rock. I made a total of 50 rings with clips by using a little spray paint, heavy duty upholstery thread, and a few unused napkin rings and bracelets that I had sitting around.
My rings with clips are an assortment of sizes, all in silver and gold tones! I LOVE the look much, much more than if they were all standard, uniform rings. See the DIY process: (click photo to enlarge)

1. Buy miniature clothespins and mass produced jewelry.
2. Snip hardware, just leaving the giant hoops of the earrings. (I used earrings that gave me a total of 8 usable hoops per pair.)
3. Clip clothespins onto cardboard and spray paint them black.
4. Use heavy thread or wire to tie clips onto the ring (the thread fit through the spring in the clothespins, so drilling wasn’t necessary! Yea!)
5. Slide them onto the curtain rod and use the clips to pinch the scarves and fabric! Enjoy!
(I was able to use this DIY method for creating curtain clips that saved us A LOT of money in exchange for minimal time invested by me to put it all together.)
I’m pretty pleased with myself about this little curtain project of mine!
Yards and yards of fabric, lots and lots of my silk scarves, and a little DIY = my OWN curtain wall. Nobody will walk in and say, “Oh, so and so bought those same curtains,” or any such thing. That’s enough to keep me happy. My scarves are all still usable if I change to something else next year, and all of the scarves have some sort of memory attached to them, since they were ALL accumulated and worn throughout the years. For example, the scarf that has “Paris” all over it, was purchased by my grandmother in Paris as a gift for me when she travelled a few years ago. Are my curtains Hippie curtains? Gypsy style? I don’t know. I don’t care that they’re not traditional window treatments. I’m enjoying them! I care most that I think they look good, are functional for diffusing light where needed, and they’re reusable/repurposable on a whim! Love. 🙂 I’m still playing around with the placement/draping of the scarves and fabric; I’ll have it finalized before I “reveal” this room in its entirety in a separate post!
(click on photo to enlarge)
Later!
Your Friend,
~Amber Hamilton Henson
PS
Enjoy my projects or links? Please, pin it, tweet it, like it, whatever… just be social and feel free to share as long it links back to here and my watermarks are visible on the photos! Also, if you do feature this curtain project in some way on your blog/site/’zine, please let me know!
This post will link to several Daily DIY parties, you can visit the links:
Unique Window Treatments Category @ FunkyJunkInteriors
Sunday’s Best #50 @ My1929Charmer
Masterpiece Monday #92 @ BoogieBoardCottage
Mod Mix Monday #70 @ Mod Vintage Style
Mop It Up Mondays #36 @ iShouldBeMoppingTheFloor
Be Inspired #39 @ ElizabethAndCo
Primp Your Stuff #65 @ PrimpJunktion
Wow Us Wednesday #86 @ SavvySouthernStyle
Wicked Awesome Wednesday #81 @ HandyManCraftyWoman
This post is featured in Hat Trick magazine! Click on the magazine cover to be re-directed to Hat Trick magazine:


Library/Home Office Tour
When you walk through our front door, standing in the foyer, look to your left. Our home library is the room you see. You can see other rooms by visiting my “decor” page and selecting a room to tour. This blog is a work in progress, one room per post.
(click on photo to enlarge it)

We painted the room green, built the bookshelves, sewed the curtains, covered all the chairs.
The bookshelves cover an entire wall, however, despite recently donating most of my novels, we still have WAY TOO MANY books to fit onto the bookshelves. Right now, we have a couple stacks of books that are four feet tall beside the shelves, all of my cookbooks are kept in the kitchen, etc. We have plans to build a couple more sets of shelves soon. Really soon.
What’s on the bookshelves? Well, my rolls of sign vinyl are on the bottom, then a row of kid books, then reference books, gardening books, decorating, DIY, college textbooks, Mitch’s childhood encyclopedia set, and books that have passed to me by family. Sounds like a lot of books? Nope. Not nearly as many as some of my family members.
Just like in the rest of the house, I keep real plants anywhere I can reach them, and i only use artificial plants for areas I can only reach with a ladder. (10 foot ceilings, here)
Here’s the top of the bookshelves: (click to enlarge)

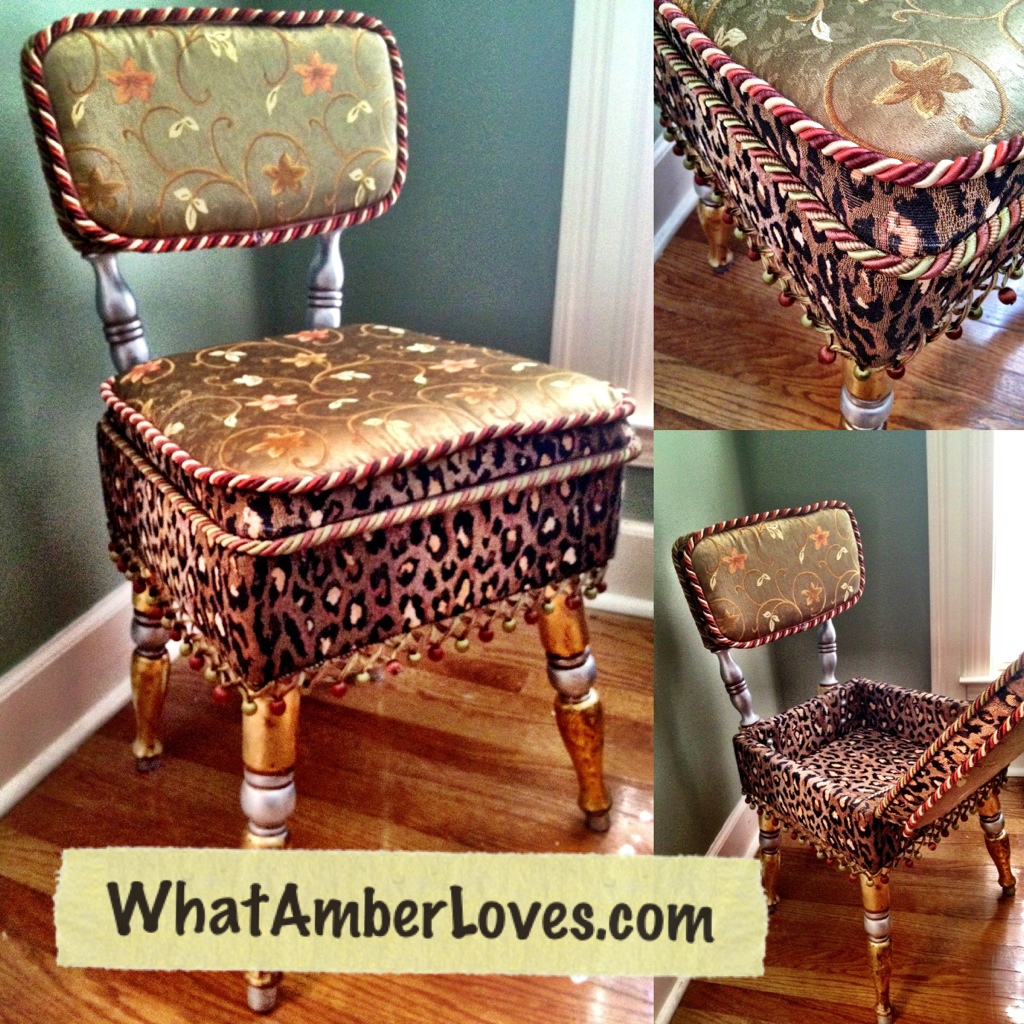
Here are a couple views around the room: showing the bookshelf wall; big birdcage hanging in front of the windows; elephant and bird collection that sits on top of the armoire that holds my Summa sign cutter; our wacky old sewing chair with built-in storage that we found at a thrift market and re-upholstered: (click to enlarge)

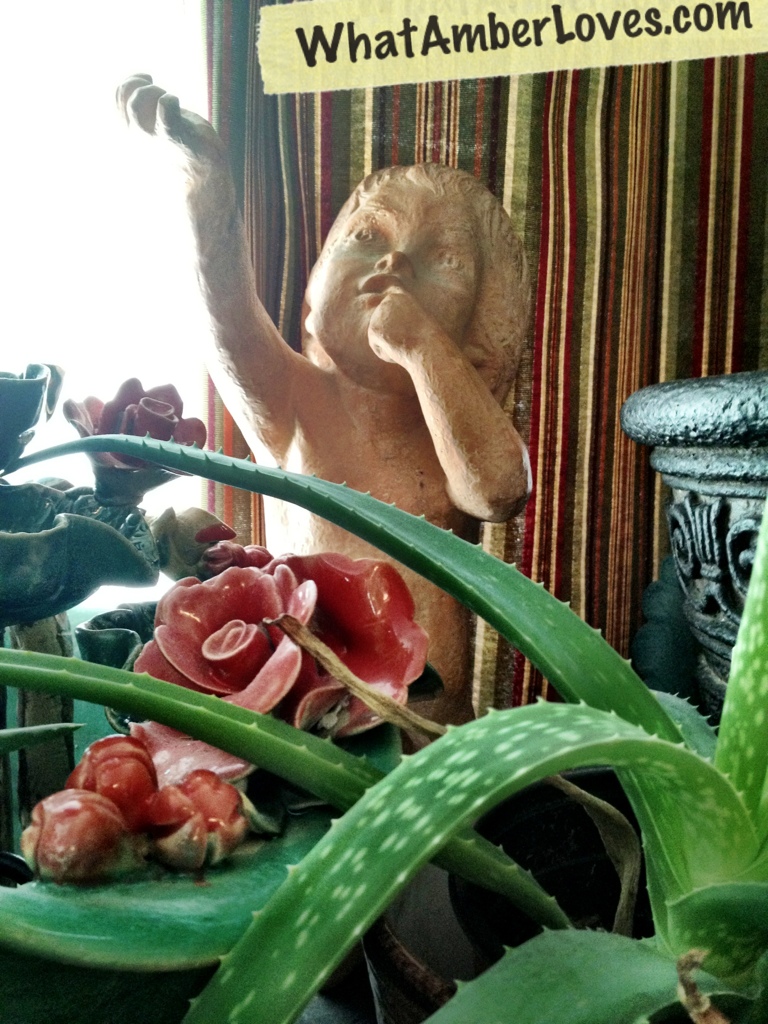
Here are a few more views around the room: the industrial file cabinets that I’ve labeled for myself and our girls to keep their schoolwork through the years and vital records (the other four drawers on the 2nd file cabinet are on my “to do” list); the 1930s “satellite” chair that we re-upholstered; aloe vera and houseplants; fountain; decorative pieces: (click to enlarge)

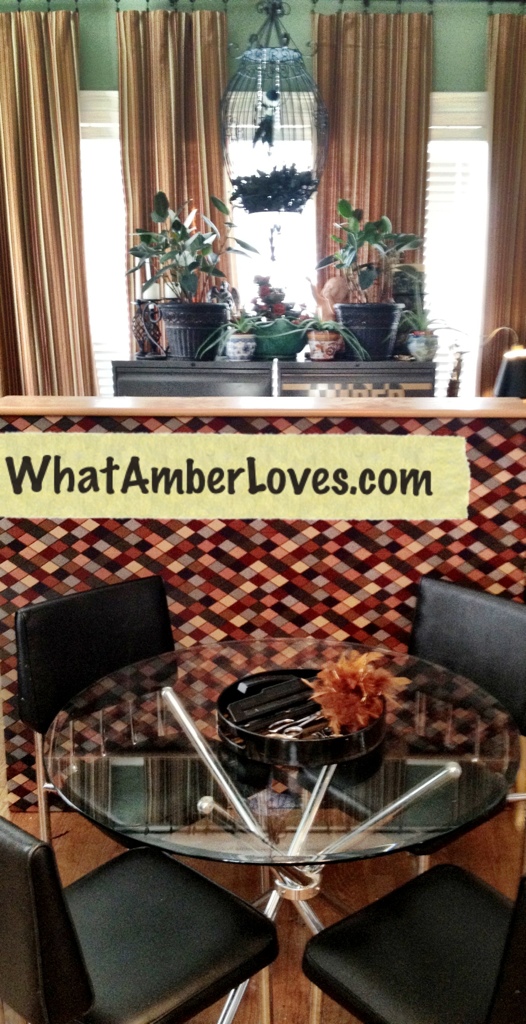
Here are a few more views around the room: the diamond fabric covered screen/shroud hides my old metal steel tanker desk, so that you’re not looking at the backside of the computer/printer/hub/etc; our chrome glass-topped “Sputnik” table for our daughters’ afternoon homework with our chrome chairs from the 70s, topped by a tray that holds a few essentials for homework; a close-up of the fabric of our floor-to-ceiling curtains that I sewed: (click to enlarge)

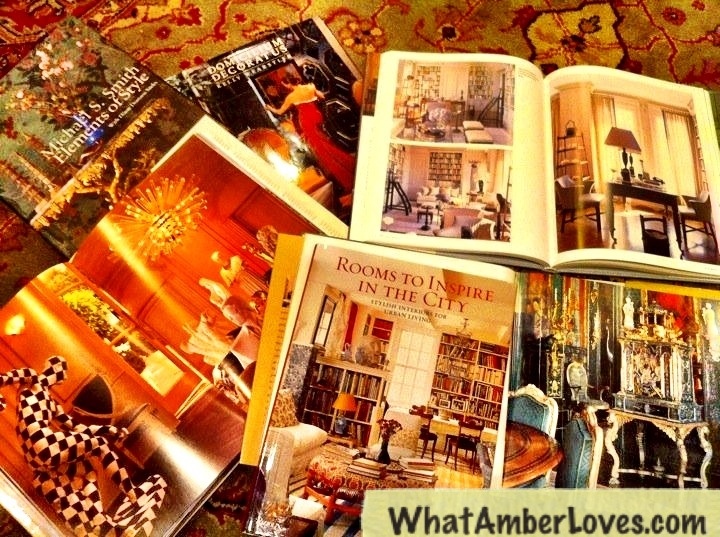
Like I said, I got rid of most of my novels and just read on my iPad via iBooks or NOOKapp, now. However, when it comes to “look books,” I doubt technology will ever be able to replace how I feel about being able to sit down, open up, and spread out several books at once the way I do. It’s kind of my quiet time to regenerate creative energies. Surprisingly, blogging and visiting so many blogs lately seems to be having this same effect, sparking my creativity…
(click to enlarge)
That concludes our tour of this room! You’ll notice i didnt show you my desktop. Well, its piled high with papers, magazines, the girls’ stuff from school, and MORE at the moment. If I clear it off anytime soon, I’m sure I’ll probably be proud enough to write a post about it! Lol. Second, I may re-edit this post at a later day just to add a few “behind the scenes” photos to the end of this post that show the “before” shots of the chairs and the “during” bookshelf building.
Enjoy my projects or links? Please, pin it, tweet it, like it, whatever… just be social and feel free to share as long it links back to here! Also, if you do feature this room in some way on your blog/site/’zine, please let me know, and I’ll add your link into this post!
Later! (more photos at the bottom of this post!)
See you in blogland!
Your Friend,
~Amber Hamilton Henson
PS This room of ours is looking forward to the party circuit!! The daily links:
Catch as Catch Can #90 @ My Repurposed Life
Link Party and Mes Preferes #73 @ ReDoux Interiors
PotPourri Party #42 @ 2805
Inspiration Friday #83 @ AtThePicketFence
What’s Cluckin’ #21 @ ChickenScratchNY
Wow Us Wednesday #86 @ SavvySouthernStyle
The individual / detail photos in no particular order:


Master Bedroom Tour
Welcome to our Our Master Bedroom Suite!
(At any point, you can click on a photo, and an enlarged copy will open in a new window/tab!)

Pinning Welcome!
On this site, bits and pieces of different rooms are visible in my project posts and recipe posts, but this is my VERY FIRST “finished” whole room reveal in Blogland! YAY!
We’ve had a hand in creating A LOT of what is in the room you are about to see.
Specifically:
*We put in new hardwood Sapele floors.
*We painted the walls using Home Depot’s flat Behr “Smokey Topaz.”
*We built and upholstered the headboard.
*We built and upholstered the valance.
*We painted the antique dress form and covered her in leather.
*We painted and applied vinyl graphics to a vanity.
*We painted and upholstered the stool for the vanity.
*We reupholstered the antique Italian settee.
*We decoupaged an antique door and hung it above the bed.
*We created the “floral” arrangements and potted the plants.
*We accessorized using pieces passed down through the family, gifts, and a few unique finds from specialty boutiques.
I’m sure I’m forgetting things in the list, but you get the gist of it, right? This isn’t a catalog room by any stretch of the imagination. It is ours, just ours, and we worked for it. Several of these projects happened just prior to beginning of this blog, since I just started two months ago, but a few have happened recently. For example, you can read more about the door in my “Crazy Old Door” post, or read a tutorial about applying vinyl graphics to furniture in my “Vanity” post by clicking on those links.
Have you signed up to receive my updates or “liked” the Facebook page, yet?

In this first area that I’m showing in the next photos, you’re looking to the far end of the room. You see the door we decoupaged, headboard we built, the bed, a pair of contemporary chests, and the antique settee we re-upholstered:
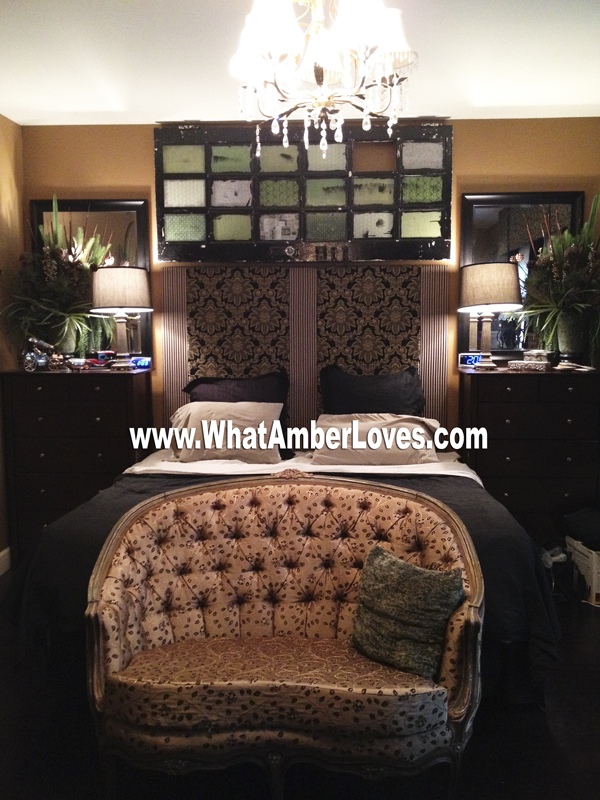


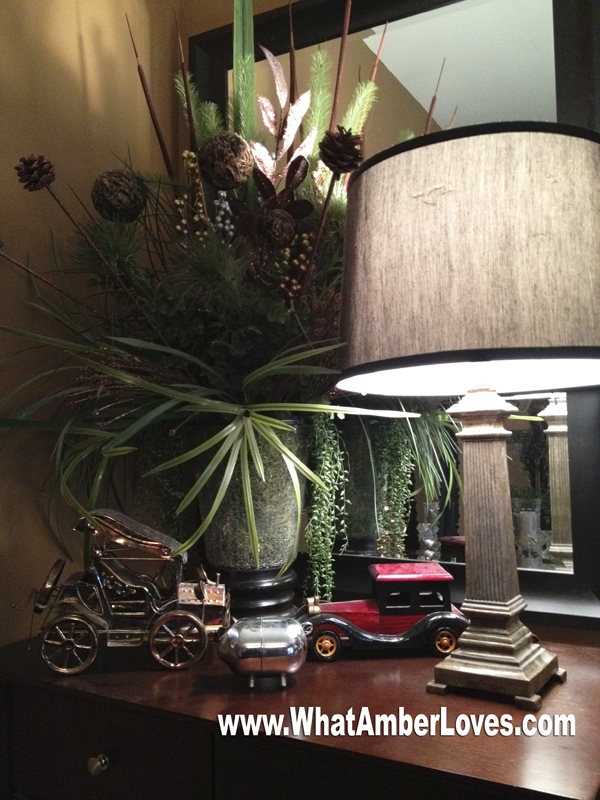
The next photo is the top of the chest on “his” side of the bed, topped by a floral arrangement, lamp, copper car musicbox, wooden car storage box, and a little piggy bank from his childhood:
The next photo shows the top of the chest on “her” (my) side: Similar to his, except that instead of cars, I have pieces of silver handed down to me from my grandmother and a silver plate trinket box given to me by a friend:

Next, also on my side, you see my re-vamped antique dress form that was in terrible condition when I purchased it. We painted it gloss black and covered the crumbling, tattered paper-ish form of the body in real black leather. She is fully functional, now, spinning, widening and compressing as needed. You can also see a red lacquered jewelry box from my mother in-law and one of my many vintage lucite purses from the ’50s:

Next, you’ll see my deco vanity vignette with stacked mirrors, wall shelves, with arrangements, crystal lamps and clocks, houseplants, & crystal candleholders on top of the vanity.


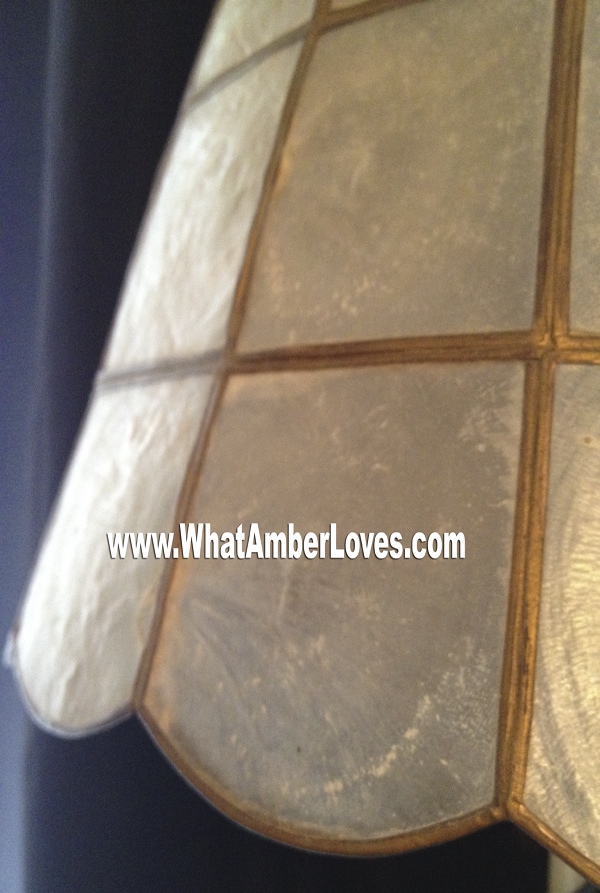
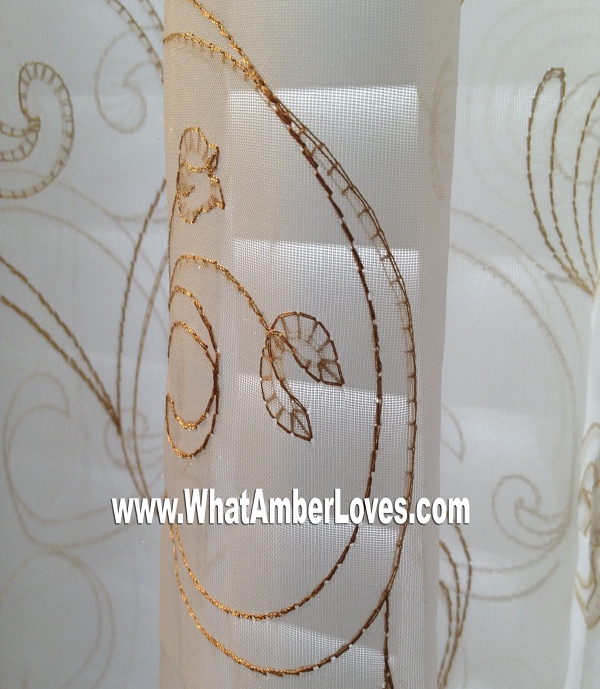
Next, you’re seeing the “window wall” area of our bedroom. Basically, it is a large pair of windows adorned by curtains, embroidered sheers, and custom valance that coordinates with the headboard. The window is flanked by a pair of HUGE 7 foot tall mirrors. Other items visible include a pair of multi-drawer jewelry chests that hold my collection of bracelets and necklaces that I make. A little shelf holding a capiz shell lamp, other little decor, and my tanning bed that I hardly ever use, because I have decided to embrace my paleness. Actually, from this point forward, I’m not going refer to myself as pale, but “porcelain,” instead. There.


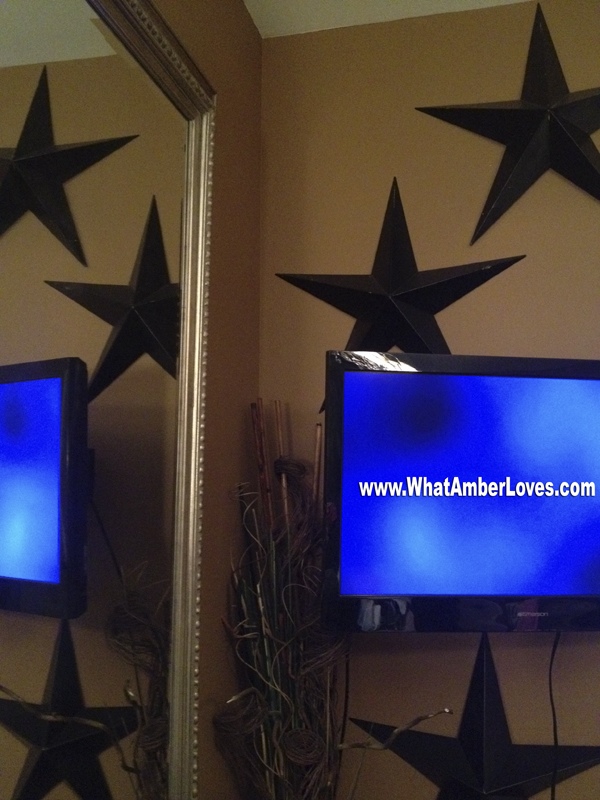
Now, in the next four photos, you’re looking at the “window wall” from the other direction, you see the tanning bed, tv, a few stars painted black, a mirror, and the rug. Do you see the rug? The rug is made entirely of scraps left over from neck-tie manufacturing. Each little piece of necktie is individually stuffed and sewn onto a backing. Neat, right? The international manufacturer’s import/export home office is here in Little Rock, and, once upon a time, they would open their warehouse one day per month to us locals and sell their overstock at wholesale prices! Perhaps, they still open once a month. I don’t know because it has been several months since I’ve been there. The pictures:


Well, that concludes my tour.

Thanks for taking the time to look around our room! I may be proud of the space, but I’m also quite flattered that you took the time to look! I’ll get around to photographing other rooms in our home at some point soon, as we complete several more projects that are midpoints!
Your Friend,
~Amber Hamilton Henson
PS
Enjoy my projects or links? Please, pin it, tweet it, like it, whatever… just be social and feel free to share as long it links back to here! Also, if you do feature this room in some way on your blog/site/’zine, please let me know, and I’ll add your link into this post!
This room will go on tour with other rooms at a few blog parties!
Daily Links:
Weekend WrapUp @ TatorTotsAndJello
Get Schooled Saturday @ TooMuchTime
DIY projects @ The36thAvenue
Saturday Nite @ FunkyJunkInteriors
Sunday’s Best @ My1929Charmer
Make The Scene Mondays @ AlderBerryHill
Masterpiece Monday @ BoogieBoardCottage
Mod Mix Monday @ ModVintageLife
Nifty Thrifty Tuesday @ CoastalCharm
Be Inspired @ ElizabethAndCo
Wow Us Wednesdays @ SavvySouthernStyle
All Star Block Party @ SimplyDoneWright
PotPourri Party #42 @ 2805
Inspiration Friday #83 @ AtThePicketFence
What’s Cluckin’ @ ChickenScratchNY
Autumn Joy Wreath! (+ DIY home happenings)
Good Morning!!


Labor Day has come and gone; it’s time for me to switch wreaths. This is one of my favorite wreaths. I purchased a fairly simple grapevine wreath with a little sign already attached that said “Autumn Joy”. It also had a few faux leaves attached. Then, every year for the last several years I’ve added little tidbits. The wreath has grown and grown! It now includes 5 little scarecrow dolls of various sizes, a garland of leaves, lucite grapes, and … 🙂

Each year, I use this wreath from Labor Day through Thanksgiving. This year, I may make a “scary” Halloween wreath to use for 2-3 weeks near Halloween, too. We’ll see whether or not I can find the time and supplies between now and then.
Here is a brief update about other recent events since my last post: Because we created a new Hot Pink Bedroom for our oldest daughter, our middle daughter was feeling like she was left behind in the “old room” that they used to share as opposed to having her “own room”, so we decided we needed to update that room for her to make it her own. She chose a dark, yet vibrant, purple paint. I’m still sewing for our oldest daughter’s room, but now I have A LOT more to do for our middle daughter’s room as well. Here’s a peek at the new purple bedroom progress:

During the last couple of months, we removed all of the carpet from the 4 bedrooms and closets that the previous owners had enjoyed. We’ve replaced the floor covering with my preference, hardwood floors. Now, other than bathrooms, ALL of the upstairs will be floored in a dark espresso finished hardwood!
Now, I’m heading away from this page to look around the blogosphere at other great Autumn project happenings! Later!
Your Friend,
~Amber Hamilton Henson
PS: (Be sure to check my “shares” page for upcoming blog parties and events!)
Oh, and I FINALLY made a Facebook page for my blog!! Hop over there and “like” it, please!!
Linking this post:
PARTIES:
Funky Fall Decorating @ FunkyJunkInteriors
MopItUpMondays, NiftyThriftyTuesday, WowUsWednesdays
Wreaths Feature @ Funky Junk Interiors
Home and Garden Thursdays @ Blissful Rhythm
Thursdays are Your Days @ 52Mantels
Transformation Thursdays @ TheShabbyCreekCottage
Time Travel Thursday @ TheBrambleberryCottage
Hookin’ Up With HOH @ House of Hepworths
Happy Hour Friday @ HappyHourProjects
Tour Our House!
Hello, Internet! Good Evening!! Welcome to our home!

(click on photo to enlarge)
I have written a couple of posts during the last couple of days, but I haven’t published them, yet. The reason? Well, they are posts about interior design projects that are happening, and I felt like my readers needed more context in which to visualize the spaces as they relate to one another. So, here it is! A labeled “floorplan” of our house!
If you read my post about our last house, the old house that became a historic house, then you already know that I truly believe in value of a good set of floorplans for helping everyone be able to visualize space and how spaces flow from one another! So, I will definitely publish a set for this house if/when we sell it, too!
The room by room tours of this house:
Dining Room – set for a “Mad Tea Party!”
Bonus Room – the room over the garage!
Library/Office – our library and homework area!
Master Bedroom – a full tour of this room!
Bedroom 4 – daughter’s “Hot Pink Bedroom!”
Other bits and pieces of interior decor can be accessed through my “Decor and Crafts” page!
Yay! 🙂
Your Friend,
~Amber


