Blog Archives

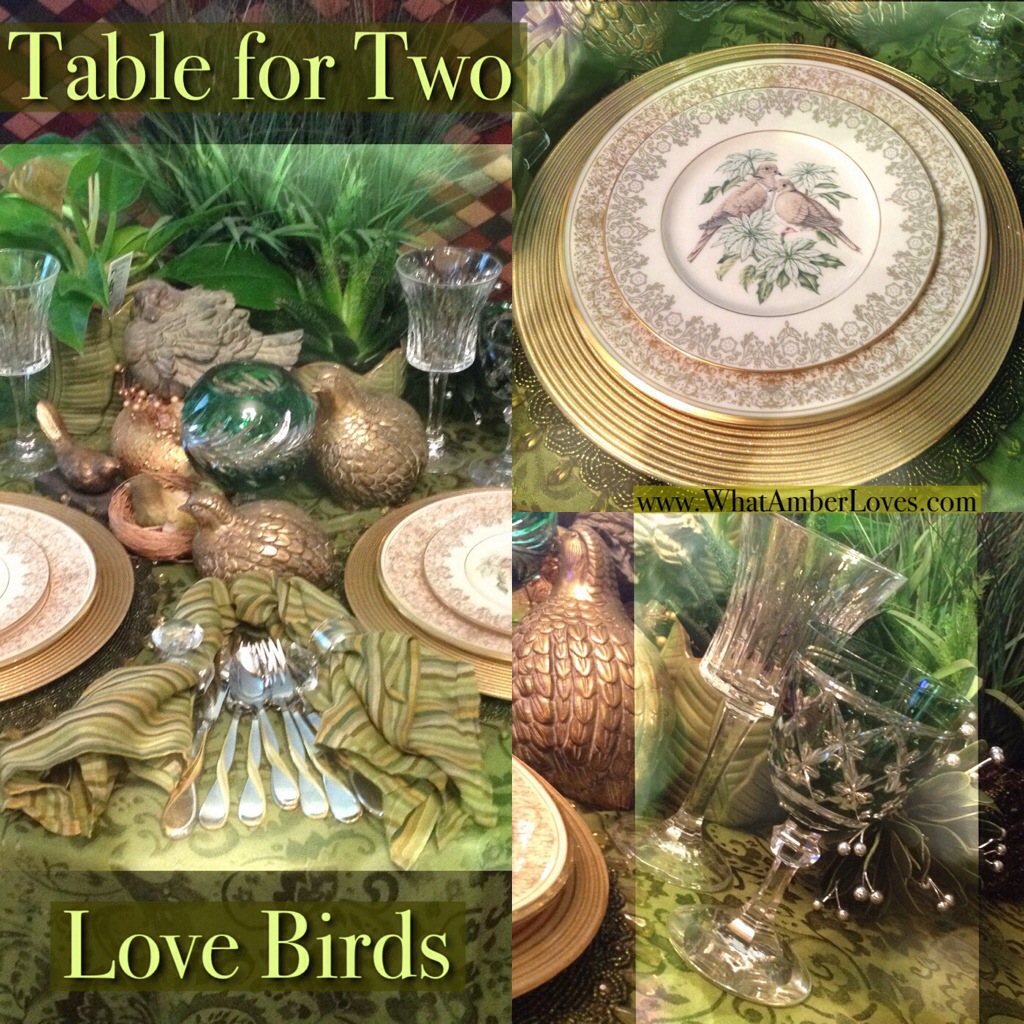
Table For Two! It’s my Birthday!

Happy Birthday to Me!
I’m 36, today!
My husband is making my favorite lamb dinner for me, tonight!
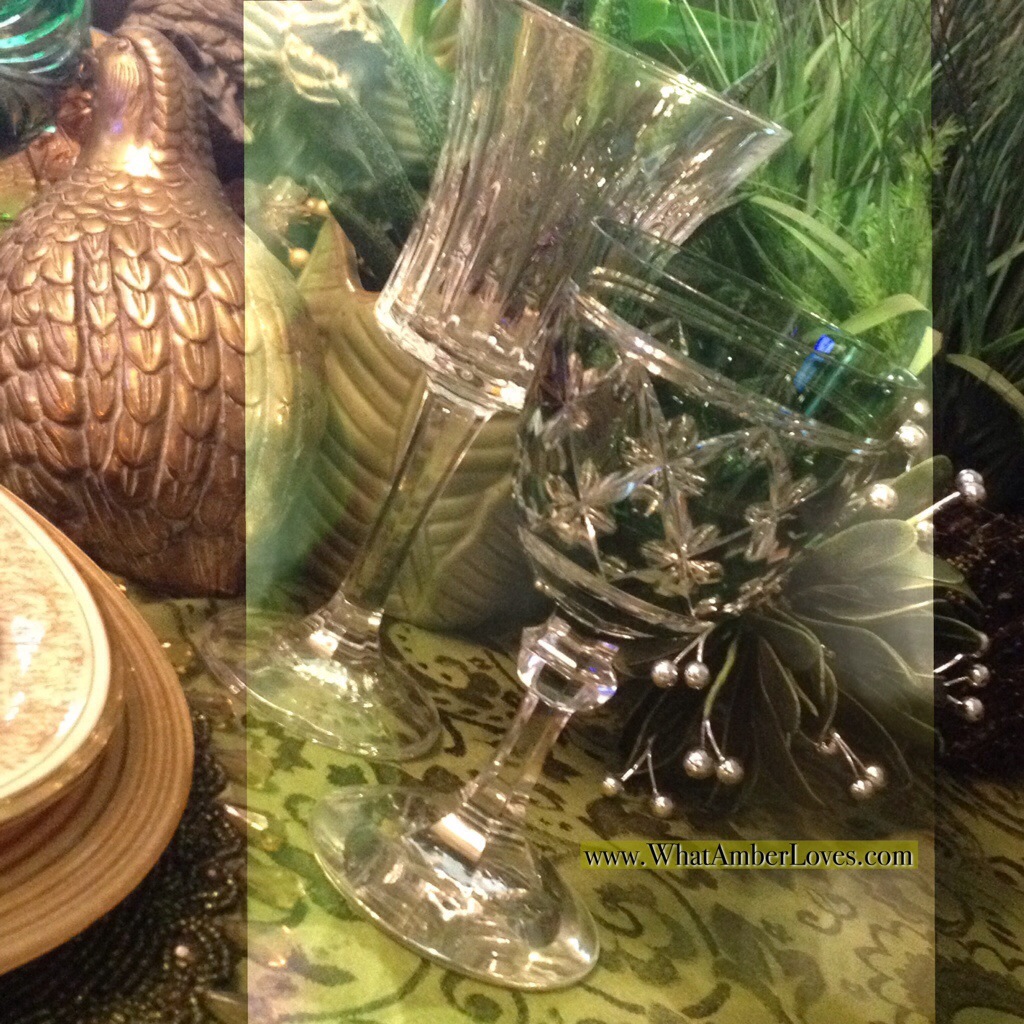
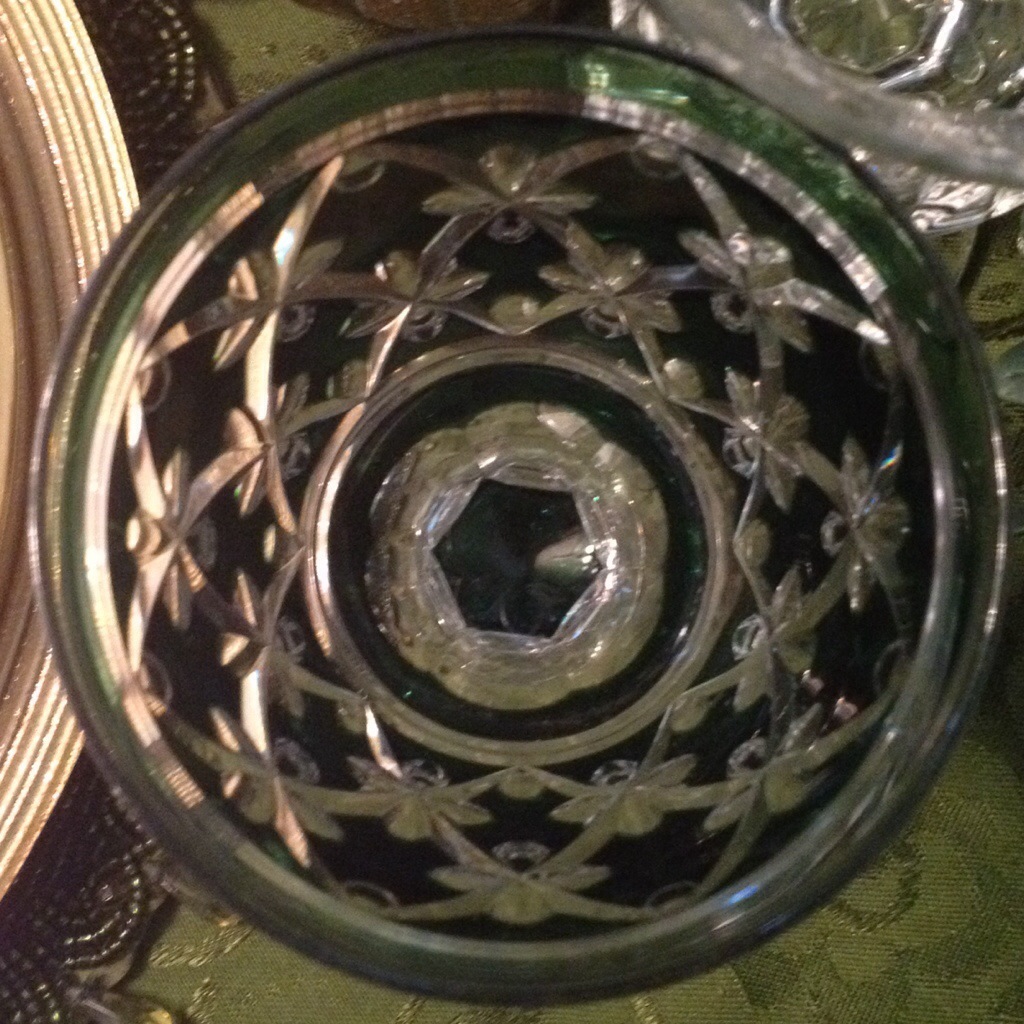
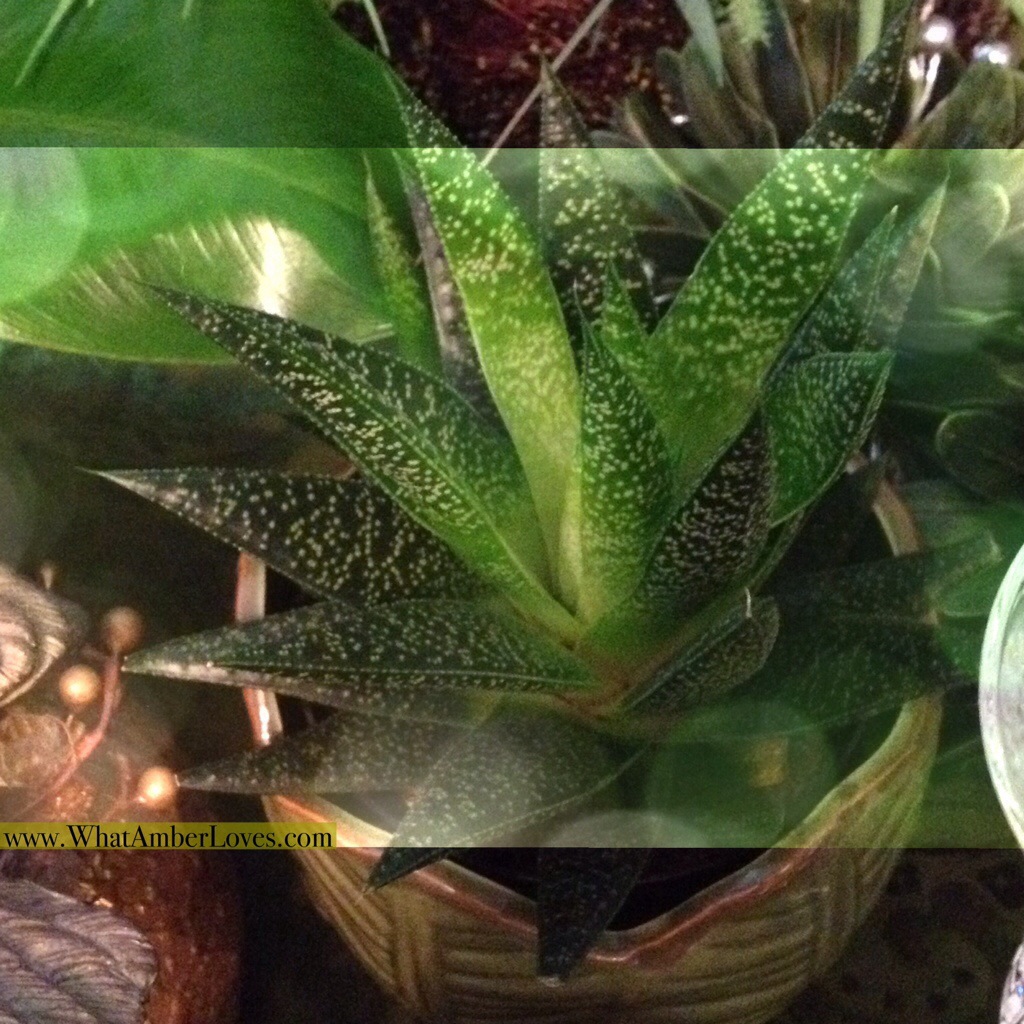
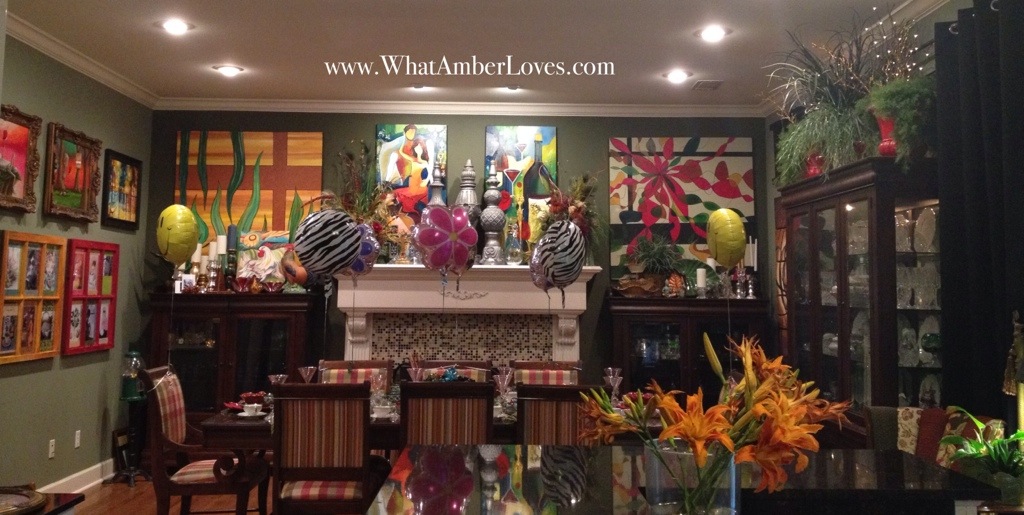
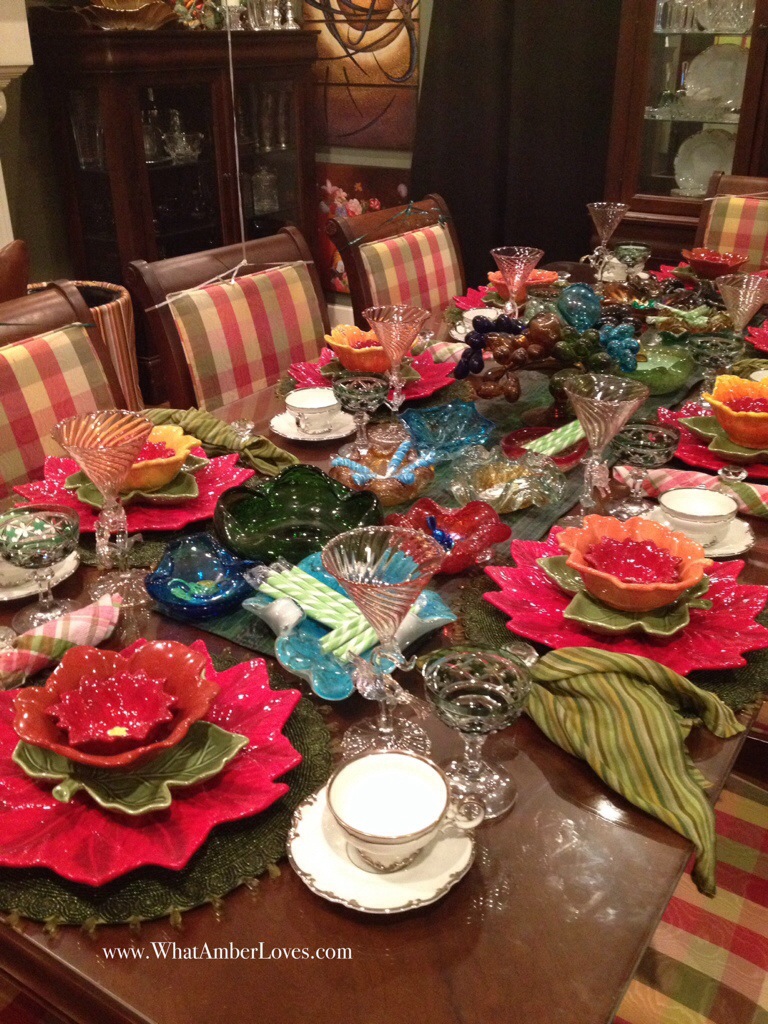
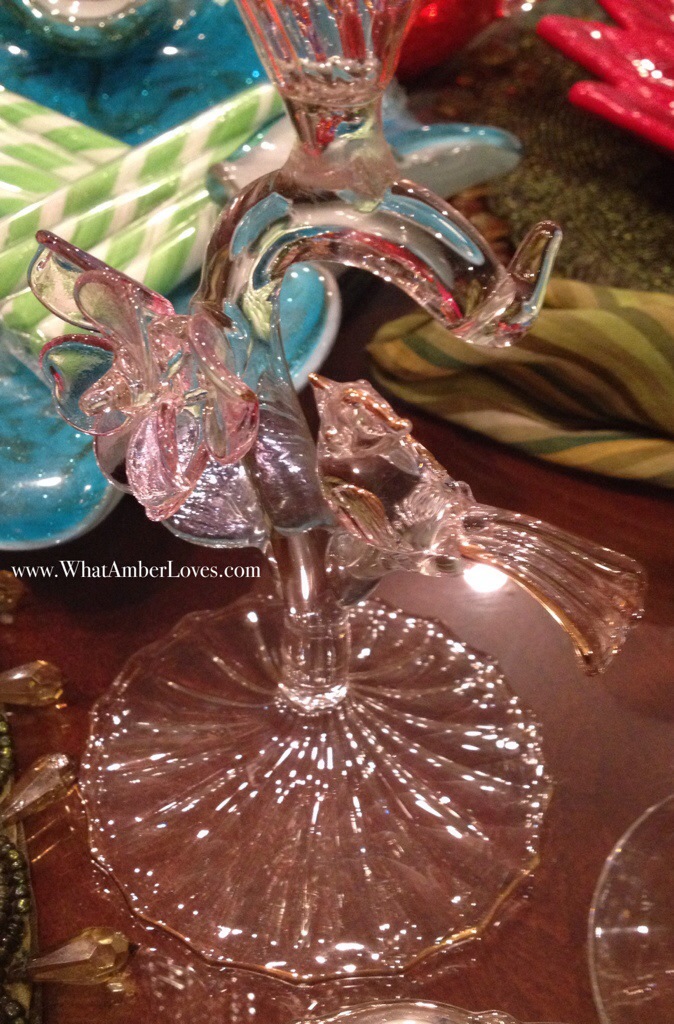
Knowing this, as a surprise for me, my middle daughter, Abigail, age 9, set a “fancy” table for two featuring “lovebirds” while my oldest, Caroline, 12, watched after my youngest, 3, so I could shower and dress uninterrupted by 3 year old Veronica.
I am in awe of the beautiful table and display she’s put together for me! So, I’ve snapped a few pics and editted on my iPhone pretty quickly to share with YOU!
She promises not to go into the china cabinets again without permission, but assures me she knows how special these things are to me and handled them all carefully, one at a time, because it’s my Birthday!
I LOVE my girls, so much!


More Later!
🙂
~Amber
>

Mad Tea Party 2014!
“There are three hundred and sixty-four days when you might get un-birthday presents, and only one day for a Mad Tea Party.”
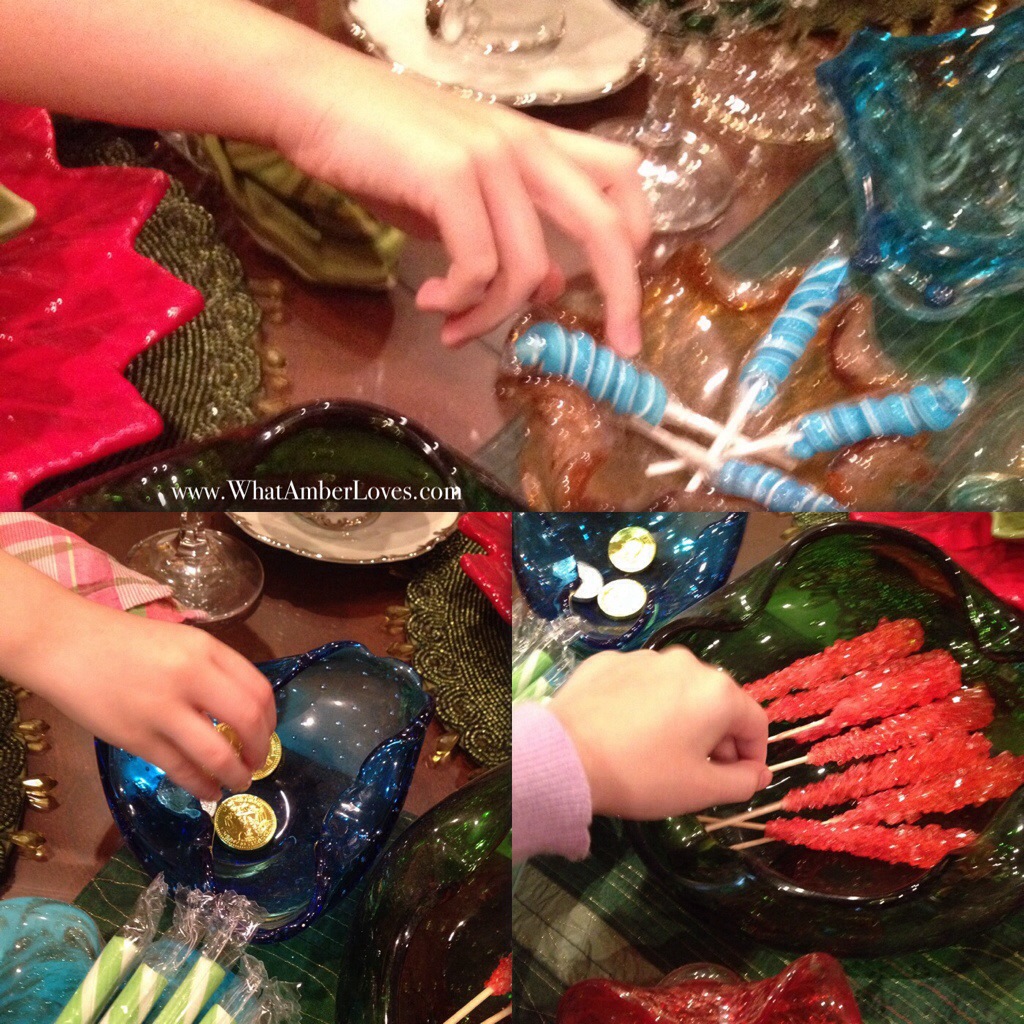
We’re serving lots of sweets, milk in martini glasses, juice in champagne saucers, and tea! There are plenty of seats left at the table, so please join us!
If you’re hosting a Mad Tea Party of your own, I’d love, love, love it if you left a link in my comments!
Click on photo to enlarge it.

Click on photo to enlarge it.
Click on photo to enlarge it.

Click on photo to enlarge it.
Click on photo to enlarge it.

Click on photo to enlarge it.

Click on photo to enlarge it.
Click on photo to enlarge it.

Click on photo to enlarge it.

Click on photo to enlarge it.

Click on photo to enlarge it.

Click on photo to enlarge it.
**********************
Prose:
A Mad Tea Party about me for my un-birthday?
Just follow the rabbit, he’ll show the way!
Once upon a time, in a mansion on a hill up high,
Where a lady, a man, & three girls love quiche and sweet pie,
They all tinkered and played for many, many days
At a glance, they lost and found time in so many ways!
See, within the new big mansion, there are so many rooms;
There are baubles, gadgets, treats, and perfumes.
And, Inside of it there are three more little houses
Since the structures are new, there aren’t any mouses!
Miss Caroline Daisy has a house that is pink;
She stores lots of treasures within it, I think.
The purple house belongs to Miss Abigail Rose;
It fits in her purple room, where she and friends doze.
The third house of gold, is owned by Veronica Lily;
We try to take her photo, but she’s silly, silly.
We make handmade yarn and jewel flower fairy dolls,
We repurpose windows and doors to hang on our walls.
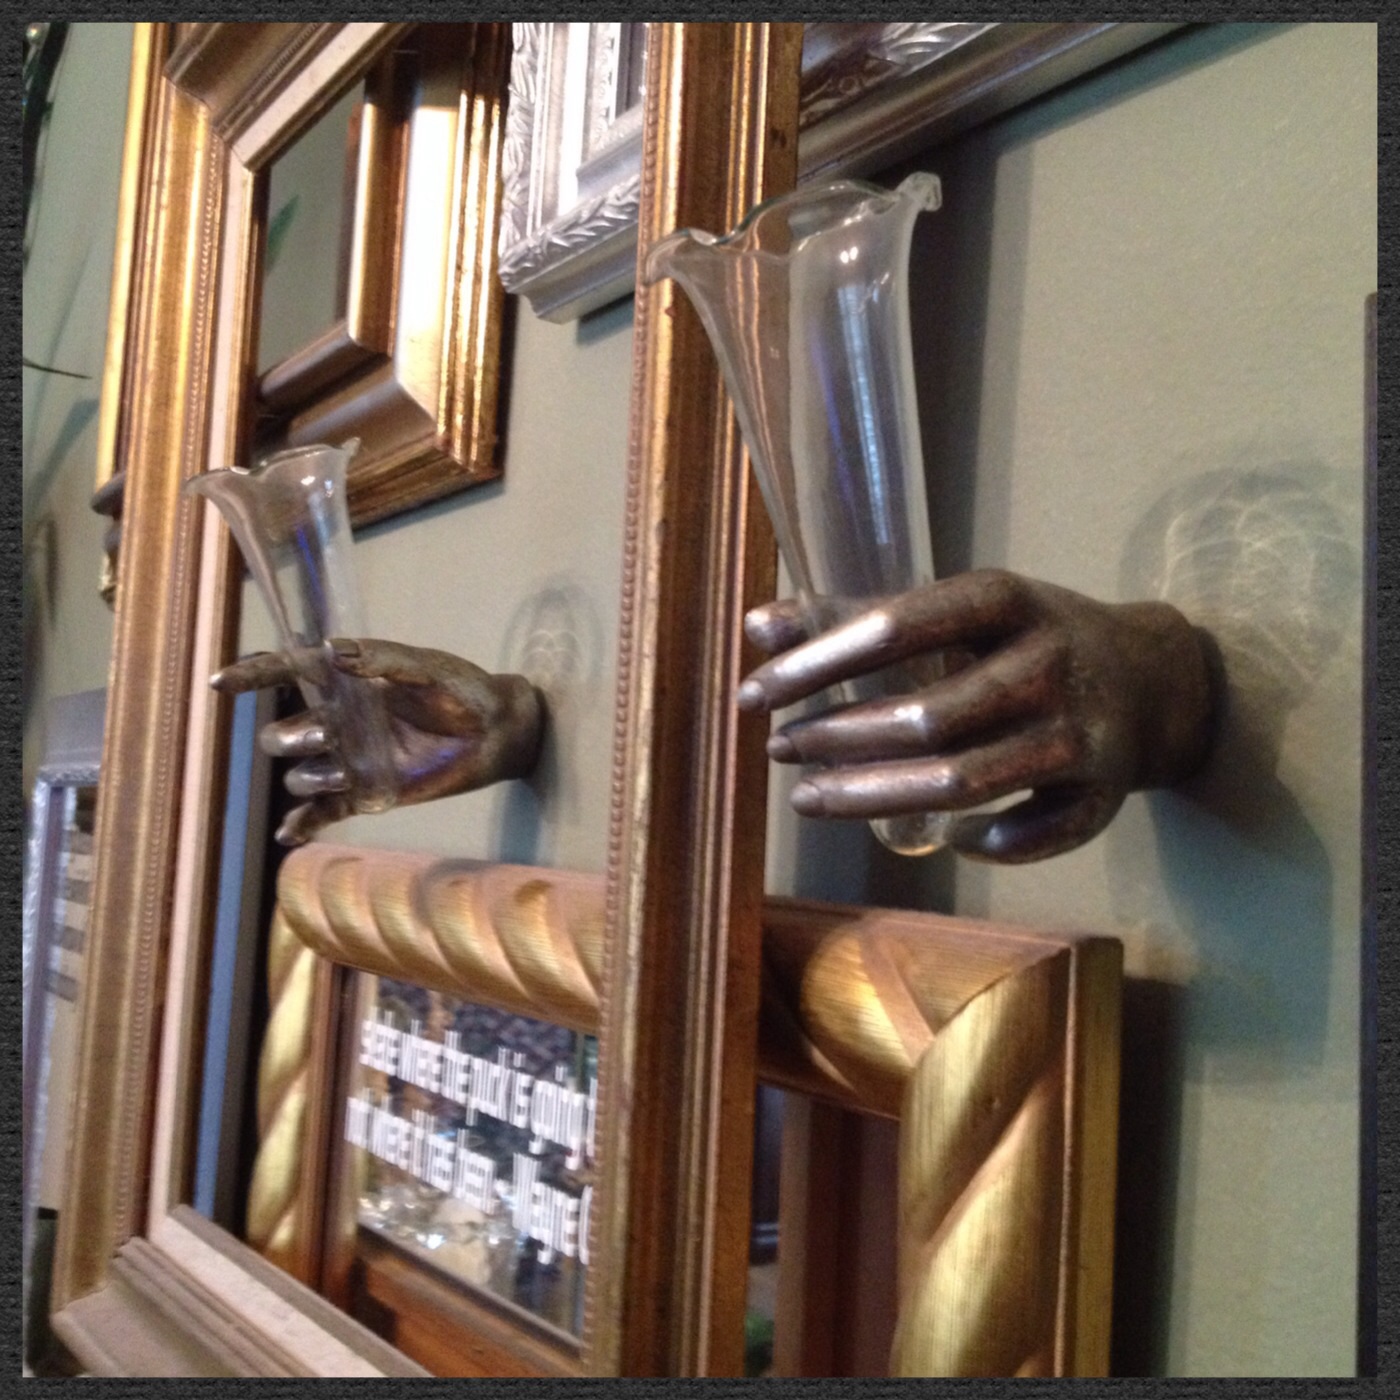
There are collaged mirrors and frames and gilding galore
with lots of belt chairs and globe lamps sure not to bore!
Each day when the clock says six, it’s time for our tea;
By then the lady has baked and prepared, busy as a bee!
She serves trifle, and cookies, and RUSSIAN tea cakes,
Since the three girls help her whenever she bakes.
Please come join us at our blog, we’ve plenty places for peacocks to sit,
Or gather with us for parades, if you won’t pitch a fit!
We can take tea in the garden, where vegetables grow,
Or inside in chairs, that my man did upholster and sew!
Big or small, indoors or out, we make gypsy style,
and craft lots of jewelry to surely bring a smile.
Lots of baubles and jewels, of the insect variety, too.
For, what good is a garden party without bugs to “boo!”?
If y’all click back through the poem, check out our blue links,
You’ll have toured our whole little blog website! “Wink-Winks!”
********************
What do you think of my poem? It rhymed! YAY!! Perhaps the poem will make more sense with photos? Try the links to see! (Some links in my poem are our fun projects, some are our recipes, and others are just bits about us and our family life. All are our photos and all are true!)
Your Friend,
~Amber Hamilton Henson
PS
The Mad Tea Party Hostess with the Mostest, Vanessa Valencia, has THE loveliest “Mad Tea Party” happening now, and links to other tea parties can be found in her sidebar and comments, too! A HUGE, “Thank You! Thank You!” to her for organizing this fun blogland event! Her amazing, fantastical, wonderful, whimsical, fanciful tea party:
http://afancifultwist.typepad.com/a_fanciful_twist/2014/07/mad-tea-party-2014.html
PPS


The Oval Window
This isn’t a sponsored post, it’s just a really positive quick review of a product we purchased!
See, we have this pretty oval window on the second story of our house that is about 24″ x 36″. It is centered just above the front door and adds quite a bit of architectural interest. The problem: I could not figure out how to dress it. If I were to add curtains, the oval would no longer be visible from the interior. That would be such a waste of a visually interesting element. However, it NEEDED to get dressed. “Why?” you ask. Well, it HAD to be addressed due to privacy concerns; it’s a bathroom window! The oval window is in a bathroom shared by our three daughters.
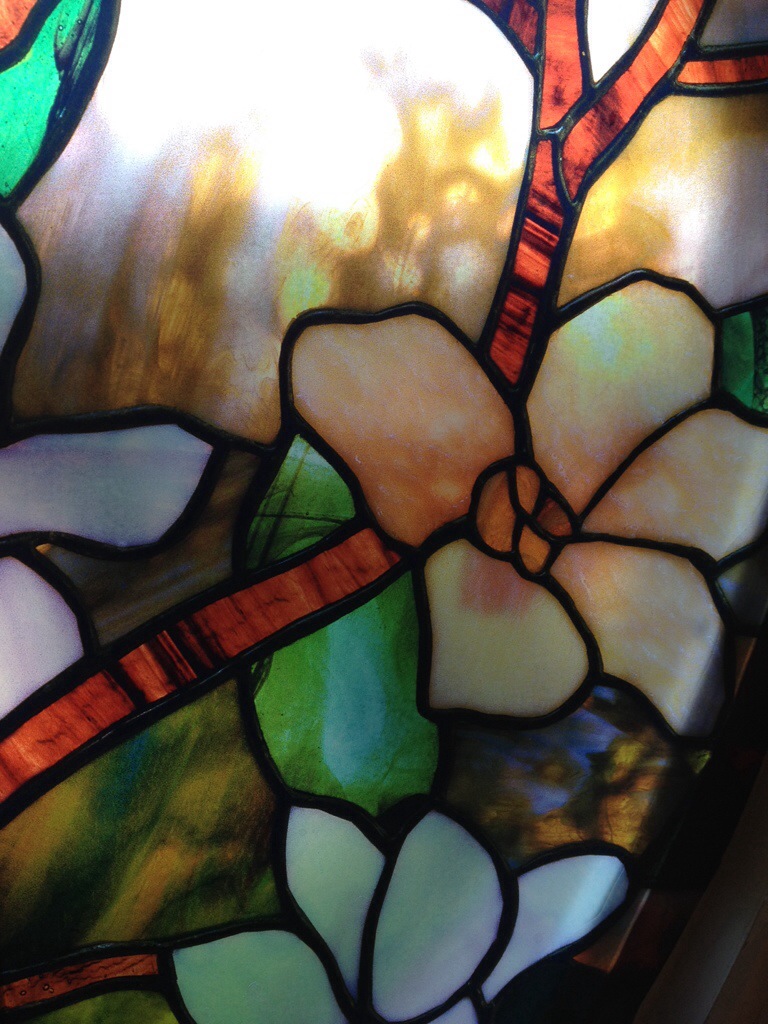
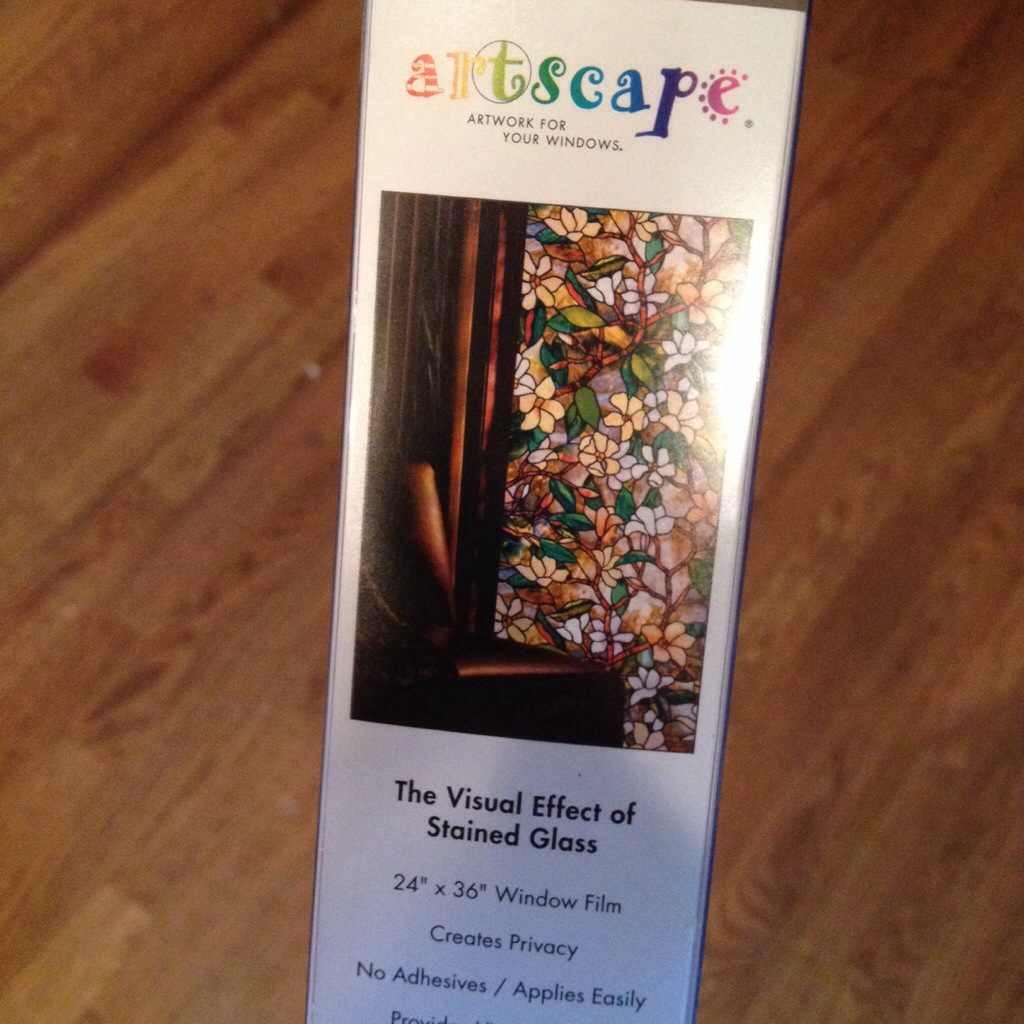
On a trip to Home Depot (a local home improvement store,) we noticed this product by ARTSCAPE. It’s a film that clings to the window without adhesive! It comes in a wide variety of prints that offer all levels of privacy from a subtle frost to elaborate stain glass designs. We opted for the “magnolia” stained glass option. It came with easy to follow instruction and installed easily in just a few minutes!
Now, our privacy concerns have been addressed, the architectural interest of the oval is still visible, and the film is really, really pretty. Our daughters LOVE it! Our middle daughter wants to know if we can buy more for ALL of the big windows in her bedroom! We’ll see. I have to research a little to find out if it comes in larger sizes, too! I’ll check their website, www.artscape-inc.com.
The pictures: (click on any photo to enlarge it.)


Your Friend,
~Amber Hamilton Henson
>
Ornament Window Valance

Click on photo to enlarge it.
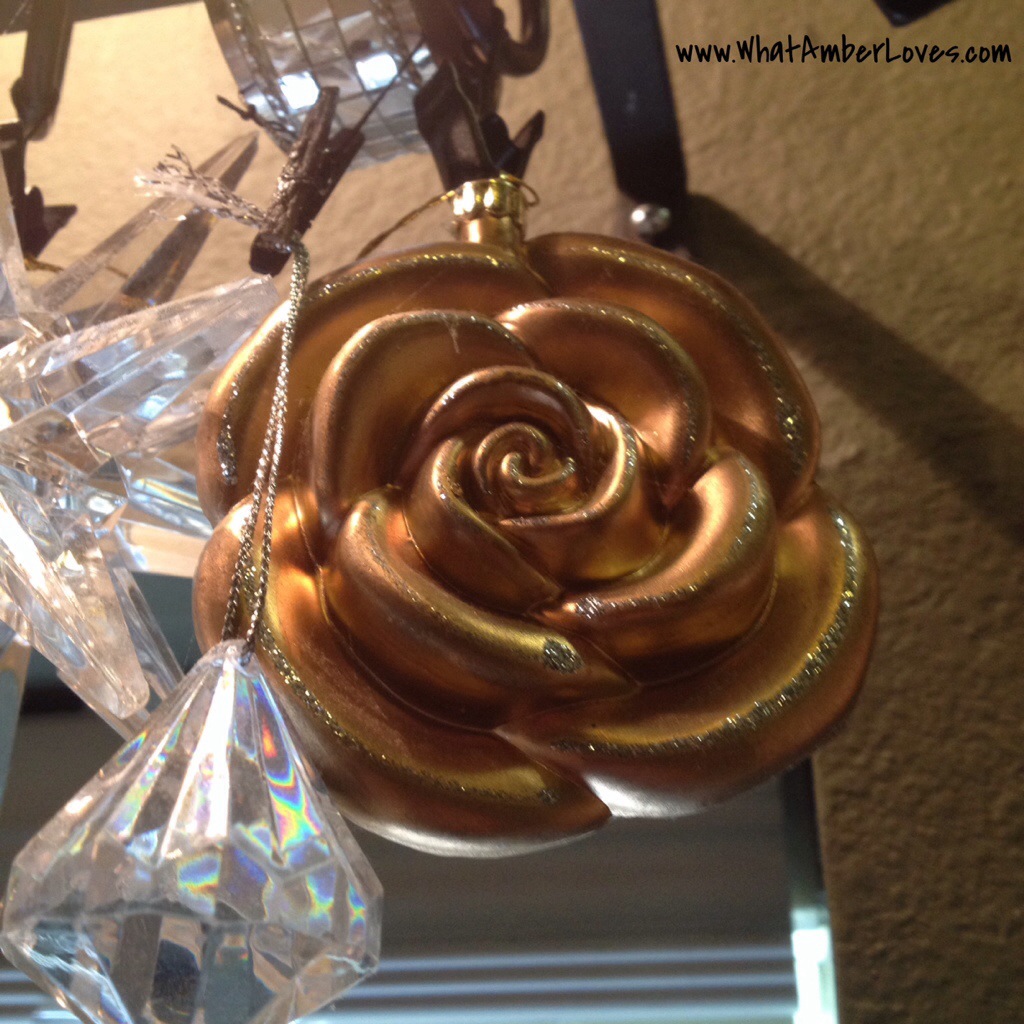
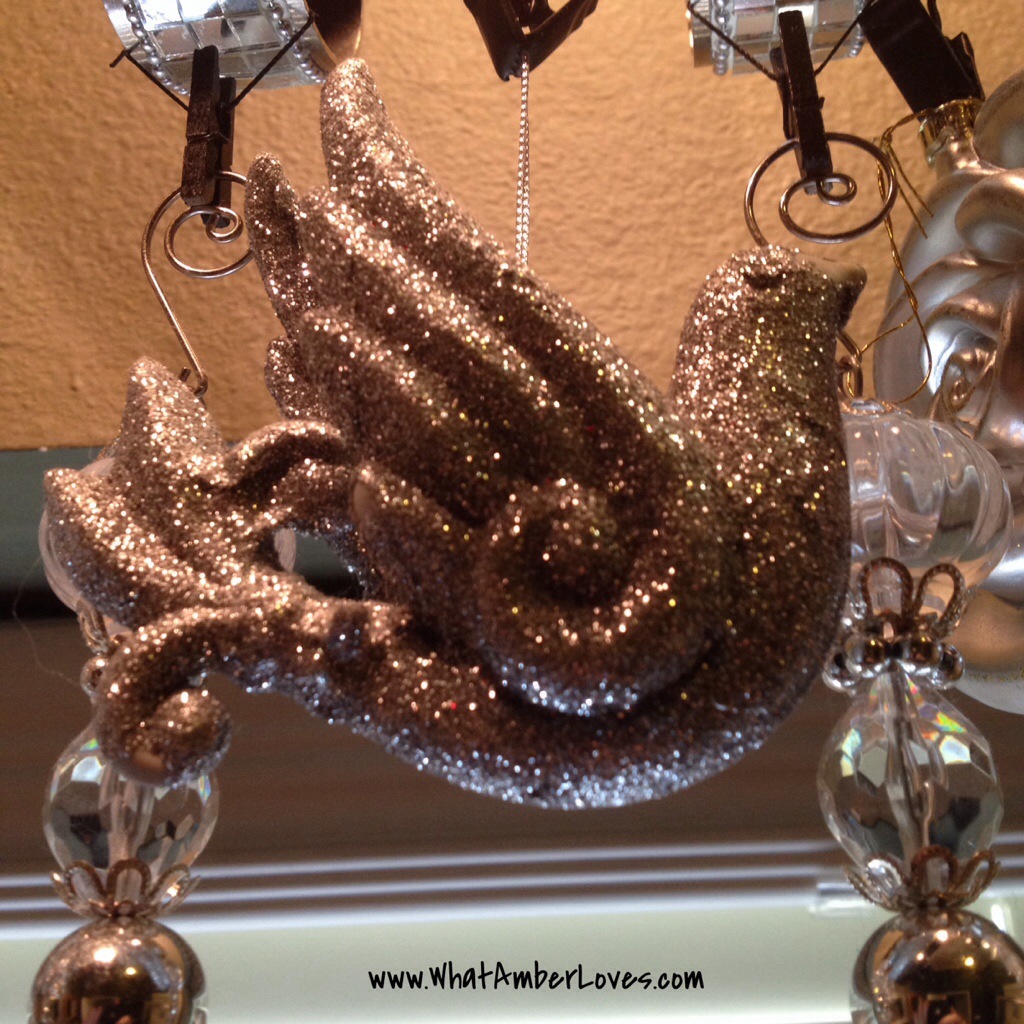
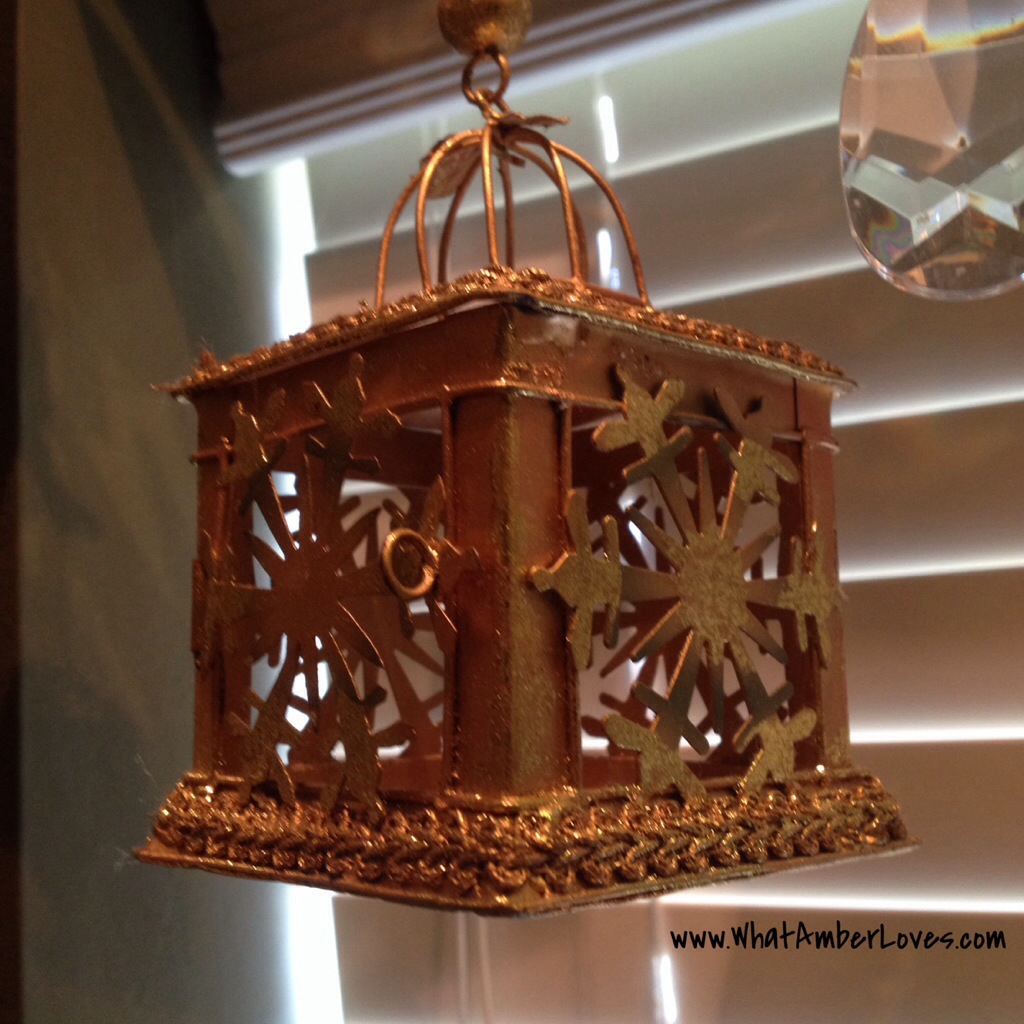
When a window needs to be dressed, it doesn’t have to be fabric, right? Right! . . .and, when you enjoy sparkly, metallic ornaments, you shouldn’t reserve them exclusively for Christmas trees for only a few weeks a year, true? True!

You and I are on the same page. We think hanging a bunch of sparkly ornaments on a curtain rod as a valance in a guest powder is a perfectly dandy form of window treatment! Yes, yes we do!
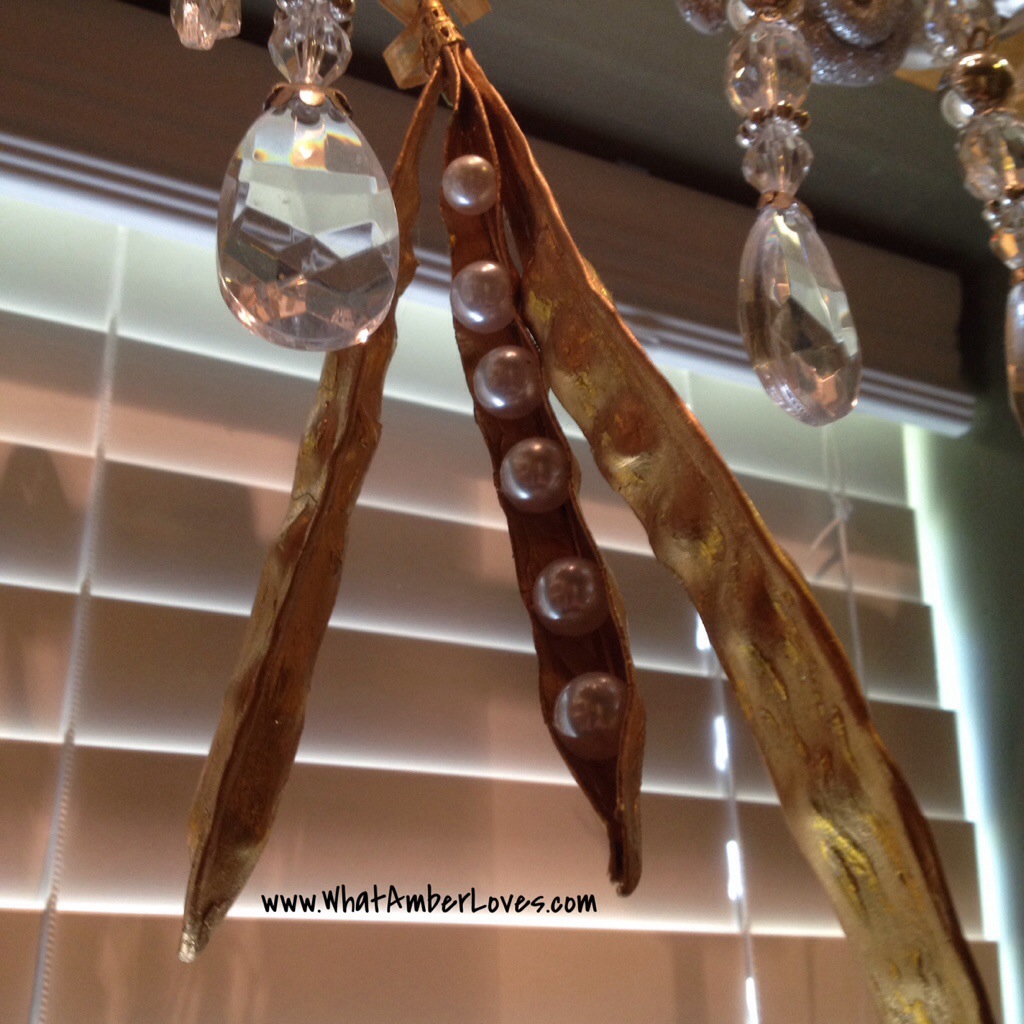
Which sort of ornaments did I choose for said valance? Well, the most fun and sparkliest ones, of course! Roses, glitter coated birds, bird cages, golden sweet pea pods with pearls of peas, crystal diamonds, and more!
I’ll refrain from showing you photos of my porcelain sink, manufactured marble shower, and toilet in this little powder room, because well, it’s just a bathroom. However, I WILL show you the gilded mirrors on the wall above a lovely pitcher and houseplants and part of my rock and crystal collection and…

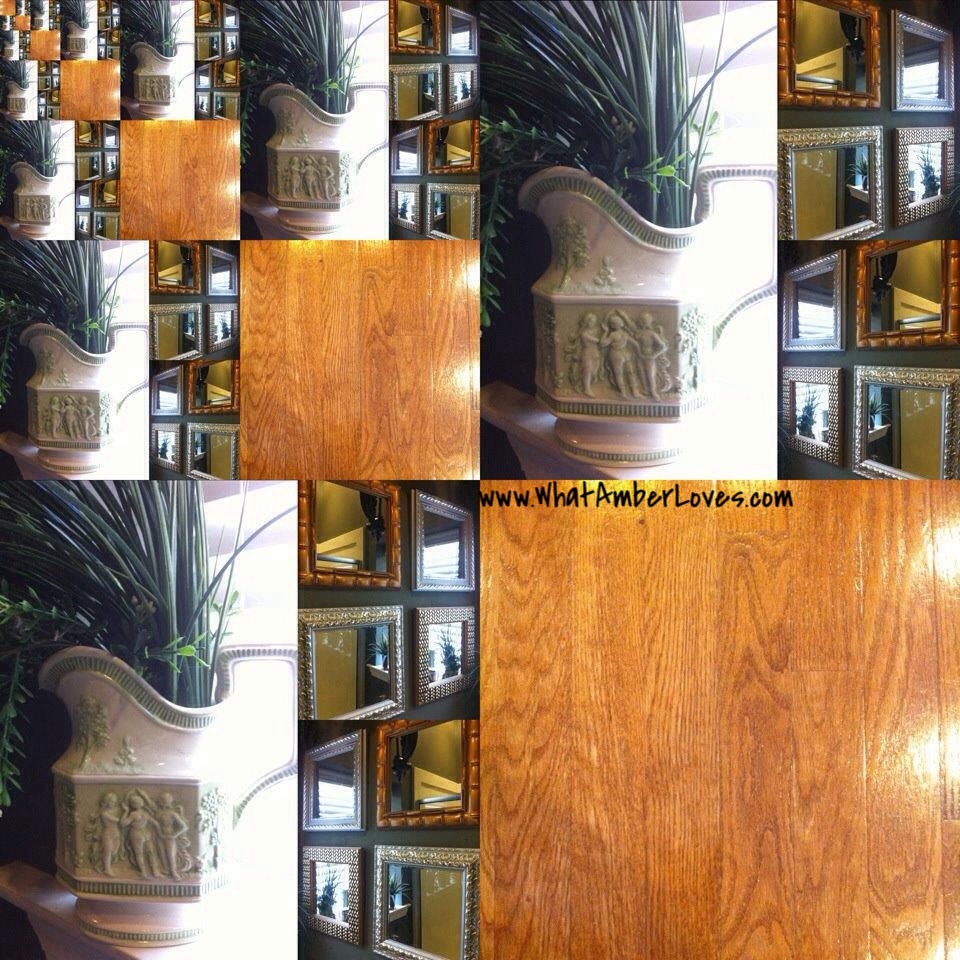
Speaking of houseplants, I just love them so much! I have to have at least one in every room, multiples in many rooms, and even artificial ones for high shelves where watering would be difficult.

Do you keep many houseplants? I worry that I may have a few too many at times, particularly when I find myself keeping them in large stainless pots in the kitchen that would otherwise be used to boil a chicken! Haha! With temps consistently over 90*F this time of year, who wants to heat up the kitchen by boiling a whole chicken anyway?! 🙂

Your Friend,
~Amber Hamilton Henson
Love Linking! Check out the parties:
http://shabbynest.blogspot.com/2014/06/frugal-friday_19.html
ArkansasWomenBloggers ~ Sunday Link Up
SavvySouthernStyle ~ Wow Us Wednesday
EverydayEnchanting ~ Inspiration Link Party
SweetBellaRoos ~ Pin it Thursday
MyRepurposedLife ~ Catch as Catch Can
FunkyJunkInteriors ~ PJ #246

Garden + PicBlender
Here we are in my Garden.
Along the path to the front door, you’re greeted not once, but twice by statuary before reaching the door.
Saint Francis of Assisi gazes into the distance across the Rosemary as you pass.

Click on photo to enlarge it.
As you continue past the wooly lambs ears growing under the white crape myrtle, a dry creek of stones between the green box woods and junipers leads the eyes toward my maiden with her water vessel awaiting visits from songbirds.

Click on photo to enlarge it.
Welcome!
Your Friend,
Amber Hamilton Henson
If you’re curious about the behind-the-scenes creation of the water maiden statuary photo, here is a quick peek at how my finished photo was constructed:

PPS
Love Linking to a few blog parties! Check ’em out:
Creative Country Mom ~ Home Sweet Garden Tuesdays
HowSweetTheSound ~ Pink Saturday

Under the Dome

Click on photo to enlarge it.
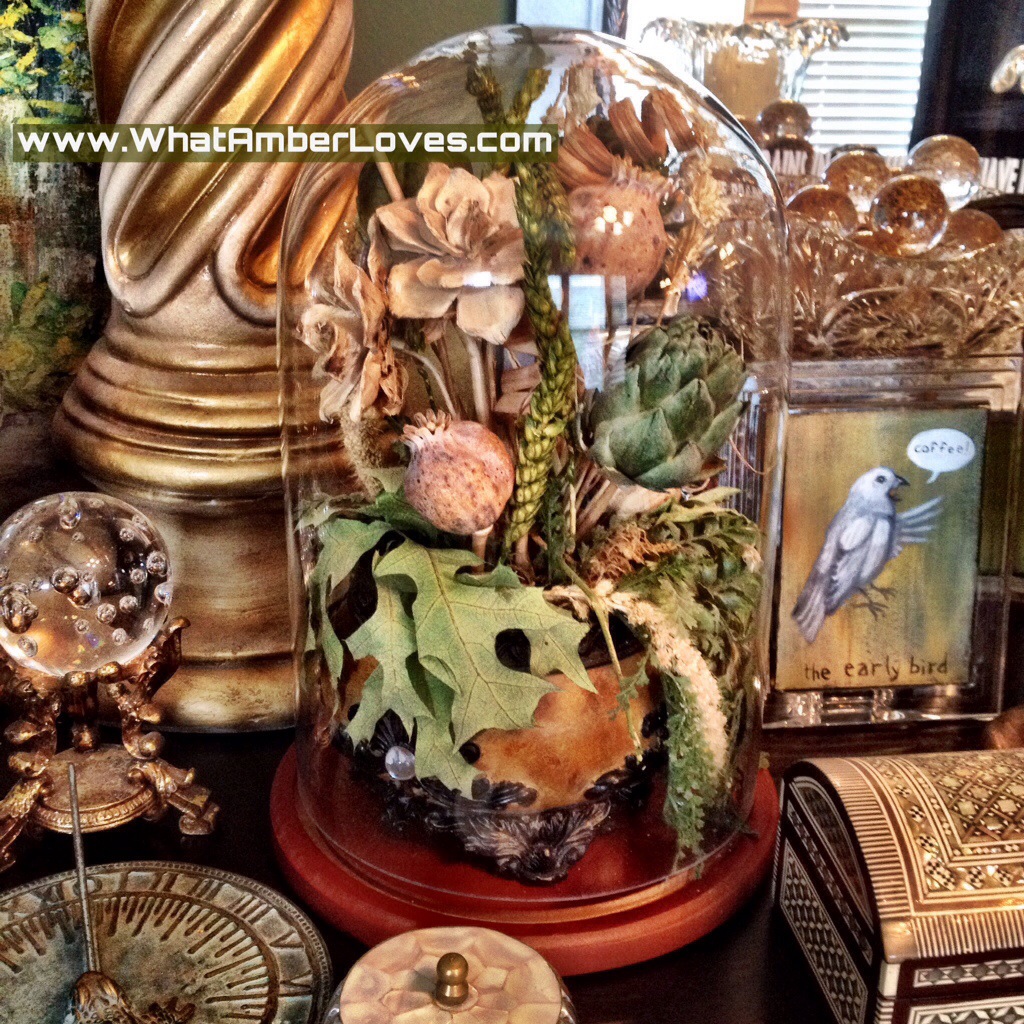
Oh, y’all… Oh, y’all! Guess what I did? For the first time ever, I’ve put an arrangement under a glass dome. I can already tell you that I’m so pleased; I envision buying many more to encapsulate my treasures and little dried floral arrangements. Why had I waited so long to embrace the glass dome, when it is obviously capable of instantly elevating any object or arrangement to rare specimen status? Glass dome, y’all. Glass dome. I’m late to the party when it comes to speckling glass domes throughout my decor, but I’m here, now!

Click on photo to enlarge it.

Click on photo to enlarge it.
Hanging on the wall near my new dome is one of my favorite paintings of a barn. It’s a favorite because it reminds me of my Gram, my paternal grandmother. No, she’s never had a barn or lived on a farm, but she loves barn art. For that reason, this painting reminds me of her and I love seeing it in my living room everyday.

Click on photo to enlarge it.
Click on photo to enlarge it.
I adore that my floral arrangement is still fully visible, yet there is this protective shield that has the added bonus of being able to reflect the light in a pillar along a curving side and a bright glint as the dome nears it’s peak while keeping cute (but often sticky) toddler fingers away from delicate foliage!
(Speaking of toddlers, I’ve never shown my youngest daughters’ rooms on this blog. This week, I’m working on a fun project of draping strings of l.e.d. lights, strands of pennant banner bunting, and garlands of yarn Pom-Pom balls all across my youngest daughter’s yellow bedroom. Details and photos in a week or so, assuming I finish the sewing and the rest of the l.e.d. strands arrive in the mail!)
Click on photo to enlarge it.
Do you use glass domes to enshrine items? Have ideas for what else belongs under a dome? If so, what? I’d love to hear!
Your Friend,
~Amber Hamilton Henson
PS
Check out these two free images I found via TheGraphicsFairy, free for my/your personal use: click to enlarge or visit her site for full size versions and lots of other cool graphics! 😉


What should I do with these images that I’ve fallen in love with? I may just print one and put it in a small frame near my dome or perhaps use one as an image transfer for a pillow?…We’ll see…
PPS
I love linking with blog parties! Its a great way to connect with other bloggers with similar interests! I’ll update this post each day as I link with parties! Check them out:
MyRepuposedLife ~ Catch as Catch Can #168
ReDouxInteriors ~ Best DIY linky #158
ShabbyNest ~ Frugal Friday
Arkansas Women Bloggers ~ Sunday Link Up

Upcycled Tobasco NeckTie Upholstery!

Click on photo to enlarge it.
More often than not, I buy something with plans to change it, but often I have to think about it for awhile before actually initiating change. Usually, it’s just a matter days to finalize my concept for what I want to do, and then I begin procuring supplies to do the task.
Today is different! Today, I bought a piece, knew immediately, and transformed it immediately!
We went to an estate sale this morning and I spotted this ornate, brass vanity stool, and I just had to have it! The manufacturer’s label says it’s made in Italy. I have no idea how old/new it is, but I’d guess 1970s or ’80s. Rather than using it for a vanity stool, I wanted to use it for a foot rest/small ottoman in the living room. It was obvious it needed reupholstery, because I don’t “do” white in my house except for sheets, towels, and candles. Furthermore, it was stained. However, the frame is all heavy metal construction! Heavy, and 18″ tall.
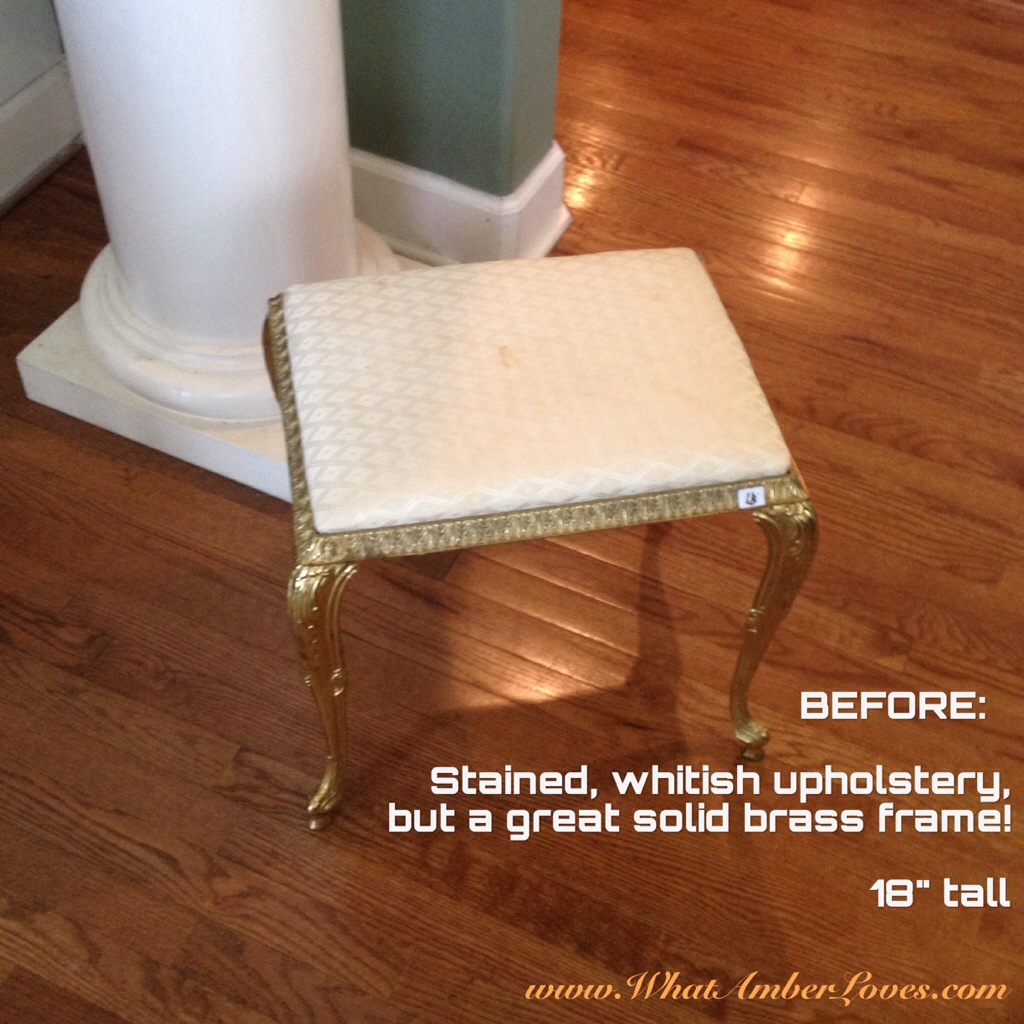
Click on photo to enlarge it.
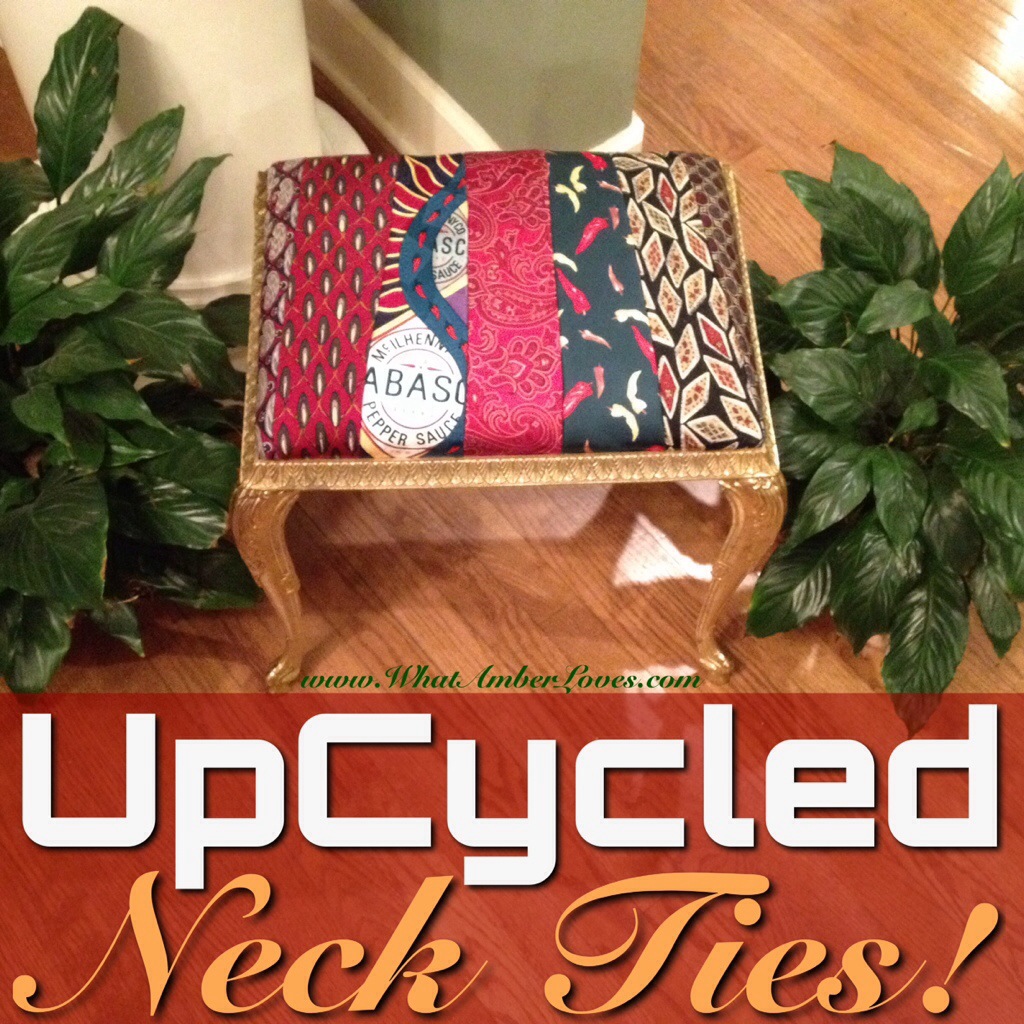
My husband Mitch suggested we sew together neckties to recover it, since he knows I’ve been diligently waiting to use neckties in a project! (Necktie window valance? Necktie lampshade? Necktie etc?)
So, that’s what happened!

Image Sources used for collage:
1, 2, 3,
The neckties are all sewn together. Then, it wraps around the cushion and is stapled on the underside. Last, it’s just screwed into the frame from the underside!

Click on photo to enlarge it.
I used a fun mix of traditional and whimsical neckties! Some are paisley, one has playing cards, one has hot peppers, and one is a Tobasco brand advertising necktie! Really! How fun is that?! I love it! I may even share this post on their Facebook page. I bet they usually only see recipe posts using their product on their page! Well, today they get to see their Tobasco necktie upcycled! Fun!

Click on photo to enlarge it.

Click on photo to enlarge it.

Click on photo to enlarge it.
I’ve got my sandals off and my feet propped up on it right now as I’m writing!
So, even though this was a fast turn around time for me, I’m really pleased!
Maybe even EXTRA pleased!
What do you think of my results from today’s project? I love comments!
Your Friend,
~Amber Hamilton Henson
PS
This post was Featured! Click on the square image (USSCrafty) to be redirected to the post and to link up your project this week:

I’m linking with some great blog parties! Check them out! (I’m updating this post as I link each day this week!)
ArkansasWomenBloggers ~ Sunday LinkUp
TwiggStudios ~ Sunday Best
USSCrafty – Submarine Sunday #87
BoogieBoardCottage ~ Masterpiece Monday #179
ElizabethAndCo ~ Be inspired #122
ConfessionsOfAPlateAddict ~ the Scoop #122
KammysKorner ~ Trash 2 Treasure
SavvySouthernStyle ~ Wow Us Wednesdays #173
FromMyFrontPorchToYours ~ Treasure Hunt Thursday #159
MyRepuposedLife ~ Catch as Catch Can #168
MissMustardSeed ~ Furniture Feature Friday
ReDouxInteriors ~ Best DIY linky #158
ShabbyNest ~ Frugal Friday
Funky Junk Interiors ~ Upcycled Side Tables

Marrying Together Unusual Items!
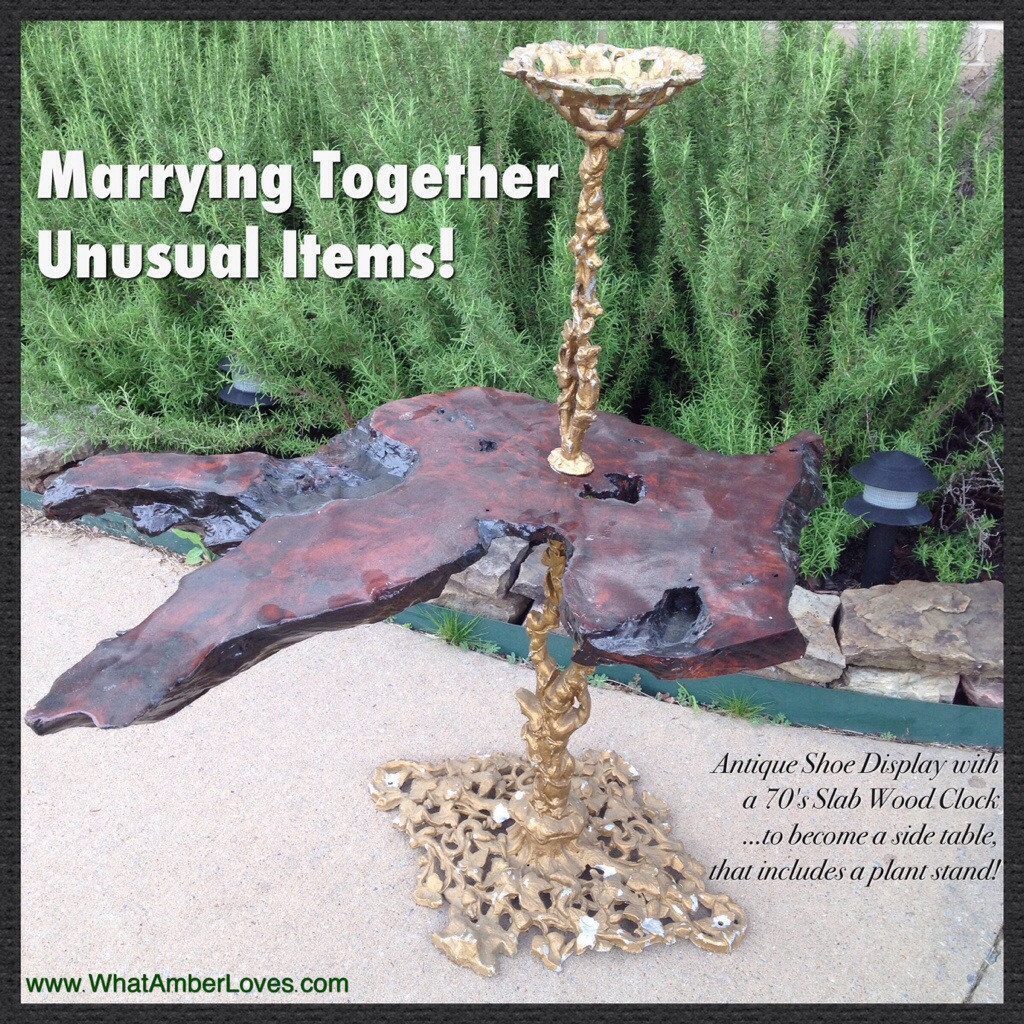
How about putting an Antique Shoe Display Table together with a 70’s Slab Wood Clock, so that it is a new piece of furniture? Well, we did just that. Now, we have a side table that includes a plant stand!
I picked up the gilded, cast aluminum(?) table-ish piece at an estate sale. The resident of the house told me it was salvaged from on old shoe store that closed and was eventually torn down in town decades ago. The same weekend, I bought a piece of slab wood that has a high gloss finish. It had a hole drilled in the center and an area routed in the back indicating it had once been used as a large clock. 1970’s style?
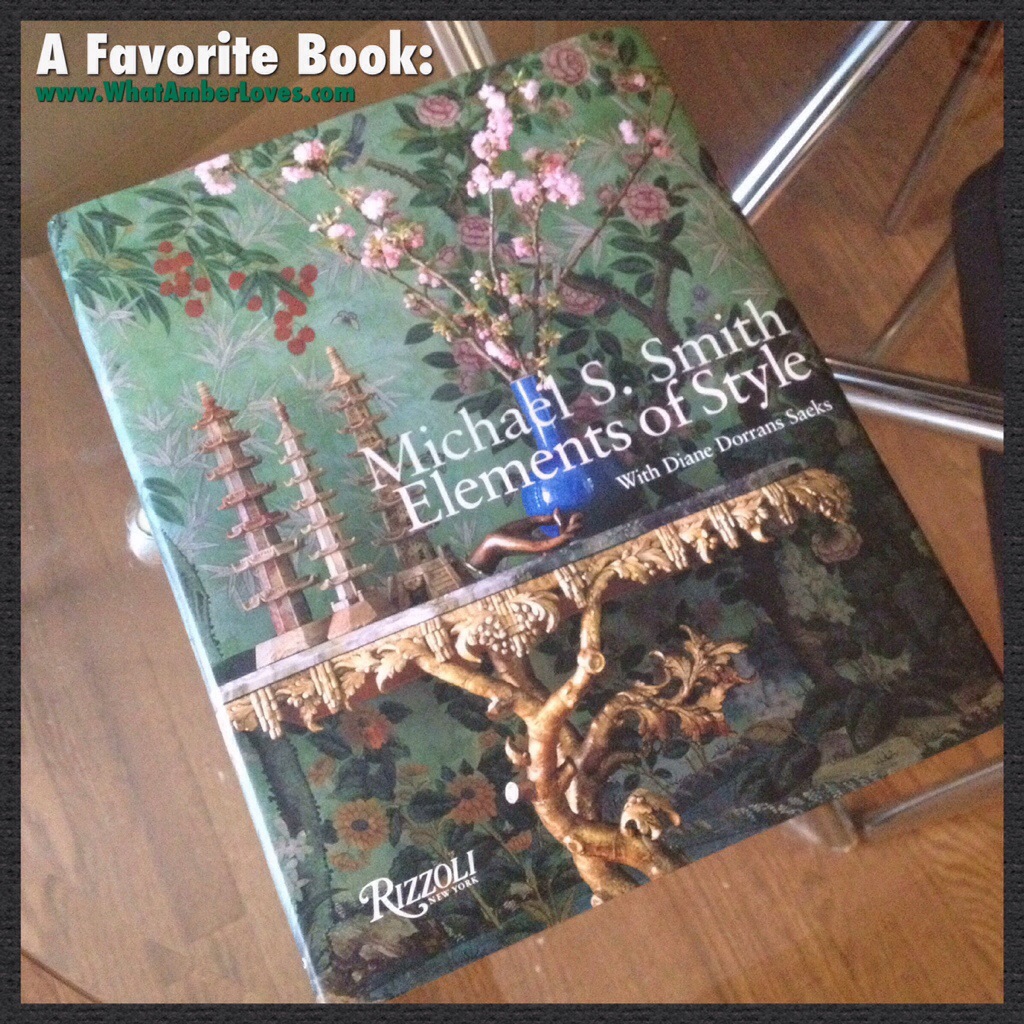
The pieces had both been sitting in the garage for a few weeks, awaiting inspiration, when while looking at one of my favorite interior design books, it suddenly came to me that I should put the two pieces together, forming a side table with plant stand! It took a little work to get the pieces together…husband had to wrestle some old bolts and chisel a bit more wood out of the way in order to get them to fit together, but “TaDa!” Here it is:
Click on photo to enlarge it.

Click on photo to enlarge it..
Click on photo to enlarge it.
Click on photo to enlarge it.

Click on photo to enlarge it.

Click on photo to enlarge it.
 </a
</a
Click on photo to enlarge it.

Click on photo to enlarge it.
So, what do you think of our funky little creation?
If you like this project, you may also like my belt chair, collage of frames, room tours, and more, if you click around my blog/website!
I LOVE comments; please do, while you’re here!
Thanks for visiting!
~Amber Hamilton Henson
PS
I’m linking with some great blog parties! Check them out! (I’m updating this post as I link each day this week!)
FromMyFrontPorchToYours ~ Treasure Hunt Thursday #158
TwiggStudios ~ Our Sunday Best Showcase
Nifty Thrifty Things ~ Sunday #158
My1929Charmer ~ Sunday’s Best Par-Tay
ArkansasWomenBloggers ~ Sunday Link
IShouldBeMoppingTheFloor ~ Inspiration Monday
ModVintageLife ~ Mod Mix Monday #155
ElizabethAndCo ~ Be Inspired #121
SavvySouthernStyle ~ Wow Us Wednesday #172
HandyManCraftyWoman ~ Wicked Awesome Wednesday #163
ReDouxInteriors ~ Best DIY Linky
My Repurposed Life ~ Catch as Catch Can
MissMustardSeed ~ Furniture Feature Friday
ShabbyNest ~ Frugal Friday
The36thAvenue ~ Best DIY projects and recipes
ChicOnAShoestringDecorating ~ Flaunt it Friday
TrulyLovelyBlog ~ Fancy This #179
HomeStoriesAtoZ~ Tutorials Tips #161
HouseByHoff ~ Enchanting Inspiration
FunkyJunkInteriors ~ #242
Funky Junk Interiors ~ Upcycled Side Tables

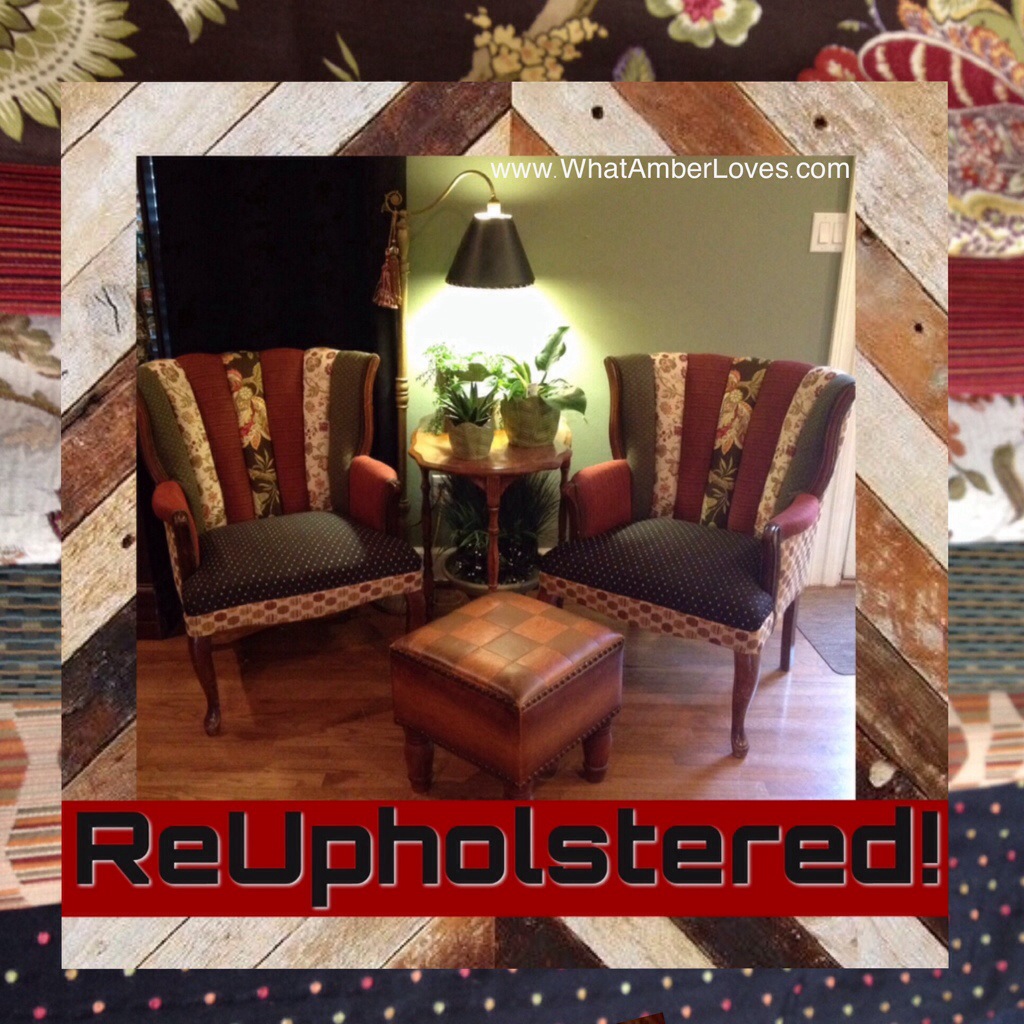
ReUpholstering Chairs!
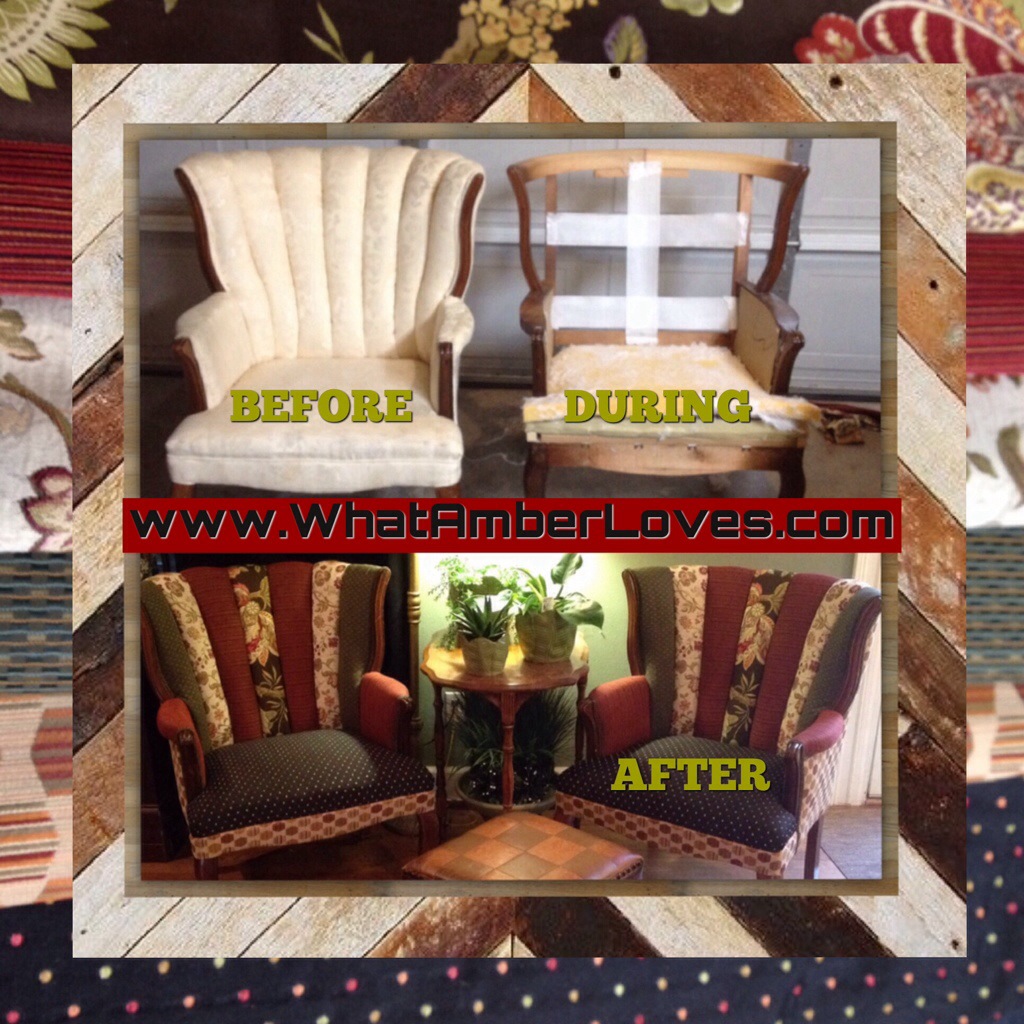
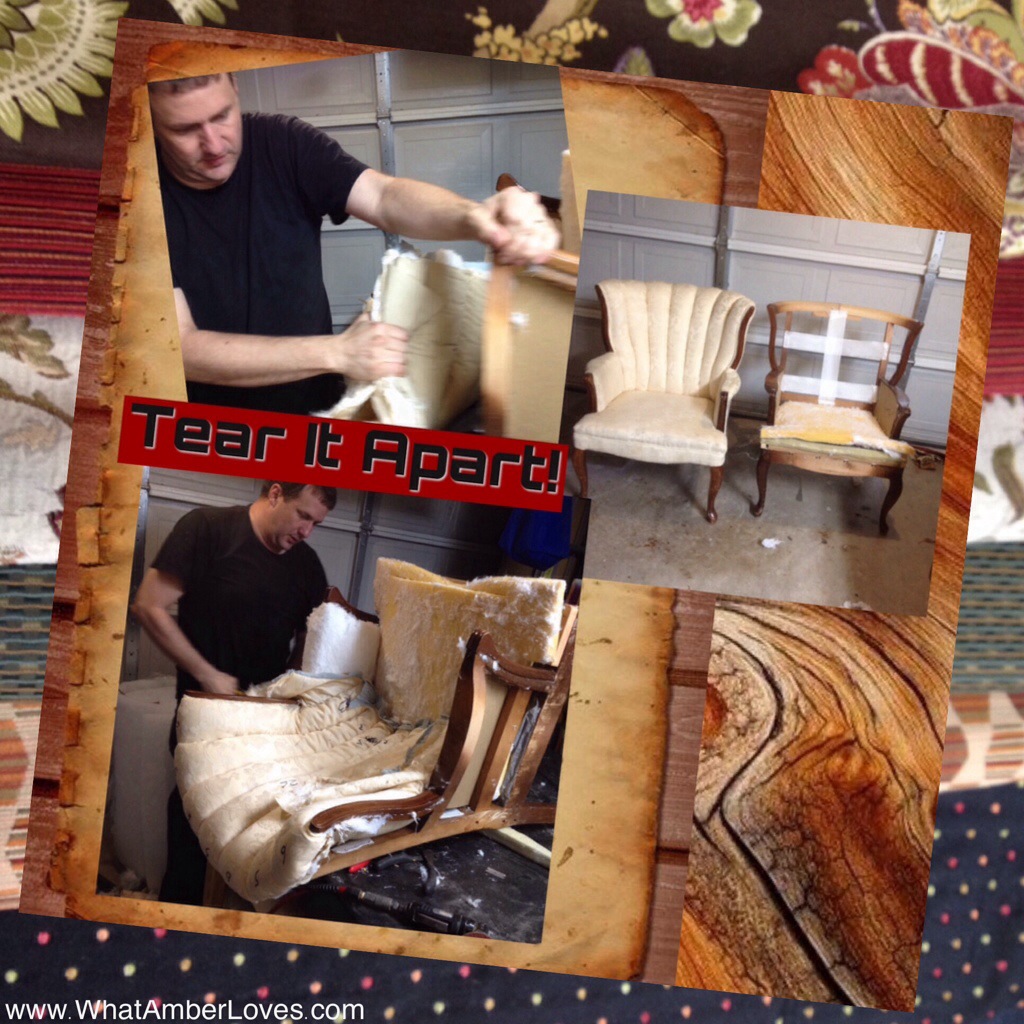
So here’s the deal. I’m re-upholstering a pair of chairs in this post. See, I bought the pair of chairs at an estate sale for $40 bucks, measured and bought clearance fabric, then took a bunch of photos while my husband re-upholstered them for me! Voila! I re-upholstered chairs, right? All kidding aside, my husband is an aircraft upholsterer by day and at night he’ll upholster things for me from time to time. So, I’m giving you in-depth, up-close look at how he re-upholstered a pair of chairs for me in the garage. You may pick up a few tips, so you can try it yourself!
I’m a very VISUAL person, so first I’m showing you several collaged photos, then text will follow with more detail. Refer back to photos as you read the text at the end. Click on any photo to enlarge it into a new window to read captions! Ready? Let’s upholster:
Click on photo to enlarge it
Click on photo to enlarge it

Click on photo to enlarge it
Click on photo to enlarge it
Click on photo to enlarge it
Click on photo to enlarge it’ll

Click on photo to enlarge it

Click on photo to enlarge it

Click on photo to enlarge it
Click on photo to enlarge it
****************************
Click on any photo to enlarge it!
****************************
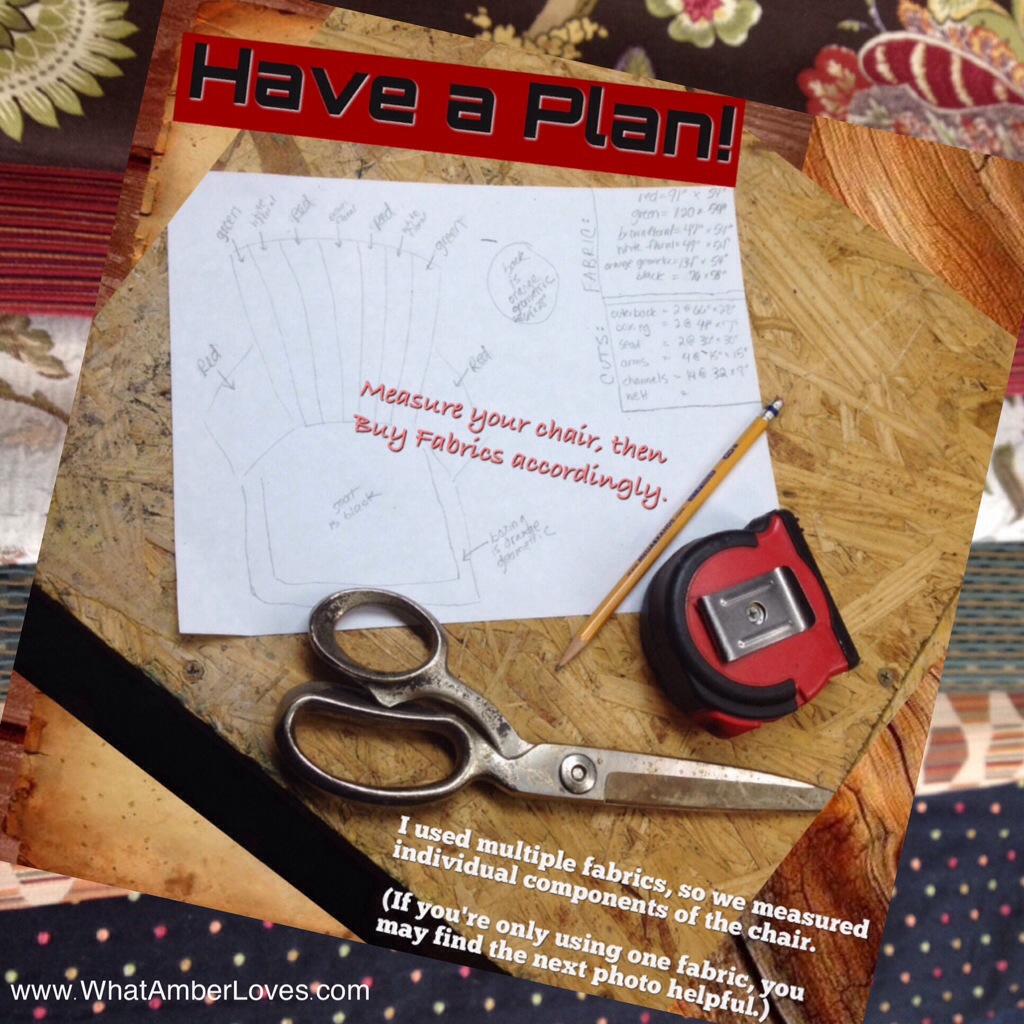
Have a Plan: I used multiple fabrics, so we measured individual components of the chair.
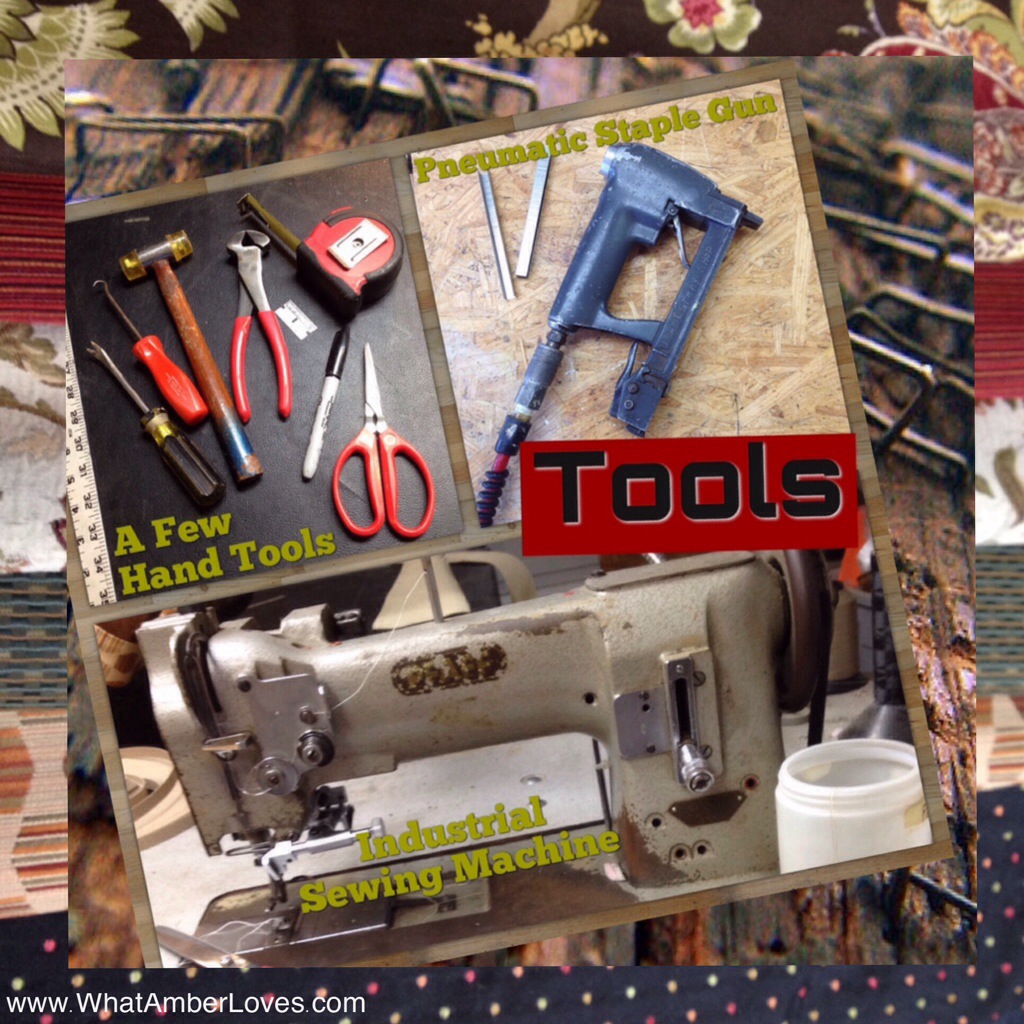
Tools: Gather your tools! A few hand tools, a pneumatic staple gun, and an industrial sewing machine with an optional double welt cord foot.
Tear it apart: Only after you’ve taken all of your measurements, made any necessary patterns*, and taken plenty of “before” photos, should you begin tearing apart the upholstery. Now, have fun tearing it apart! Be sure to remove all old staples, too!
(If you’re only using one fabric, you may find the fabric estimating photo helpful.)
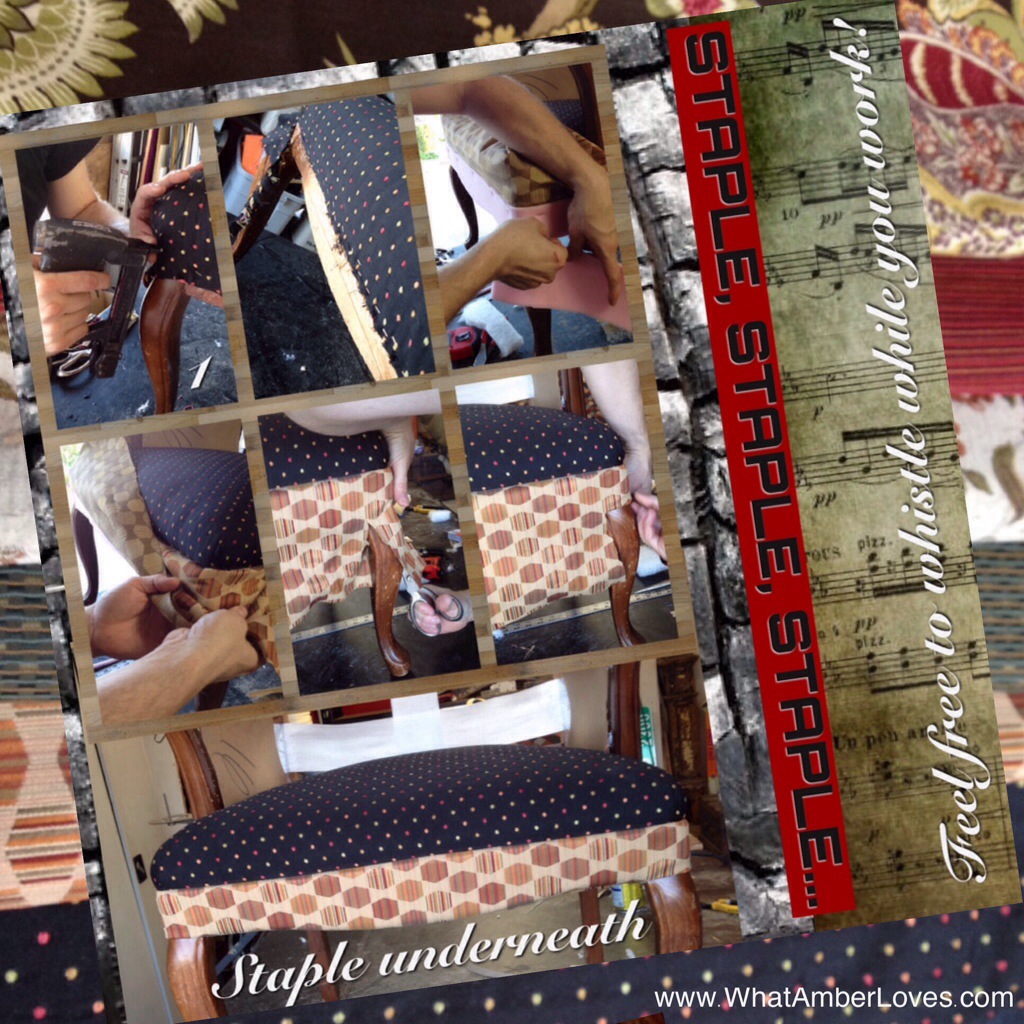
Staple, Staple, Staple: assuming you paid attention to the order you removed the previous upholstery, staple your new upholstery in reverse order, adding polyester as needed. For these chairs, the seat was first, then the bottom boxing, then the arms, then…
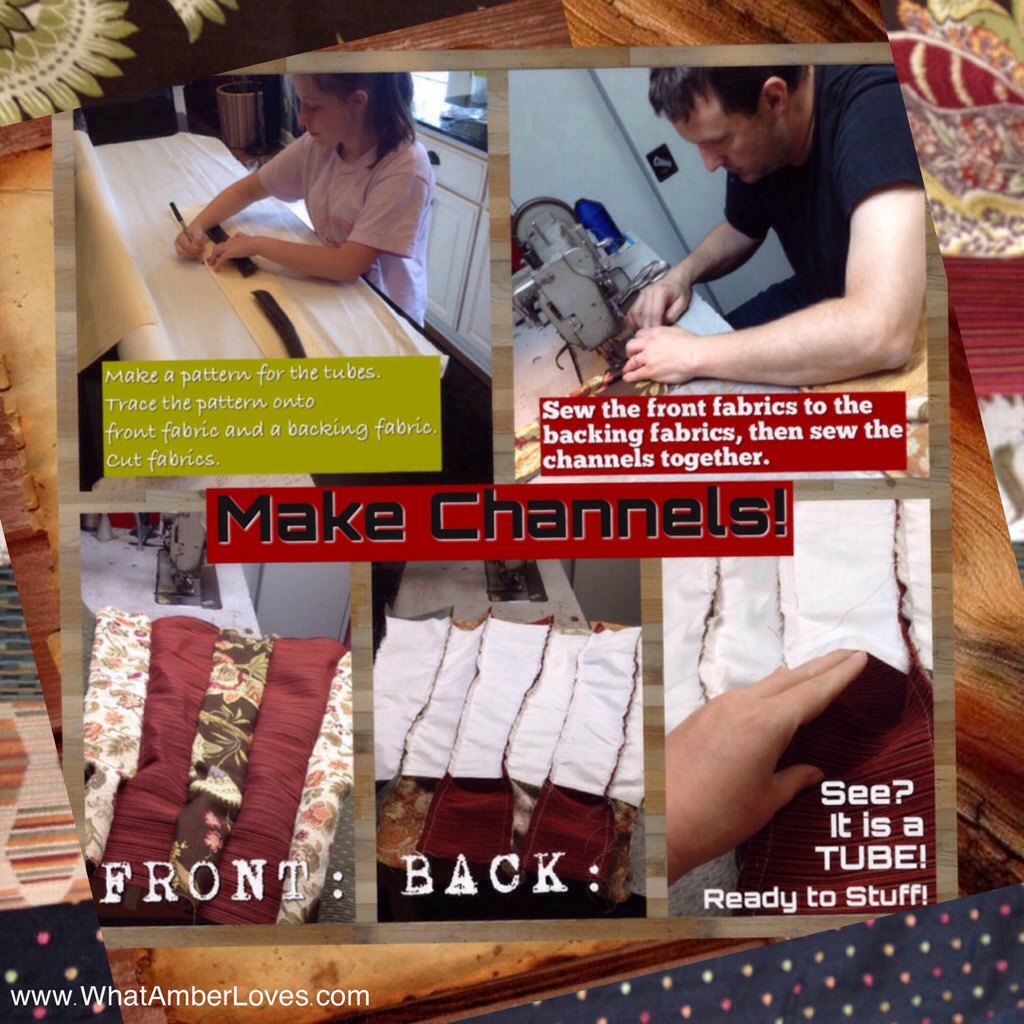
Channels: Make a pattern for the channels (tubes.) Trace the pattern onto front fabric and a backing fabric. Cut fabrics for the channels (tubes.) Sew front fabrics to backing fabrics, creating channels (tubes.) Sew the channels together. Staple to chair.
Wrap the Back: more stapling, using cardboard tack strip for folds and edges as needed. Don’t trim to short, because you need to be able to fold the fabric under to go around the legs neatly.
Repeat: second chair. Everyone likes a matched pair of chairs, right? When working with patterned fabric(s), be sure to pay particular attention to alignment!
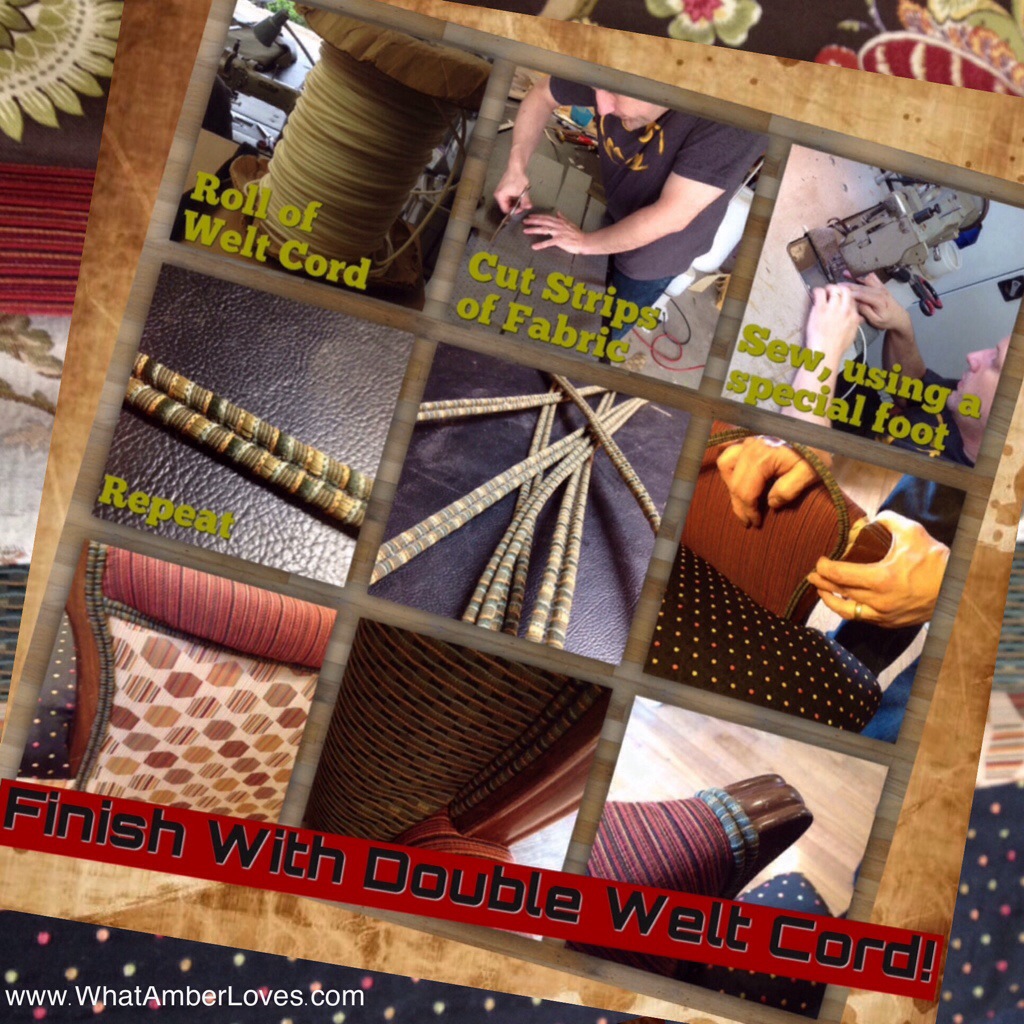
Finish with Welt Chord: cut strips of fabric, sew double welt cord, trim excess fabric, and attach to chairs via glue or staples (between cords) to finish all edges!
Photograph your finished chairs! 🙂
***********************
Please, leave a comment so that I know you’ve visited, (I LOVE comments), feel free to share it on social media, or if you have specific Questions for your project, just email me! My email address is on my ABOUT page. Feel free to click around all of the blog while you’re here visiting WhatAmberLoves! You might like my Decor and Crafts page with the room tours and other tutorials, too! 🙂
Your Friend,
~Amber Hamilton Henson

Guess what? This post is featured and linked another blog! I linked to a blog party and was chosen as a feature! Click on the square button below this text to be re-directed to her blog!

I’m linking with some great blog parties! Check them out! (I’m updating this post as I link each day this week!)
MyRepurposedLife ~ Catch As Catch Can
ACreativePrincess ~ Party #160
BeyondThePicketFence ~ Under $100 link party
RedouxInteriors ~ Best DIY linky party #156
TheHappyScraps ~ Creative Exchange
TheBrambleBerryCottage ~ Time Travel Thursday
FrenchCountryCottage ~ Feathered Nest Friday
MissMustardSeed ~ Furniture Feature Friday
RootedInThyme ~ Simple & Sweet
TaterTotsAndJello ~ Link Party Palooza
TwiggStudios ~ Our Sunday Best Showcase
Nifty Thrifty Things ~ Sunday #158
My1929Charmer ~ Sunday’s Best Par-Tay
ArkansasWomenBloggers ~ Sunday Link
IShouldBeMoppingTheFloor ~ Inspiration Monday
ModVintageLife ~ Mod Mix Monday #155
ElizabethAndCo ~ Be Inspired #121
SavvySouthernStyle ~ Wow Us Wednesday #172
MarigoldsLoft ~ Tutorial Thursdays
FunkyJunkInteriors ~ #242


